Colt UC Live Portal
Registration Guide
Home > Order Management > CIC – UC Live Portal – Registration Guide
 You can now access a suite of reports which enable you to keep track of usage across Cloud SBC.
There are a large number of reports including:
- Call quality
- Call statistics
- Successful/unsuccessful calls
The Live Platform will use application registration to Microsoft 365 (M365) tenant without needing users to sign in.
Registration: Process and Requirements
You receive an email link similar to the following:
Click on the green boutton " Click here to activate tenant"
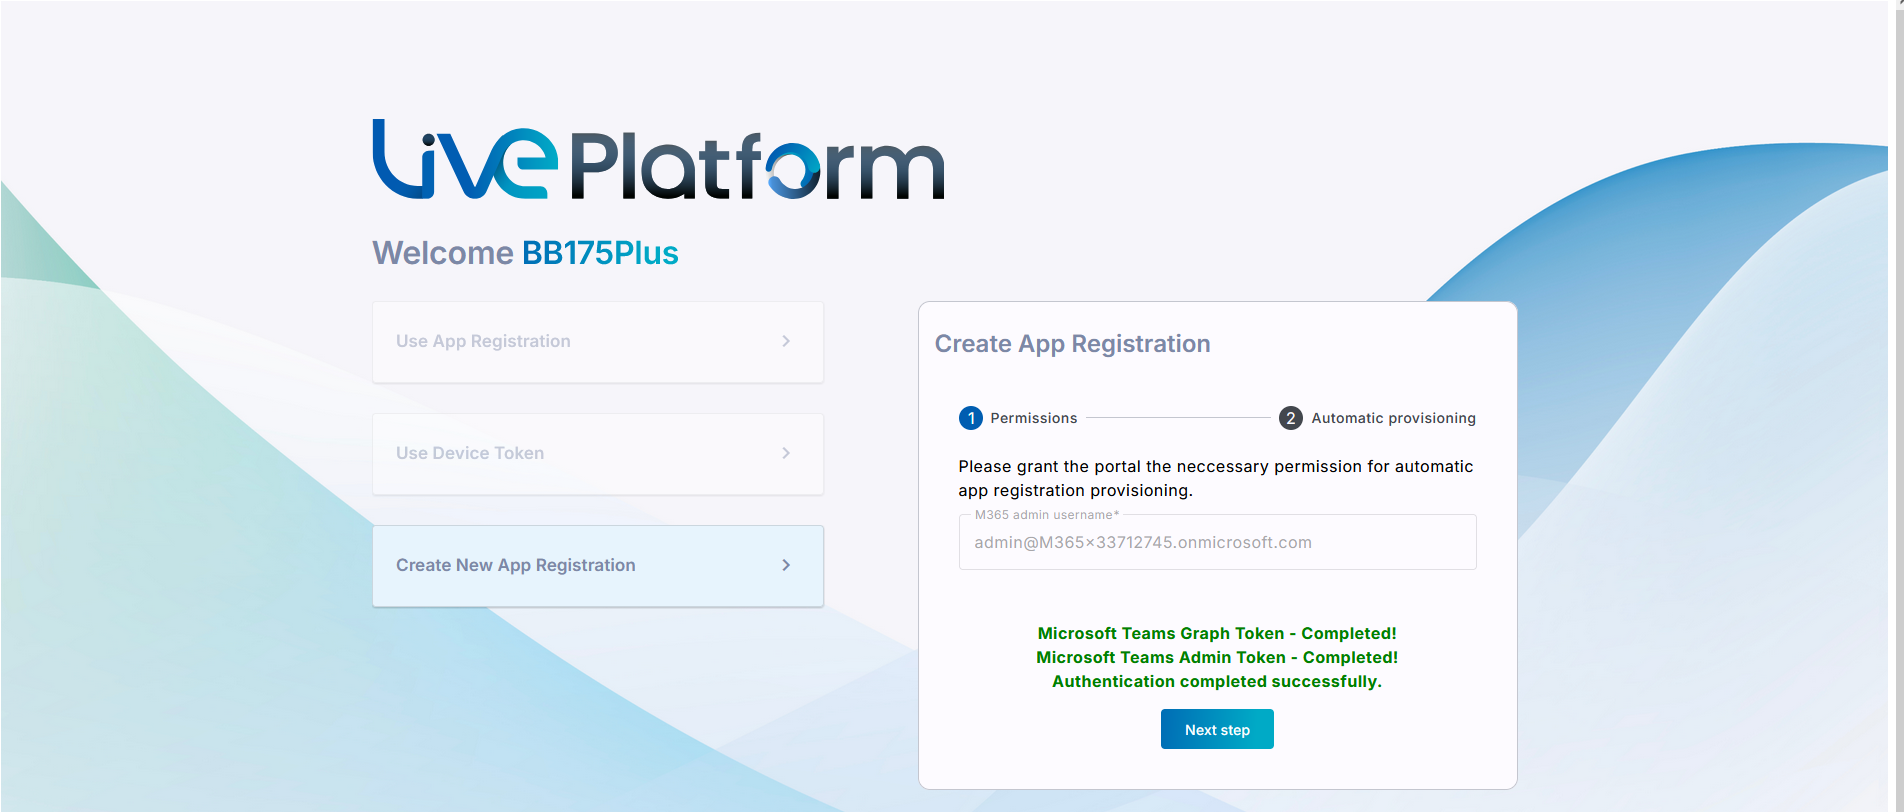
After clicking on the the Invitation email, cutomer will go to this page
- Using the personalize link this page will popup
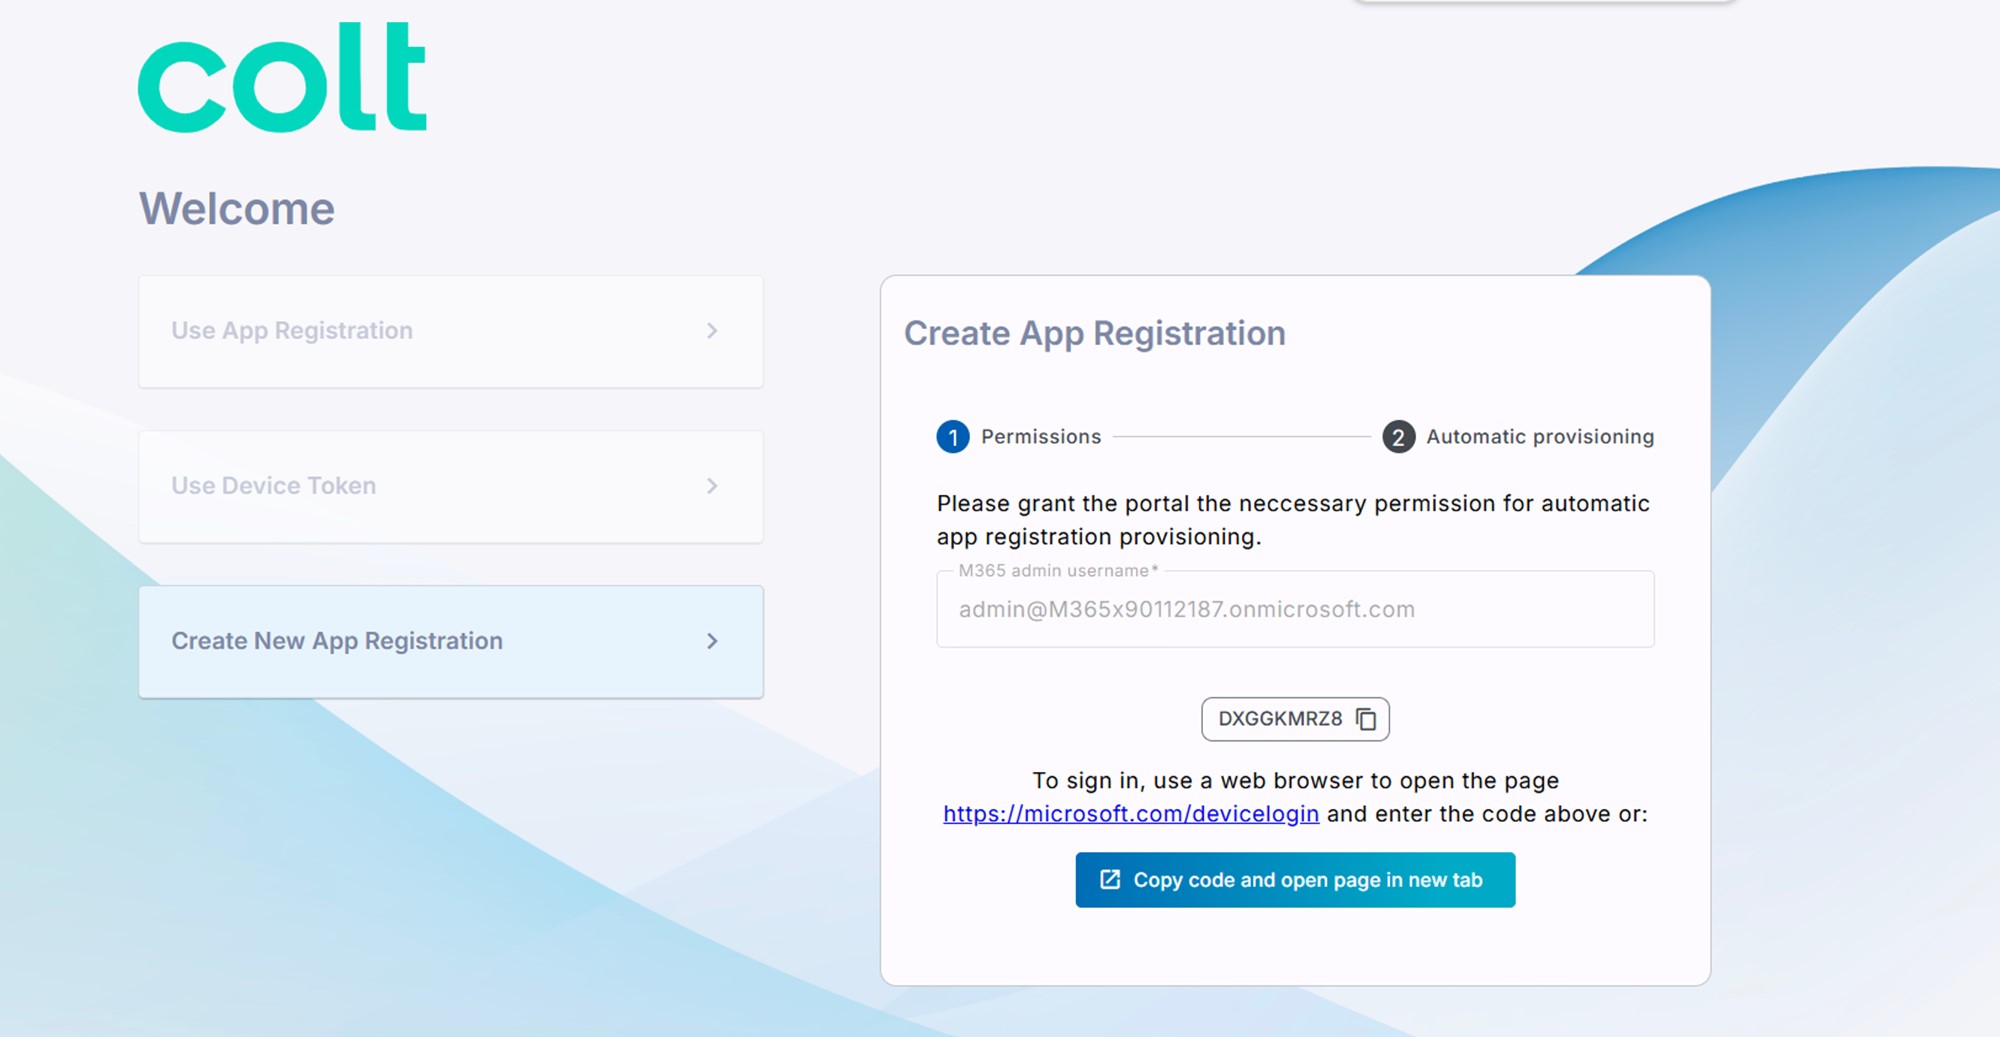
2. Click Create New App Registration.
Enter your Microsoft 365 admin username (User Principal Name - UPN)Make sure this account has Application Administrator permissions.
3. Choose one of the following options to continue authentication:
-
- Option A: Copy the code shown on screen, then click the URL below it to open the sign-in page.
- Option B: Click Copy Code and Open Page in New Tab to automatically copy the code and open the sign-in page in a new browser tab.

4. Click Next or enter code if you clicked the ....device/login link above.

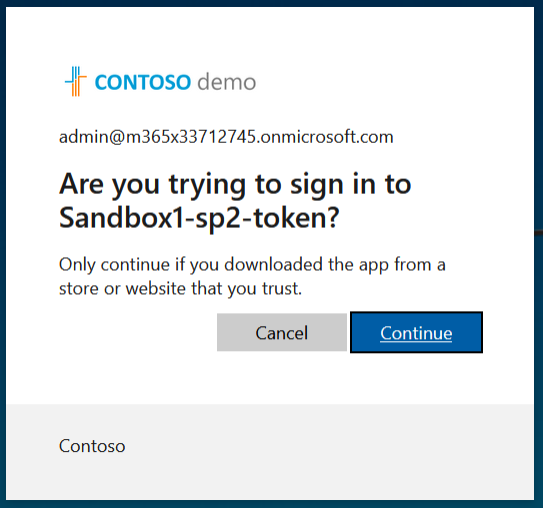
5. Sign in using your Microsoft 365 tenant admin credentials.
6. Click Continue to proceed.
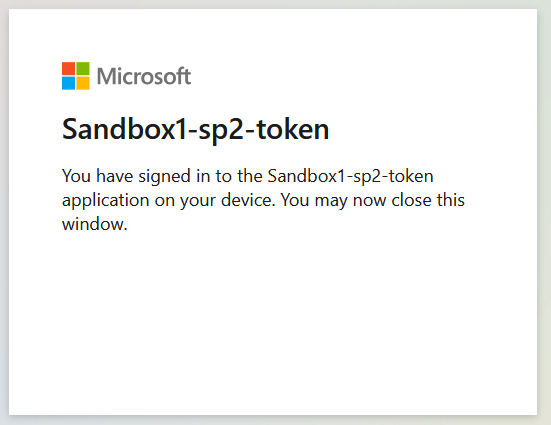
7. Close the dialog box.
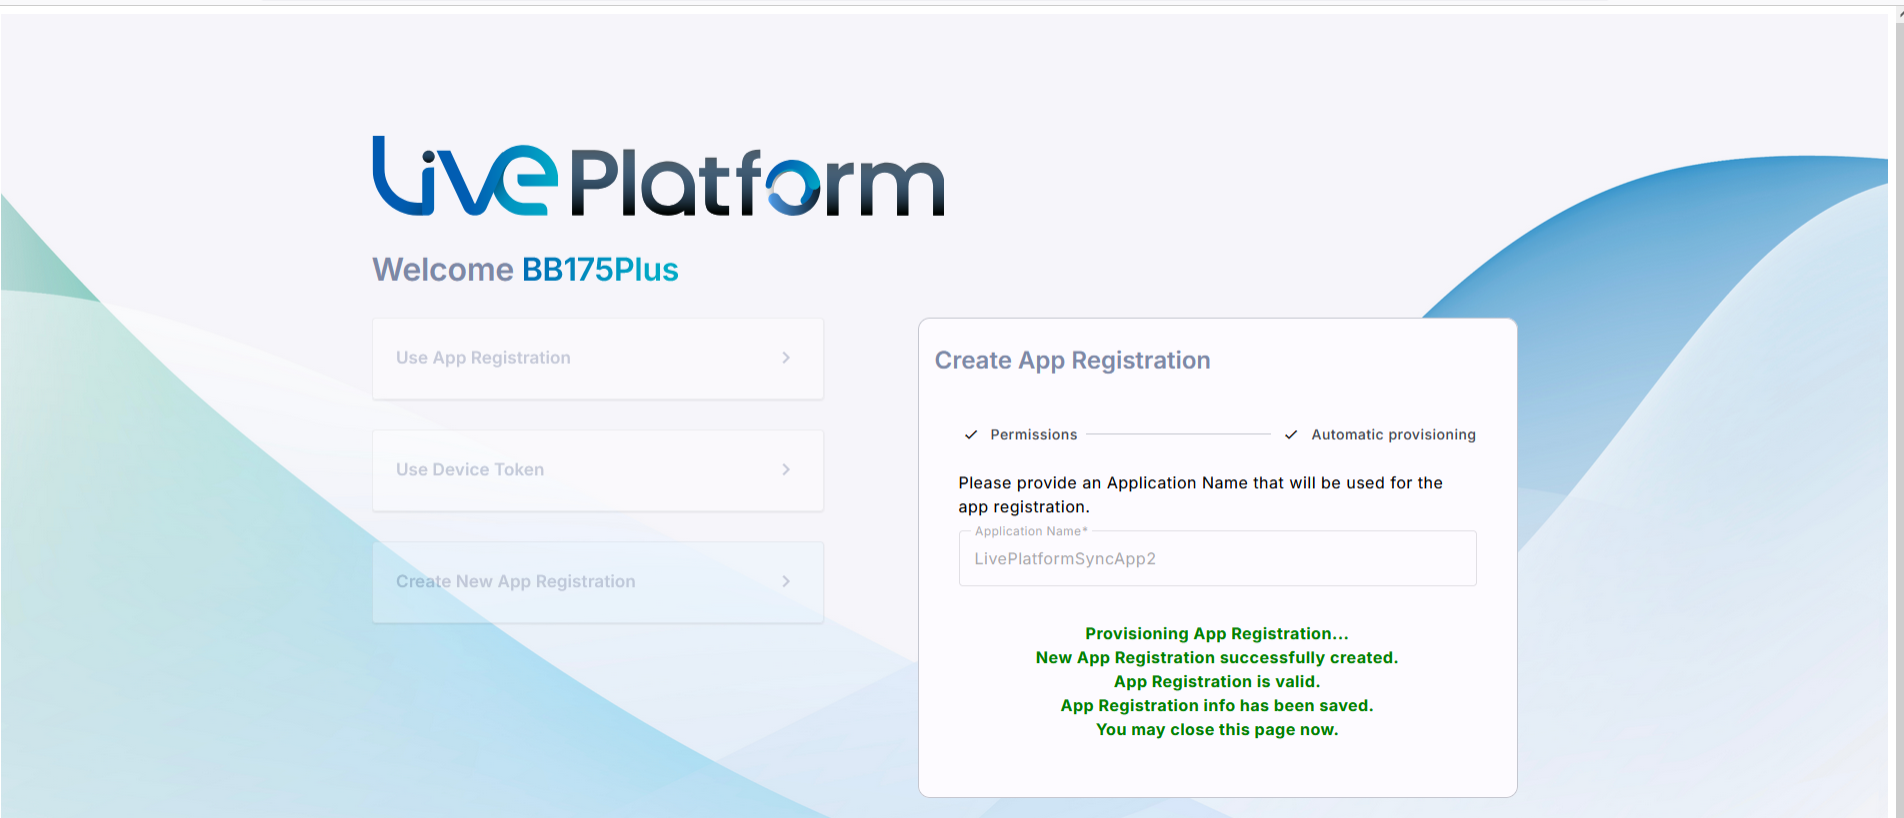
A confirmation message will appear indicating that the connection was successfully established
8. Enter a name for the Application Registration.
Make sure the name follows these rules:
-
- Must be 3–15 characters long.
- Cannot include the following characters:
\ / : * ? " < > | audit - Can contain letters (A–Z, a–z), numbers, and special characters (except
.and spaces). - Must be unique per service.


9. Confirm the on boarding to the UC Delivery team
10.Navigate to Microsoft 365 Settings
Go to Configuration > M365 Configuration.
- You’ll see:
- Client Secret Days Until Expire (if this is the first time it's set).
- User Name field filled with the M365 admin who authenticated the registration.
- Click Validate Authentication to confirm the tenant service credentials with the App Registration.
This procedure describes how to manually add an App registration to secure the connection between the customer M365 tenant and Live Platform. Once the App registration has been successfully created, you need to assign it Microsoft Entra ID Administrator roles (see Assign Administrator Roles to the App Registration).
| ➢ | To create the App registration: |
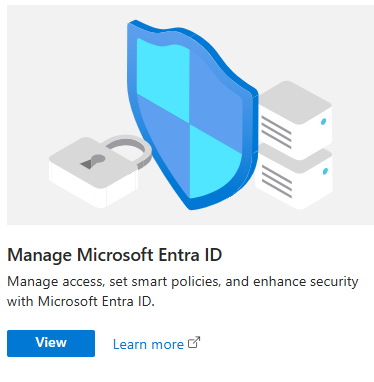
| 1. | Sign-in to Microsoft Entra ID with global Admin credentials for the M365 customer tenant. |
| 2. | Click View to the Microsoft Entra ID interface. |
| 3. | In the Navigation pane, select Manage > App registrations and then click New registration. |

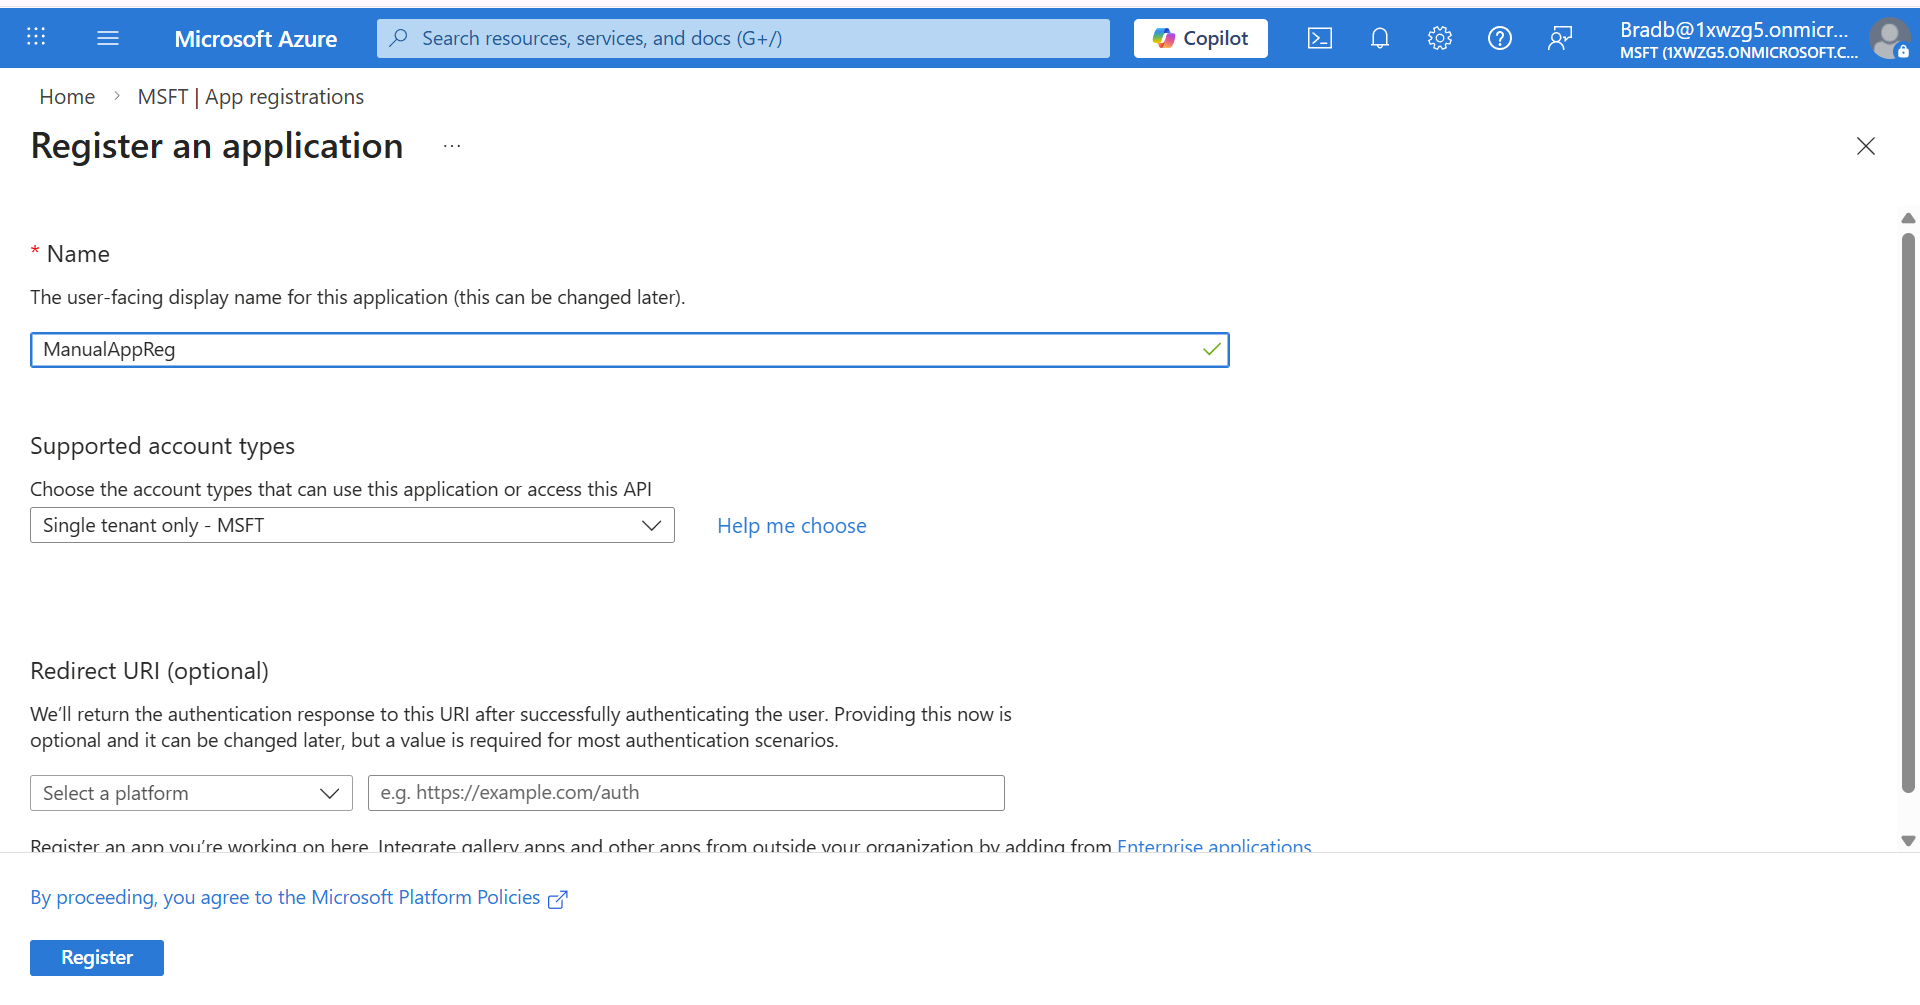
| 4. | Enter the name of the application. |
| 5. | Select Single tenant only - MSFT). |
| 6. | Click Register. The new registration is displayed. |
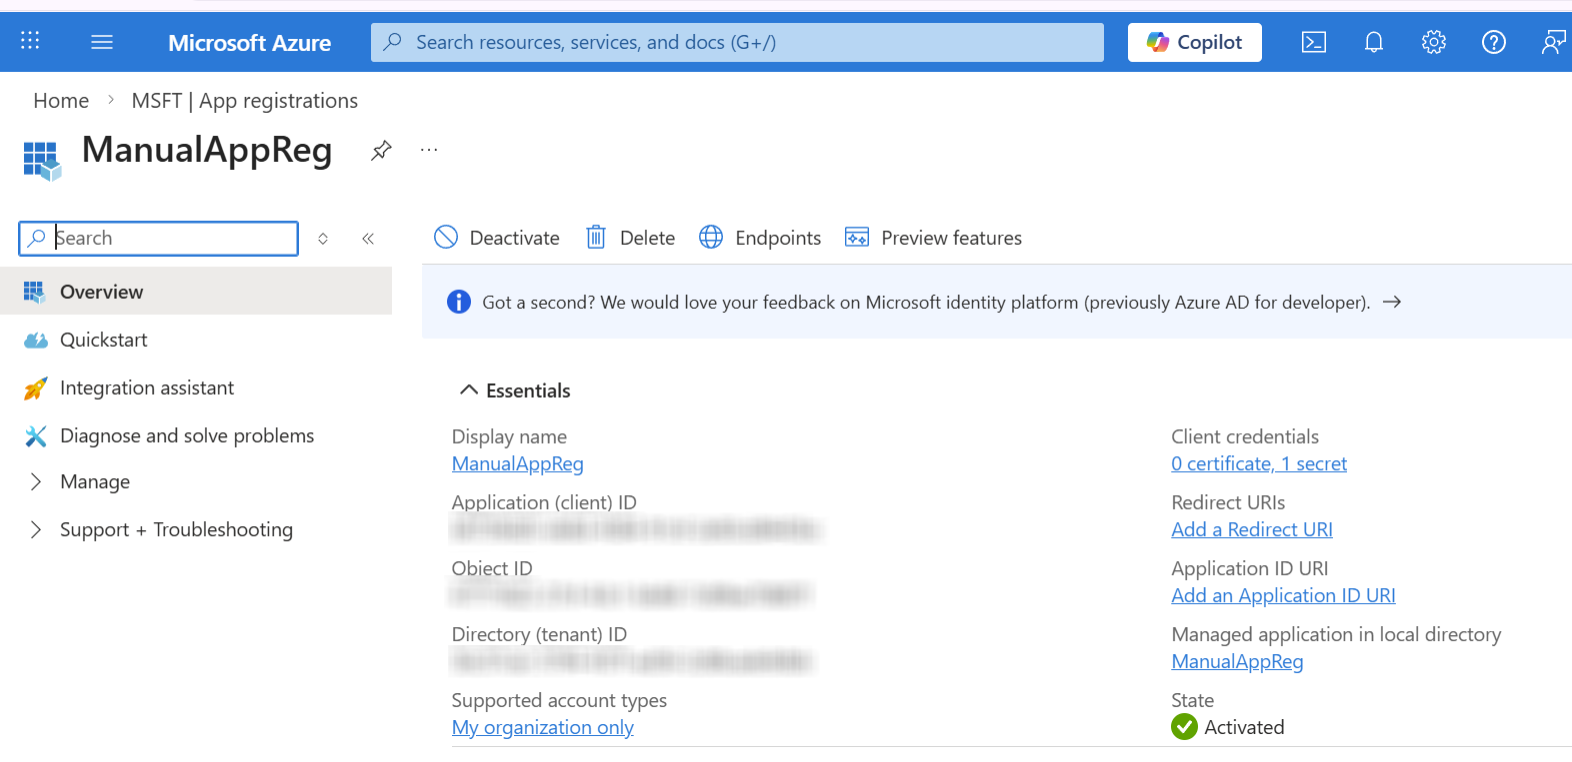
| 7. | Copy the Tenant ID and Application (client) ID value. |
| 8. | In the Navigation pane, select Manage > Certificate & secrets. |
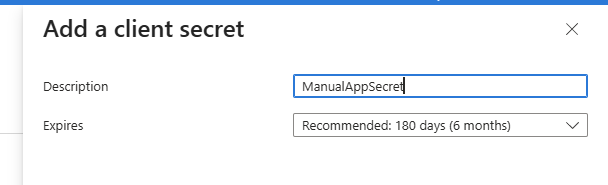
| 9. | Click New client secret to add a new client secret. |

| 10. | Enter the Description for the secret and the Expires date (recommended 12 months) and then click Add. |
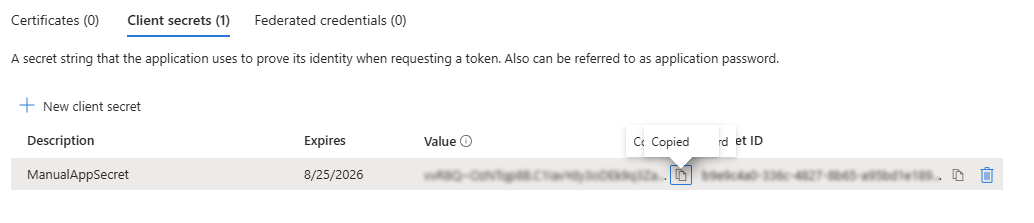
| 11. | Copy the value to clipboard as its required for later configuration in the Onboarding and Invitation wizards. |
| ● | Copy the value immediately to notepad as it hashed after a short time. |
| ● | If you use the Application registration to create additional services, a new secret should be created for each new service. |
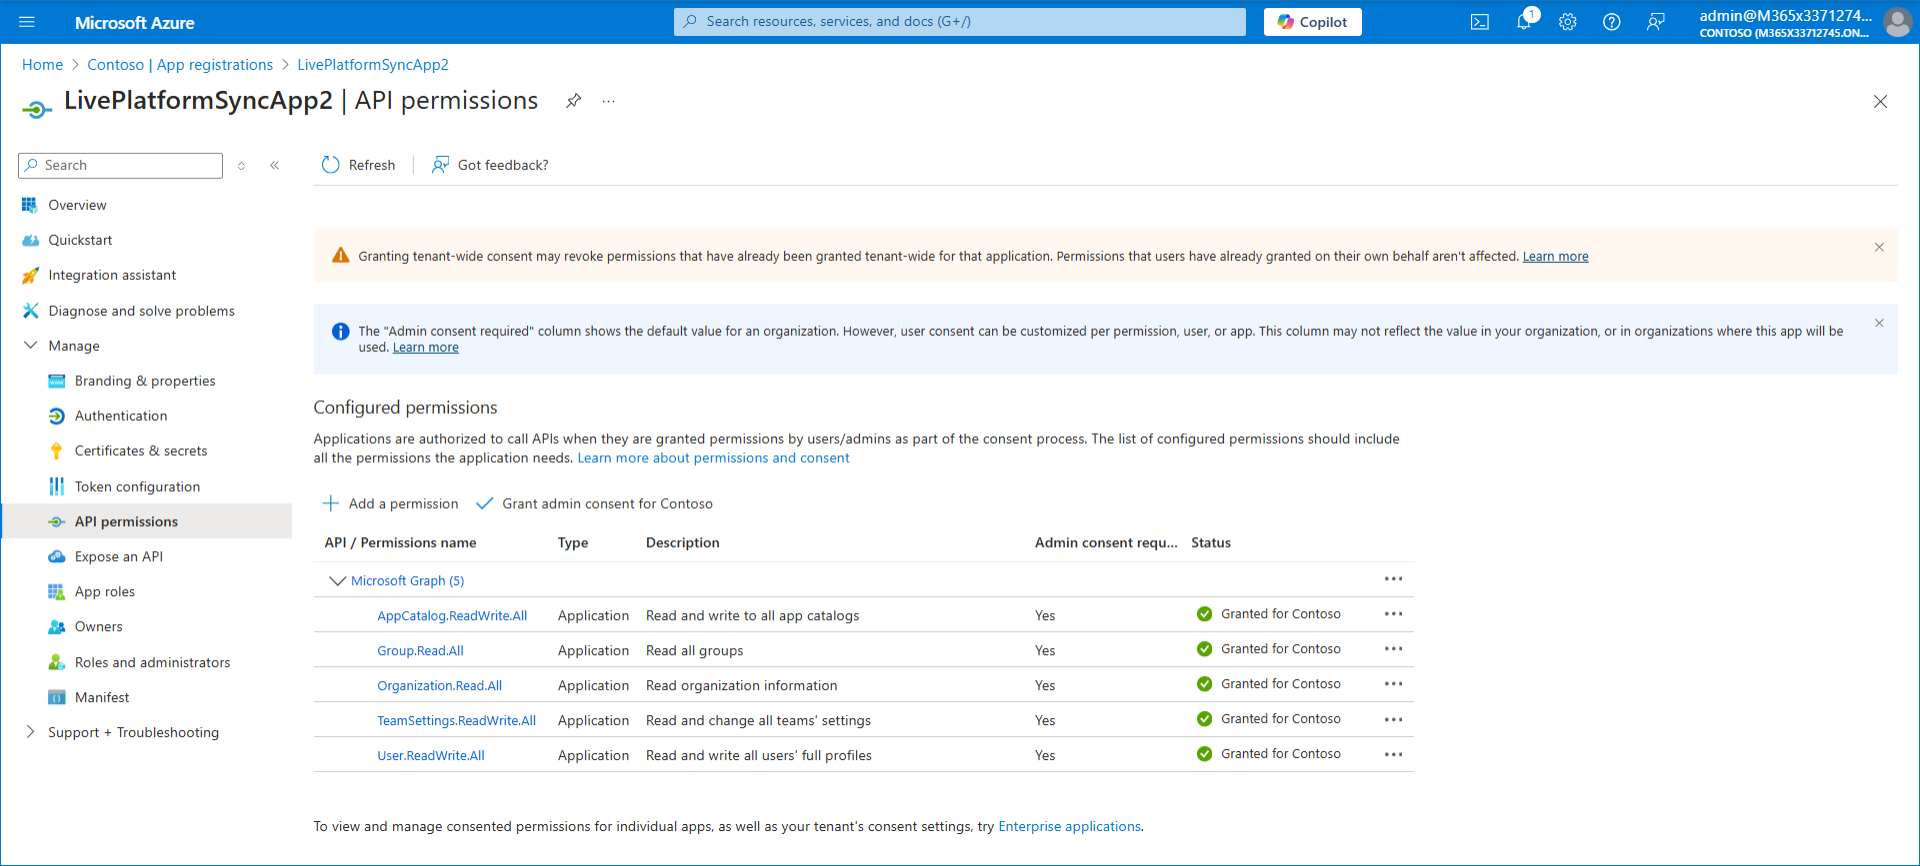
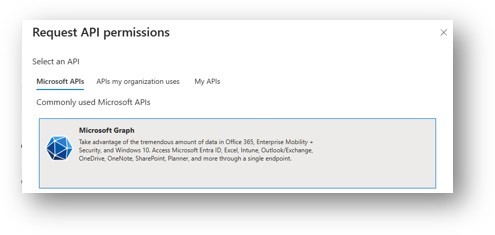
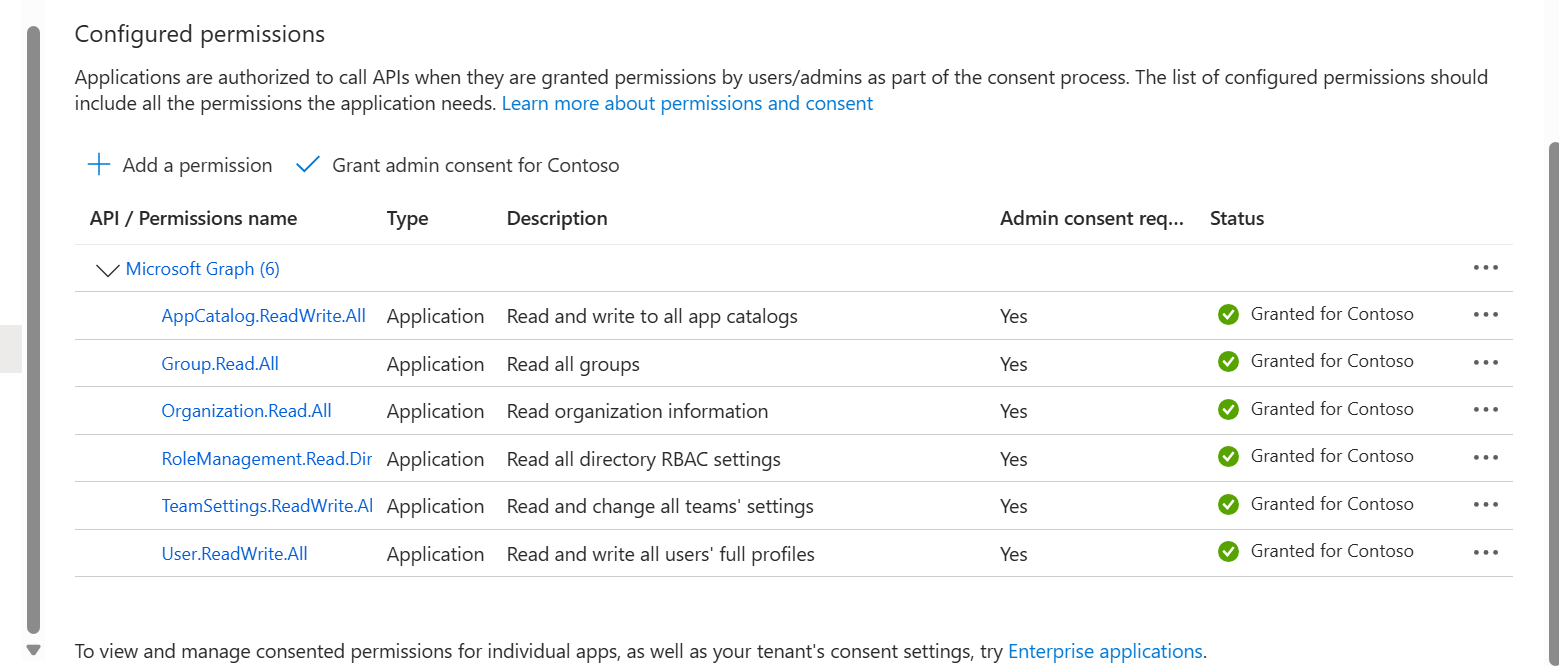
| 12. | In the Navigation pane, select Manage > API permissions. |

| 13. | Click + Add a permission and then select Microsoft Graph. |
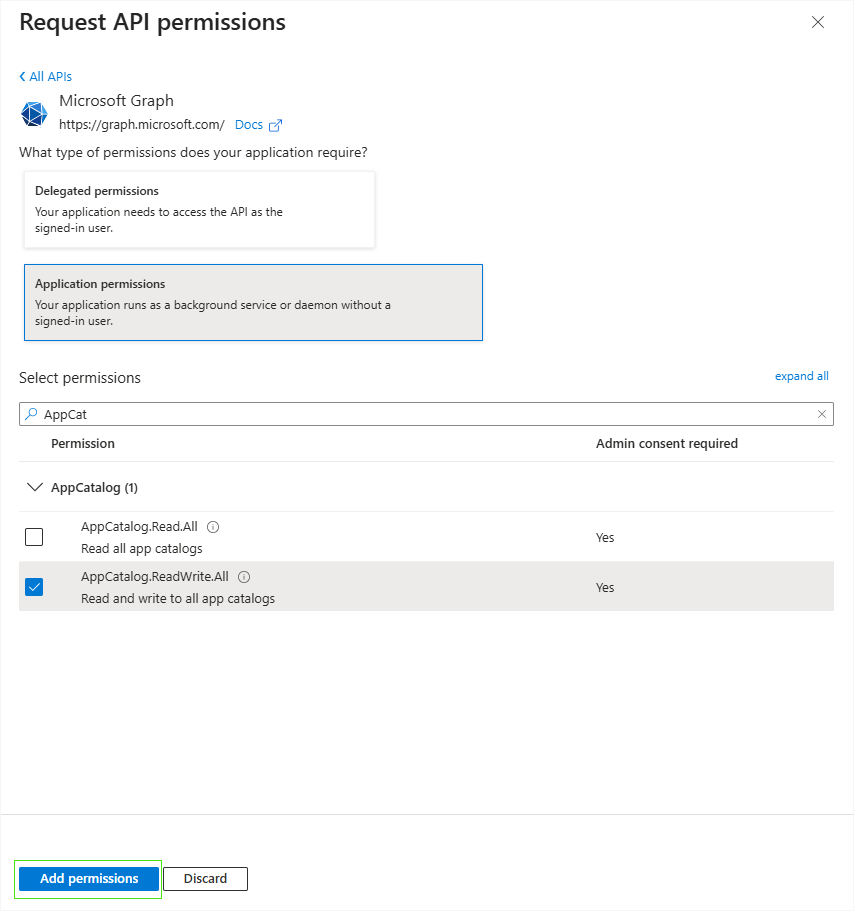
| 14. | Select Application permissions. |

| 15. | Type AppCatalog, select AppCatalog.ReadWrite.All (Read and write to all app catalogs), and then click Add permissions. |
| 16. | At the following Application permissions following the steps shown above: |
| ● | Group.Read.All (Read all groups) |
| ● | Organization.Read.All (Read organization information) |
| ● | RoleManagement.Read.Directory (Read all directory RBAC settings) |
| ● | TeamSettings.ReadWrite.All (Read and change all teams' settings) |
| 17. | Add the Delegated permission User.ReadWrite.All (Read and write all users' full profiles). |
| 18. | Grant admin consent for the new permissions. |
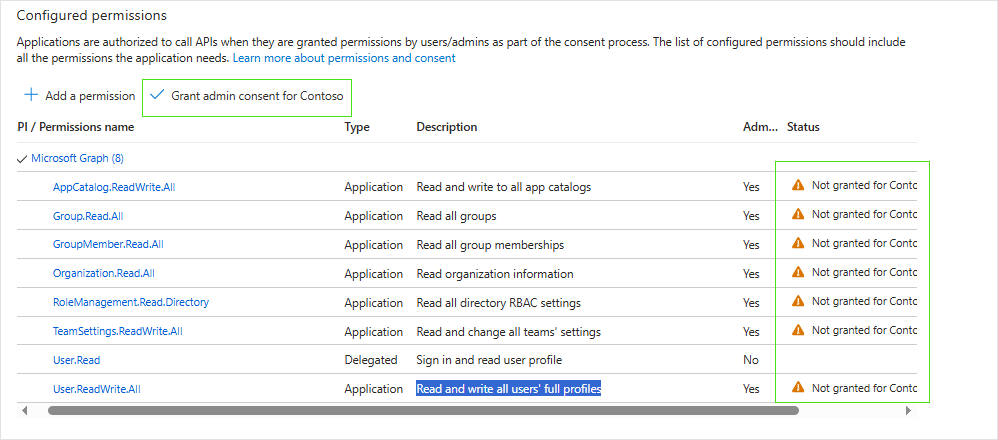

All permissions are granted.
| 19. | Proceed to Assign Administrator Roles to the App Registration. |
To complete the authentication, after creating the app registration manually, follow these steps:
- Use the email sent by Colt
It contains a personal token and a link to access the login page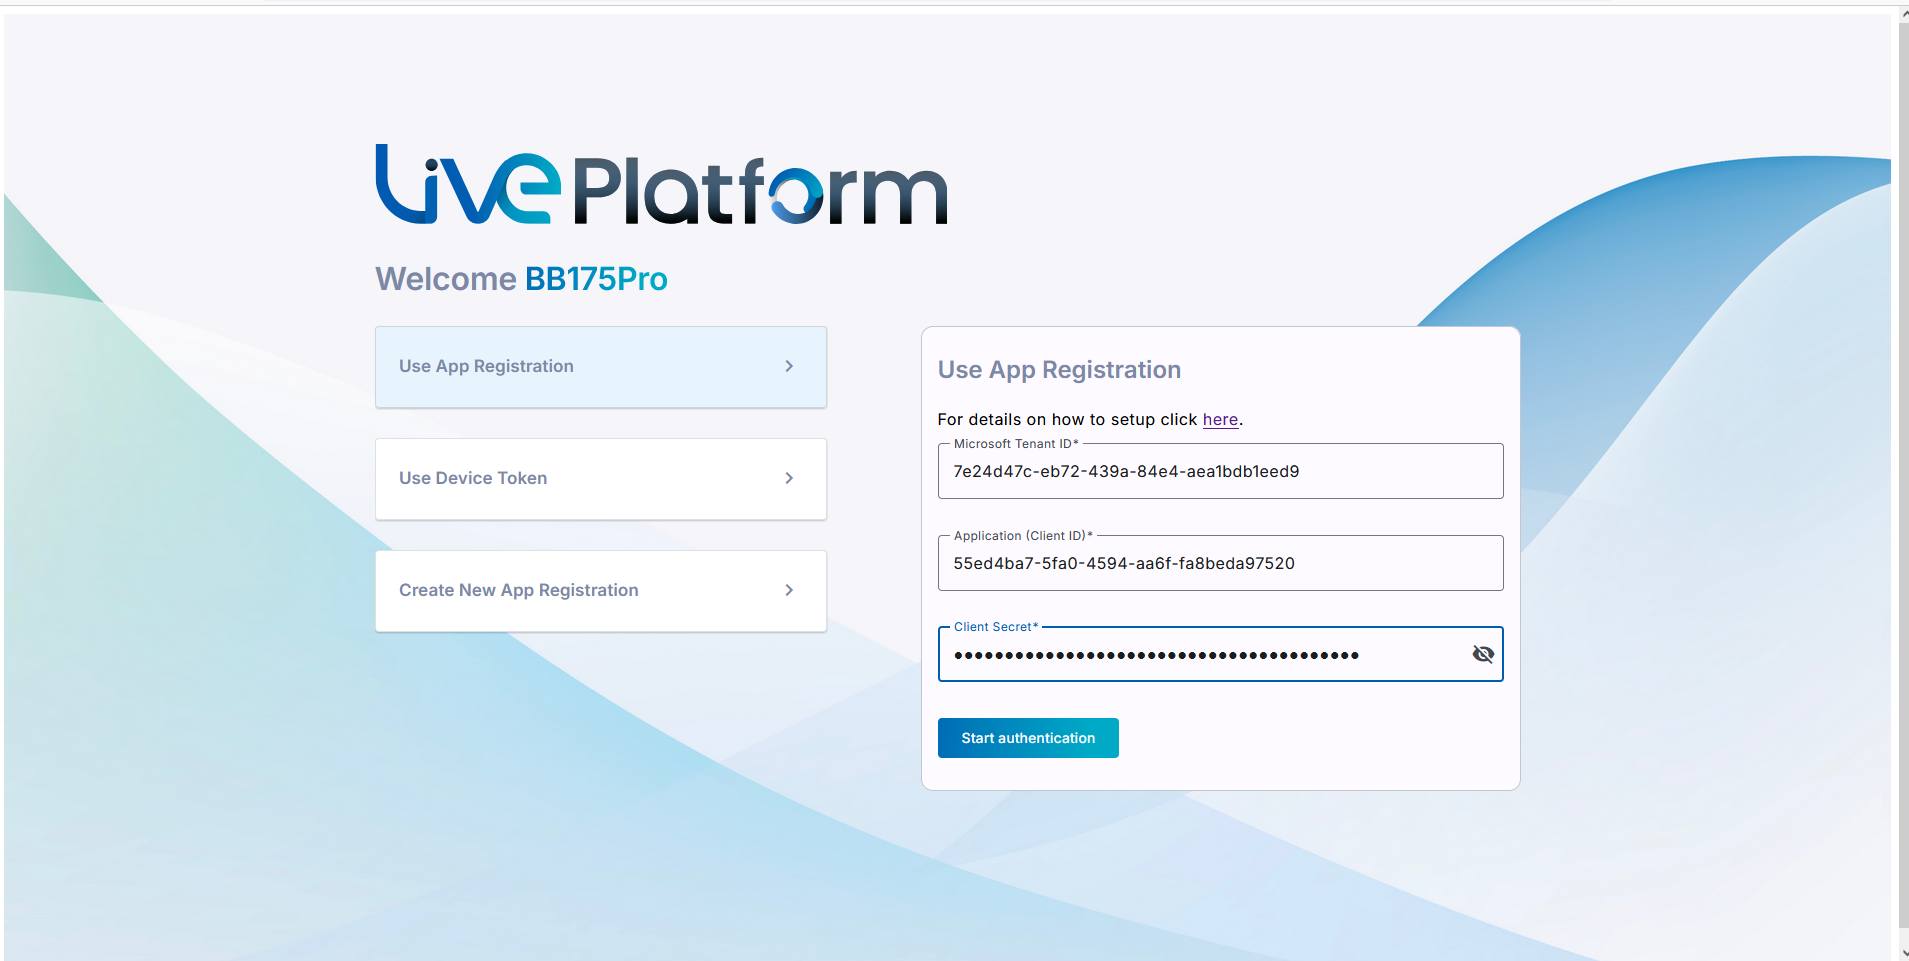
- On the login page, enter the following details:
- Tenant ID
- Application (Client) ID
- Client Secret from your App Registration
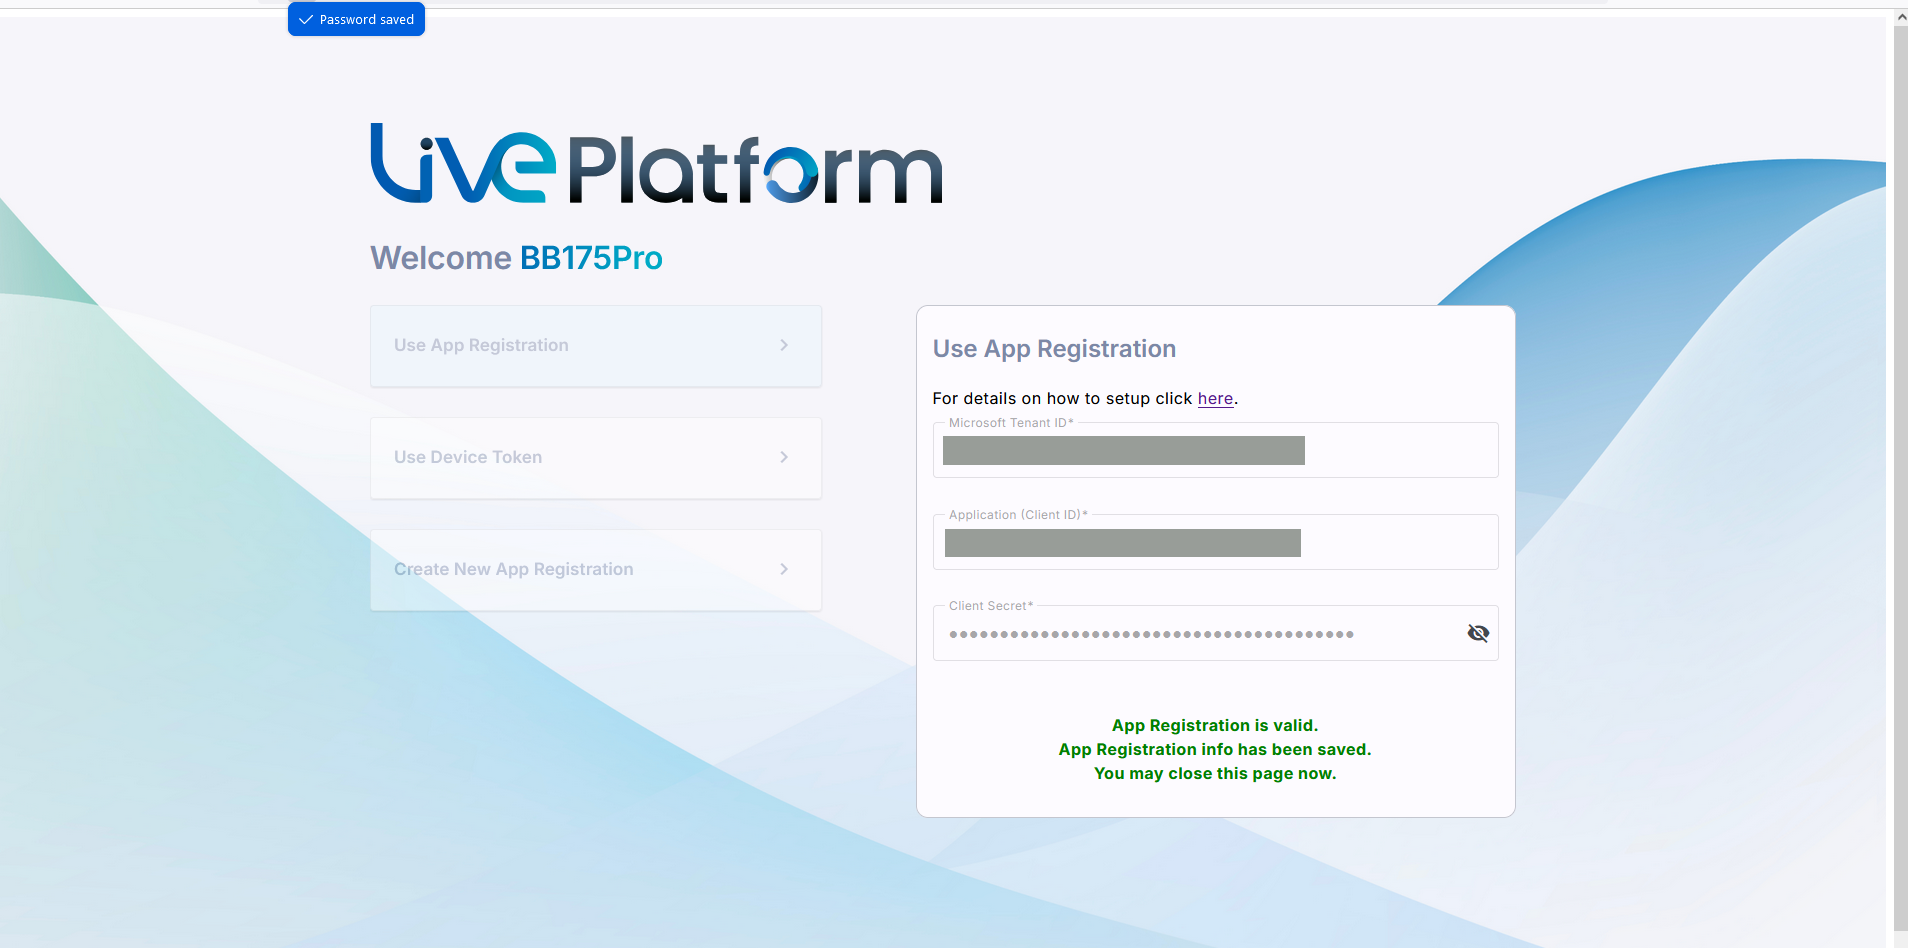
| 3. | A confirmation message is displayed that the Application Registration is valid. Close the window. |
4. Confirm the creation with the Colt delivery team
Once the application registration is complete, notify the Colt delivery team so they can validate the onboarding process.
Once you have created the App Registration, you must assign it Microsoft Entra Administrator roles using the table shown
|
Administrator Role |
Purpose |
Deployment Stage |
Validation Conditions |
|---|---|---|---|
|
Application Administrator Prerequisite for Automatic Registration creation only. |
Creates Enterprise app on customer Azure tenant automatically, which is required for automatically creating the Enterprise app on the customer Azure tenant, synchronizing with the M365 tenant and securing the completion of the Onboarding. |
Onboarding Only |
This permission is only required during onboarding and can be removed after onboarding. In addition, the Enterprise application created on the customer M365 tenant can also be removed. |
|
One of the following roles are mandatory for managing the Daily replication process to synchronize Live Platform with the customer tenant M365 platform. |
|||
|
Teams Administrator |
Manages Microsoft Teams service (runs Teams PowerShell) creates voice routes and manages users. This role consolidates both Teams Telephony Administrator and Skype for Business Admin roles. |
Onboarding and Day Two |
Used for daily replication. Mandatory, unless you use Sky |
| ➢ | Do the following: |
| 1. | In the search box in the Menu bar, type Microsoft Entra Roles and administrators. |
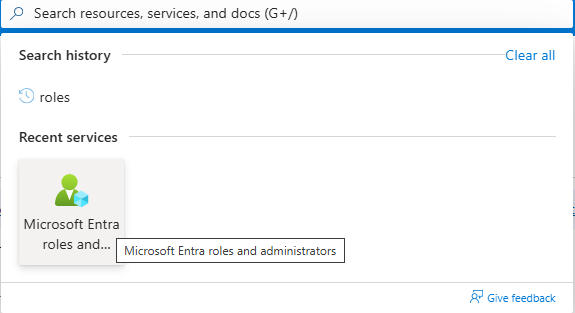
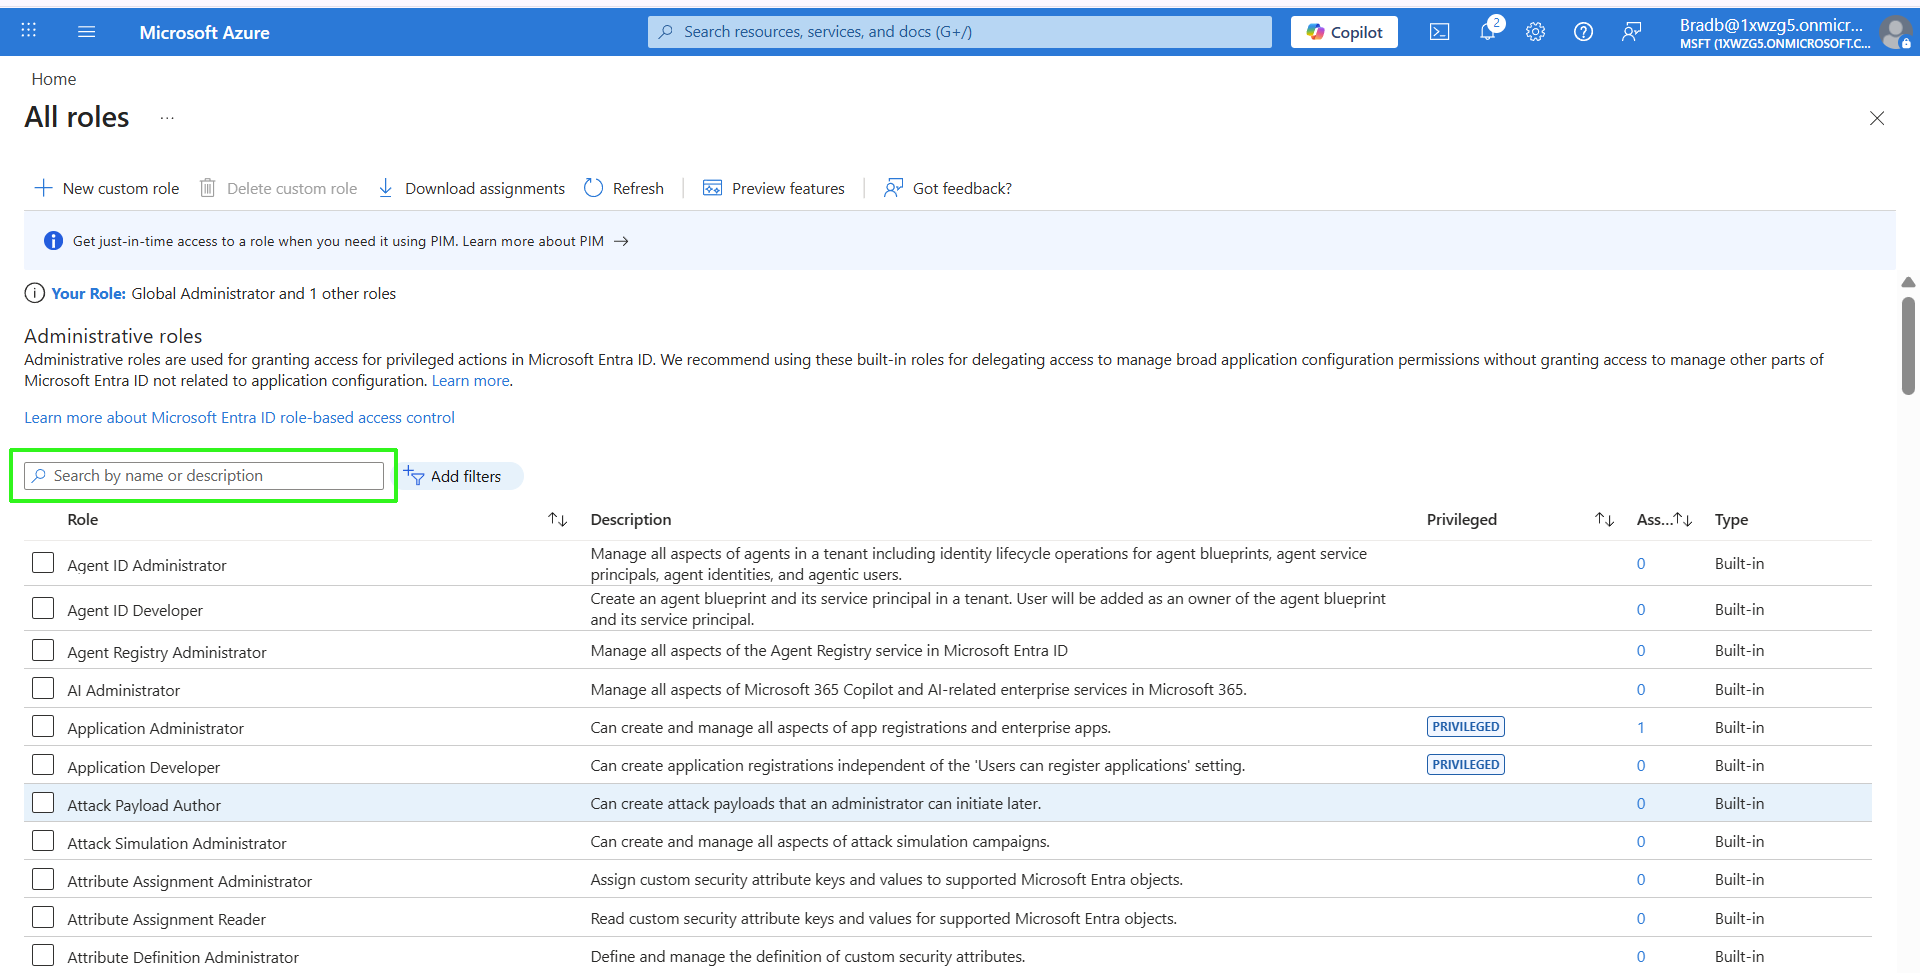
| 2. | In the Search box, start typing the name of the required role. In the example below "Teams Administrator". |

| 3. | Click the entry. |
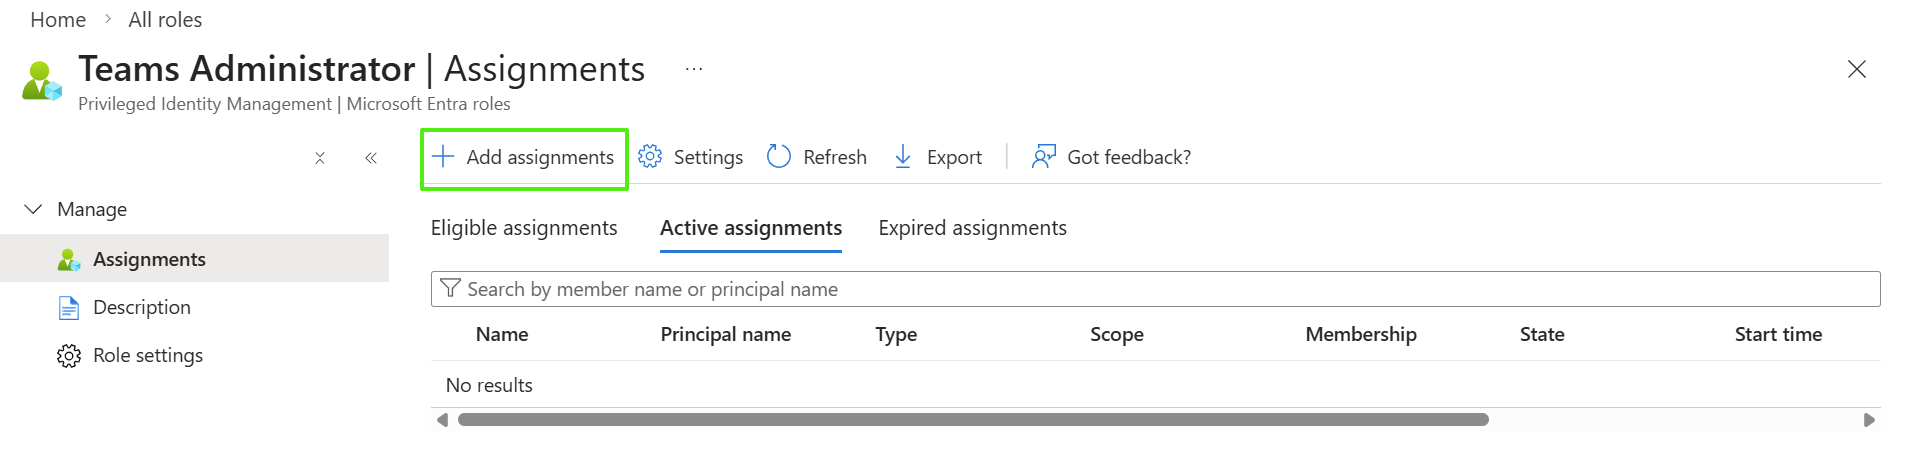
| 4. | Click Add assignments. |

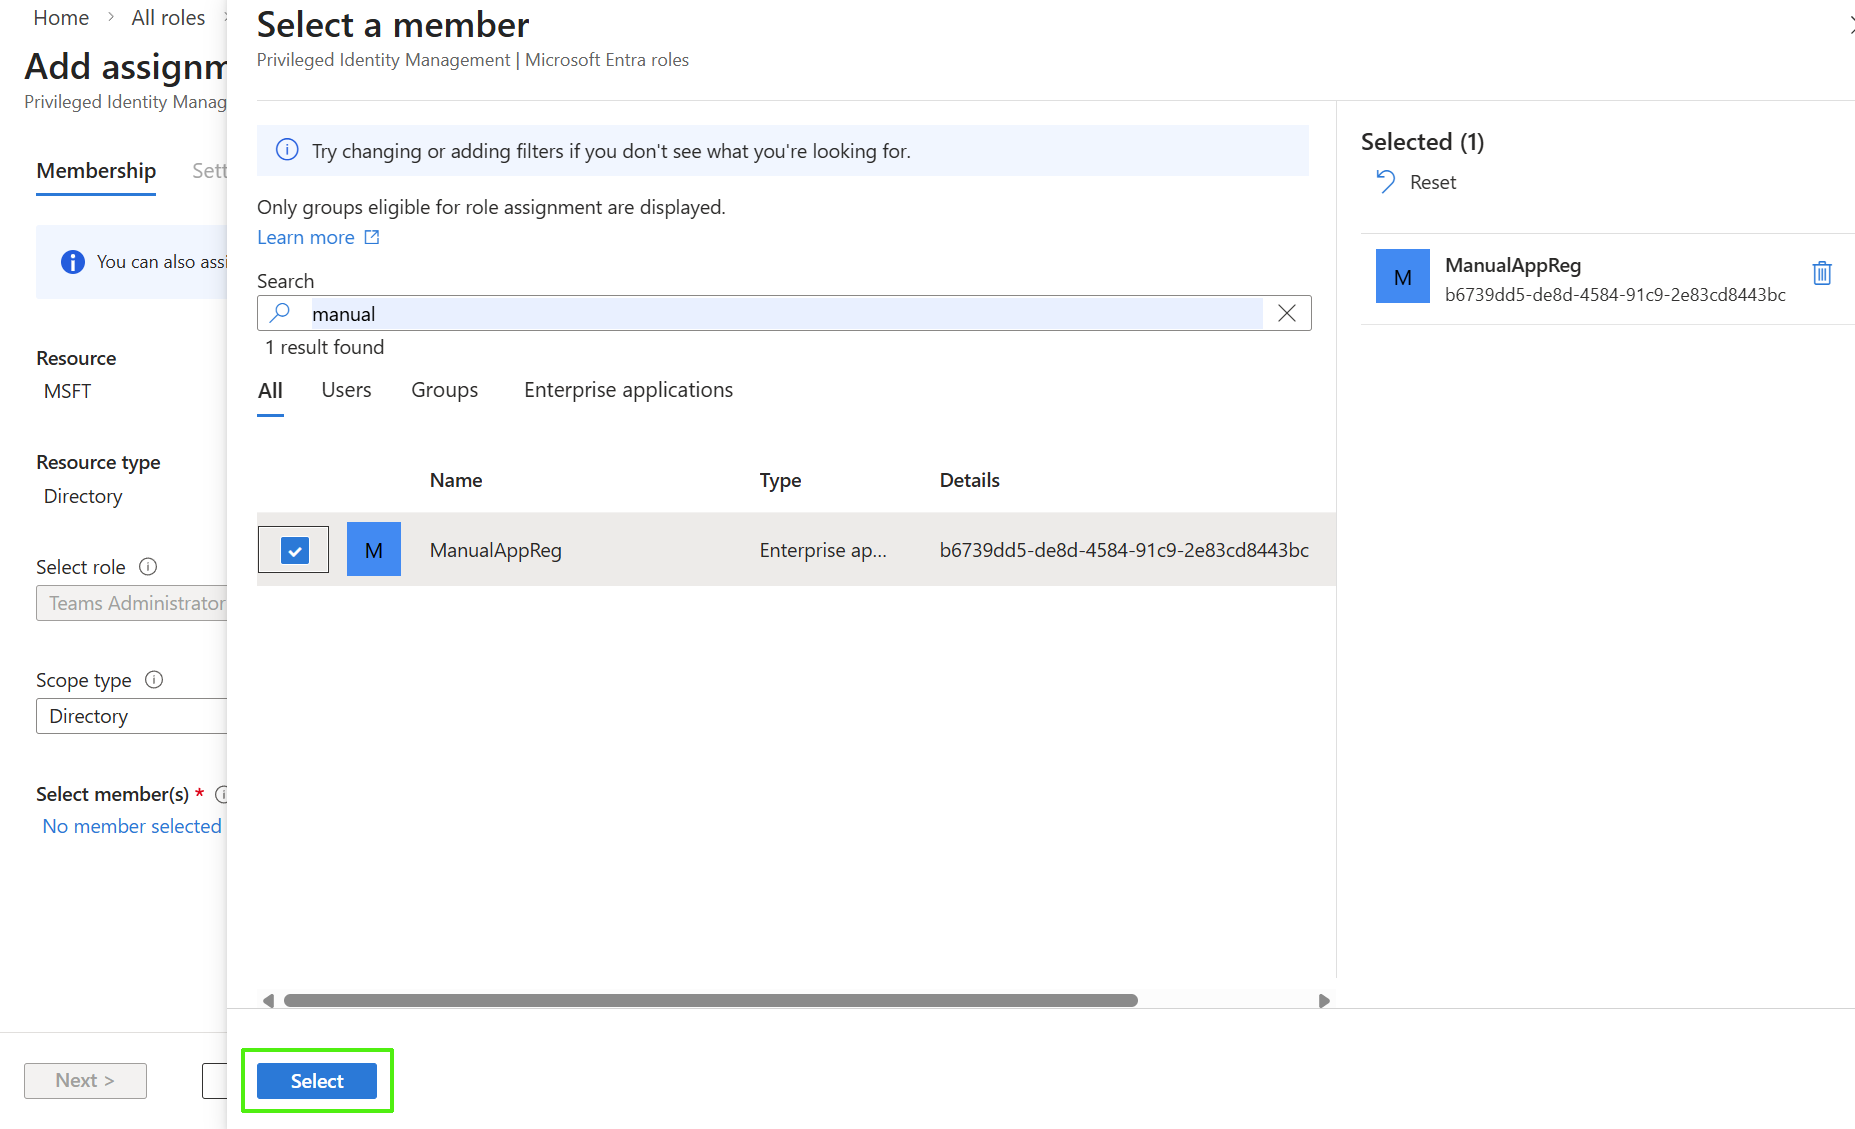
| 5. | Click No member selected. |
| 6. | Start typing the name of the App Registration that you created in Create App Registration Manually, select it and then click Select. |
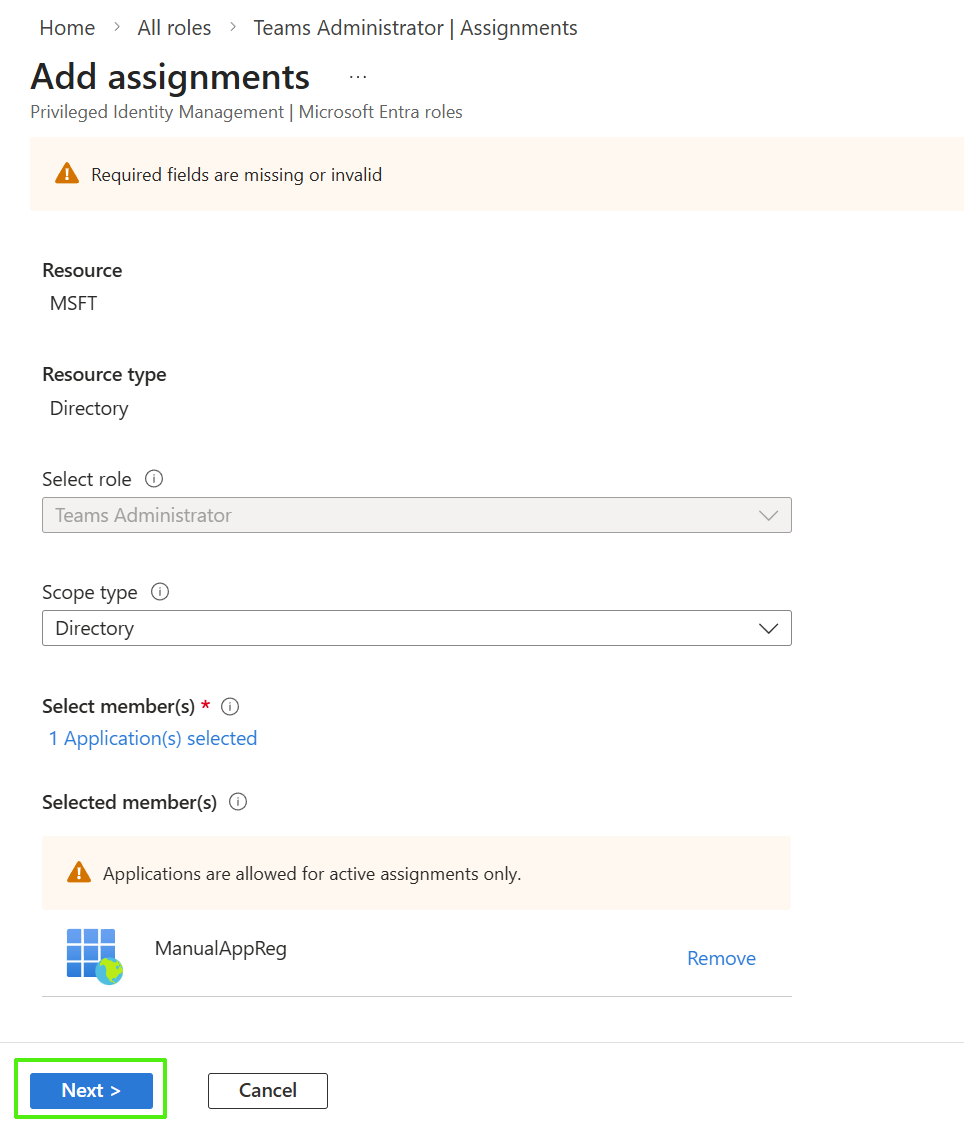
| 7. | Click Next. Enter free text to explain the justification for the role assignment. |
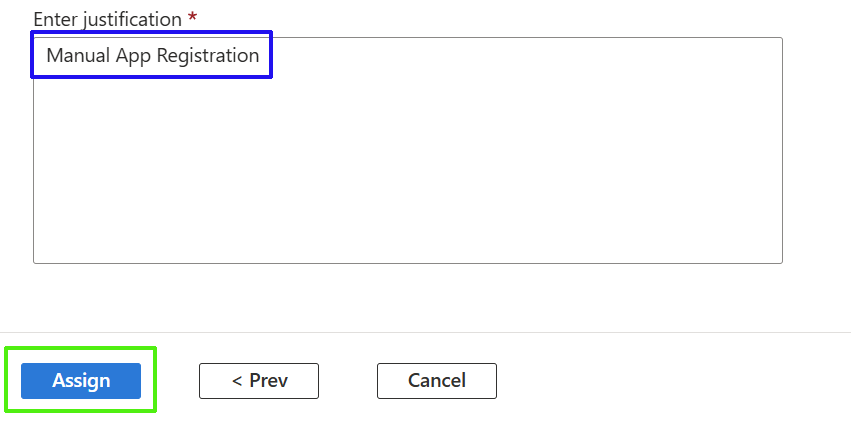
| 8. | Click Assign. |
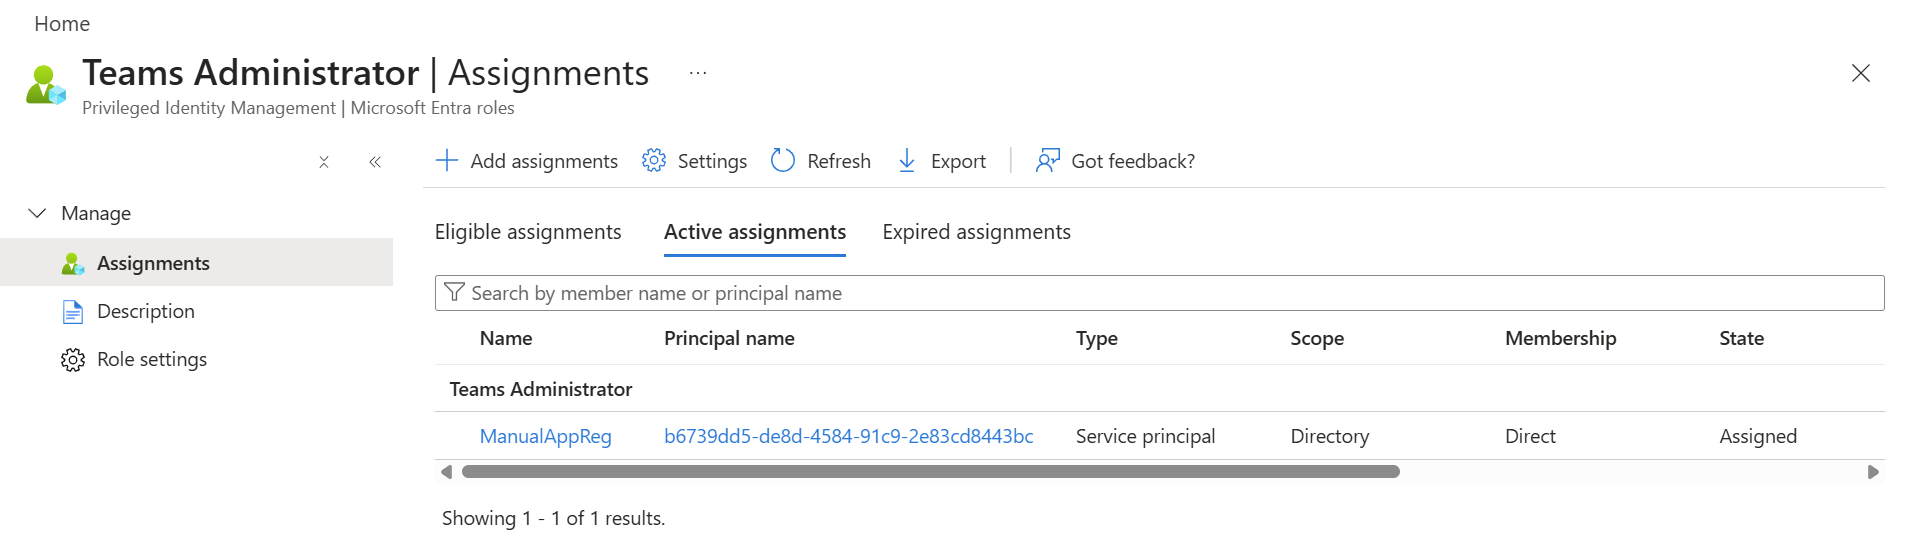
| 9. | Refresh the screen to display the new assignment. |
| 10. | Repeat the above steps for each role that you wish to assign. |
| 11. | Proceed to Authenticate using Manually Created App Registration. |
| Role | Purpose | When Needed | Notes |
|---|---|---|---|
| Application Administrator | Creates the app in Azure automatically | Onboarding only | Can be removed after onboarding |
| Teams Administrator | Manages Teams, voice routes, users | Onboarding + Daily use | Needed unless using the two roles below |
| Teams Telephony Admin + Skype for Business Admin | Manages calling, meetings, legacy commands | Onboarding + Daily use | Used together as an alternative to Teams Admin |