- How to update your profile settings?
- How to enable Single Sign On for Colt Online?
- What options are available in Colt Online?
- Which notifications/subscriptions are available in the contact management module?
- How do subscriptions and the contact management module in colt online work?
- How can I view the notifications/subscriptions that I am set up to receive from colt?
- What is Planned Works ?
- What is the Order Management Portal?
- CLI Presentation
- Colt Versa SD WAN & SASE – External Service Guide
- Getlink LDN Access Procedure
- Dedicated Cloud Access External Service Guide
- Colt Operator Connect Management Portal for Partners
- Assign a role to an existing user
- Remove the role of a user
- Modify the account group of the user
- Create a new users and assign the IPG role
- Ethernet VPN- External Service Guide
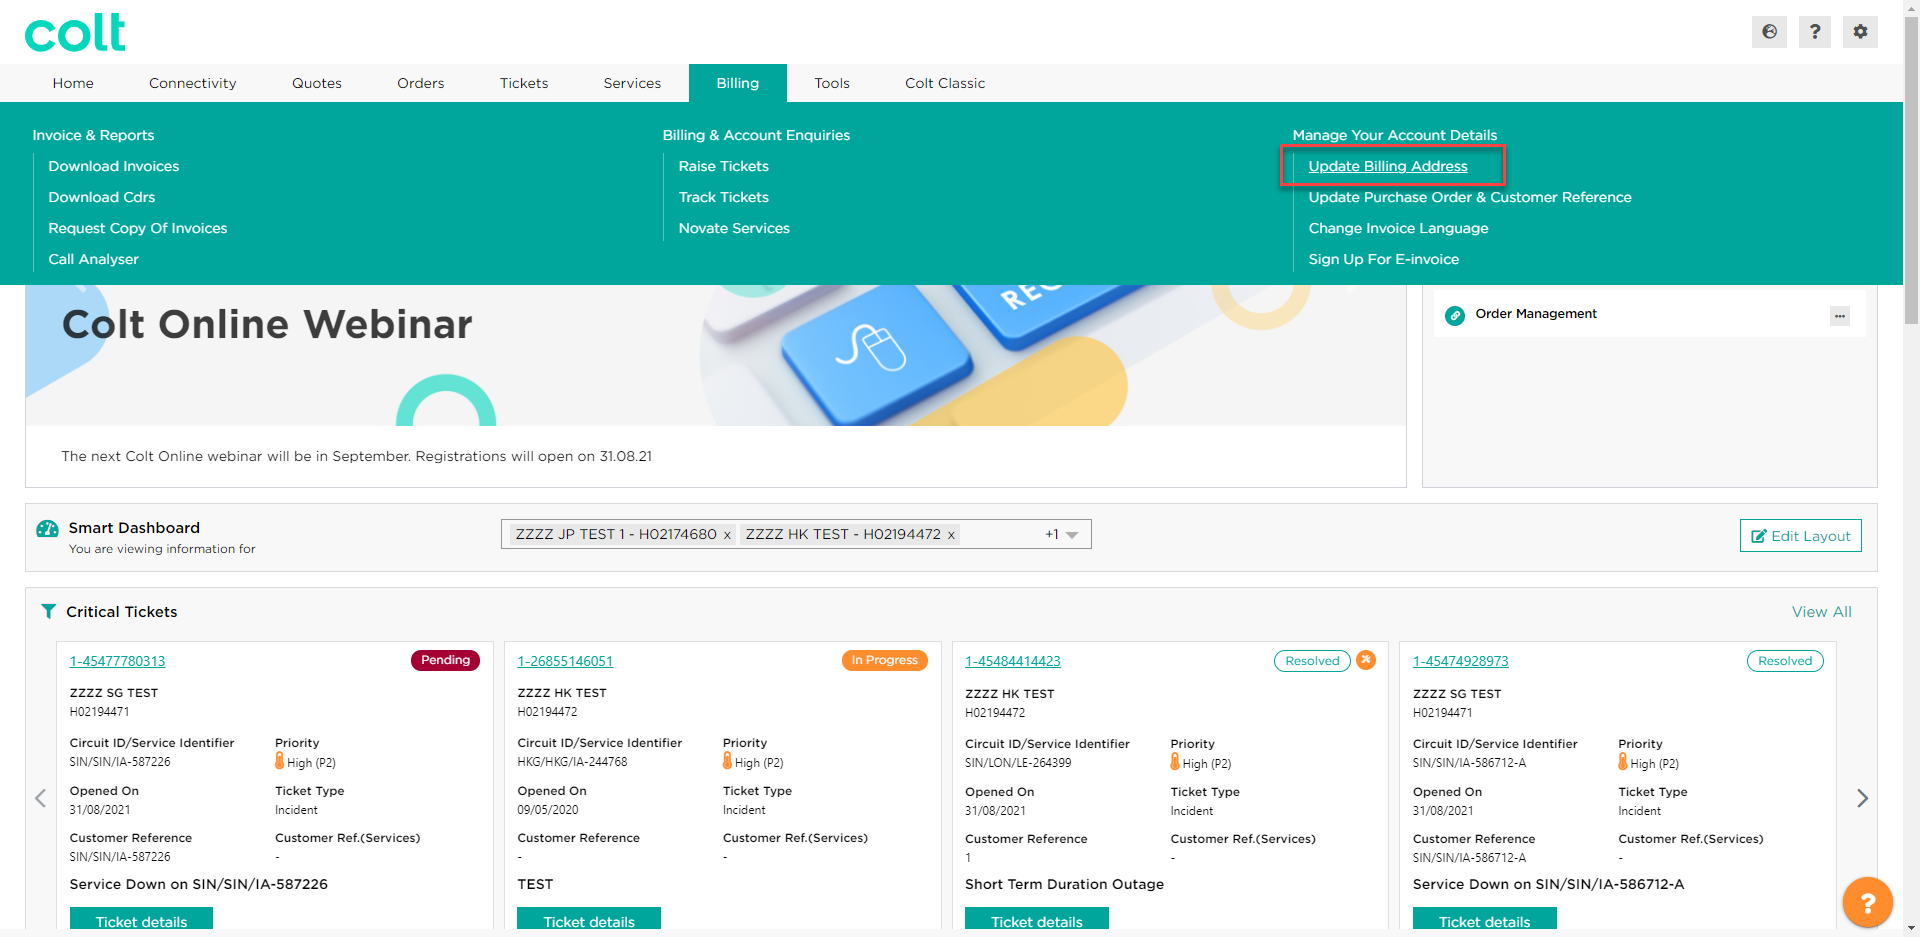
Go to the Billing Section from the menu bar and select the option Update Billing Address.
This will open the Account Management page where you can view and manage the accounts associated to your Colt Online profile. Follow the steps below to update your billing address details:
1- Click on New Request (1) to see your billing account numbers and update your details. Not finding your account? Use the Search box (3) to search or use the Smart filter (4) to filter the accounts displayed in the screen
Click on New Request (1) to continue
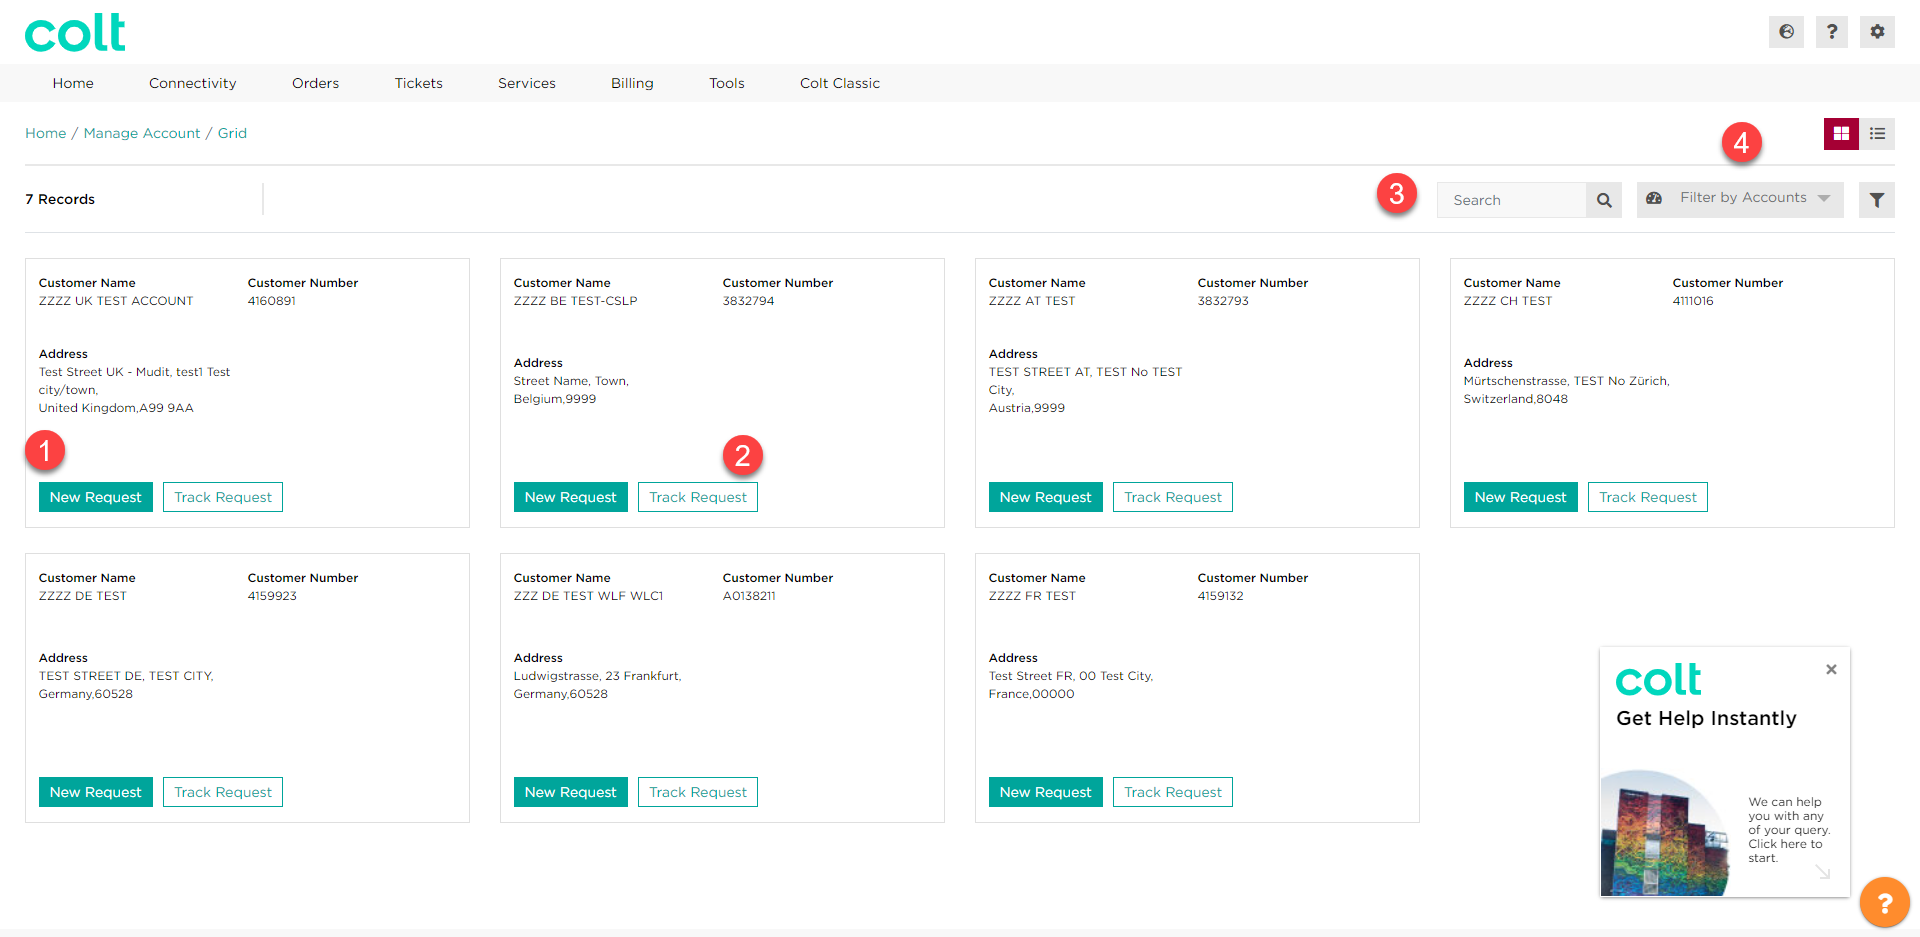
Note: Click on Track Request to view previous changes done to your account.
Colt Online will display the list of billing account numbers related to the account selected in the previous screen.
This page will allow you to see the current billing account details as Billing address (including Billing company name and Billing Contact name), e-invoice email, Customer Reference, Purchase Order nº and Invoice Language.
Use the search box to filter the data if required.
2- Select the Billing Account Number you want to update and click Next

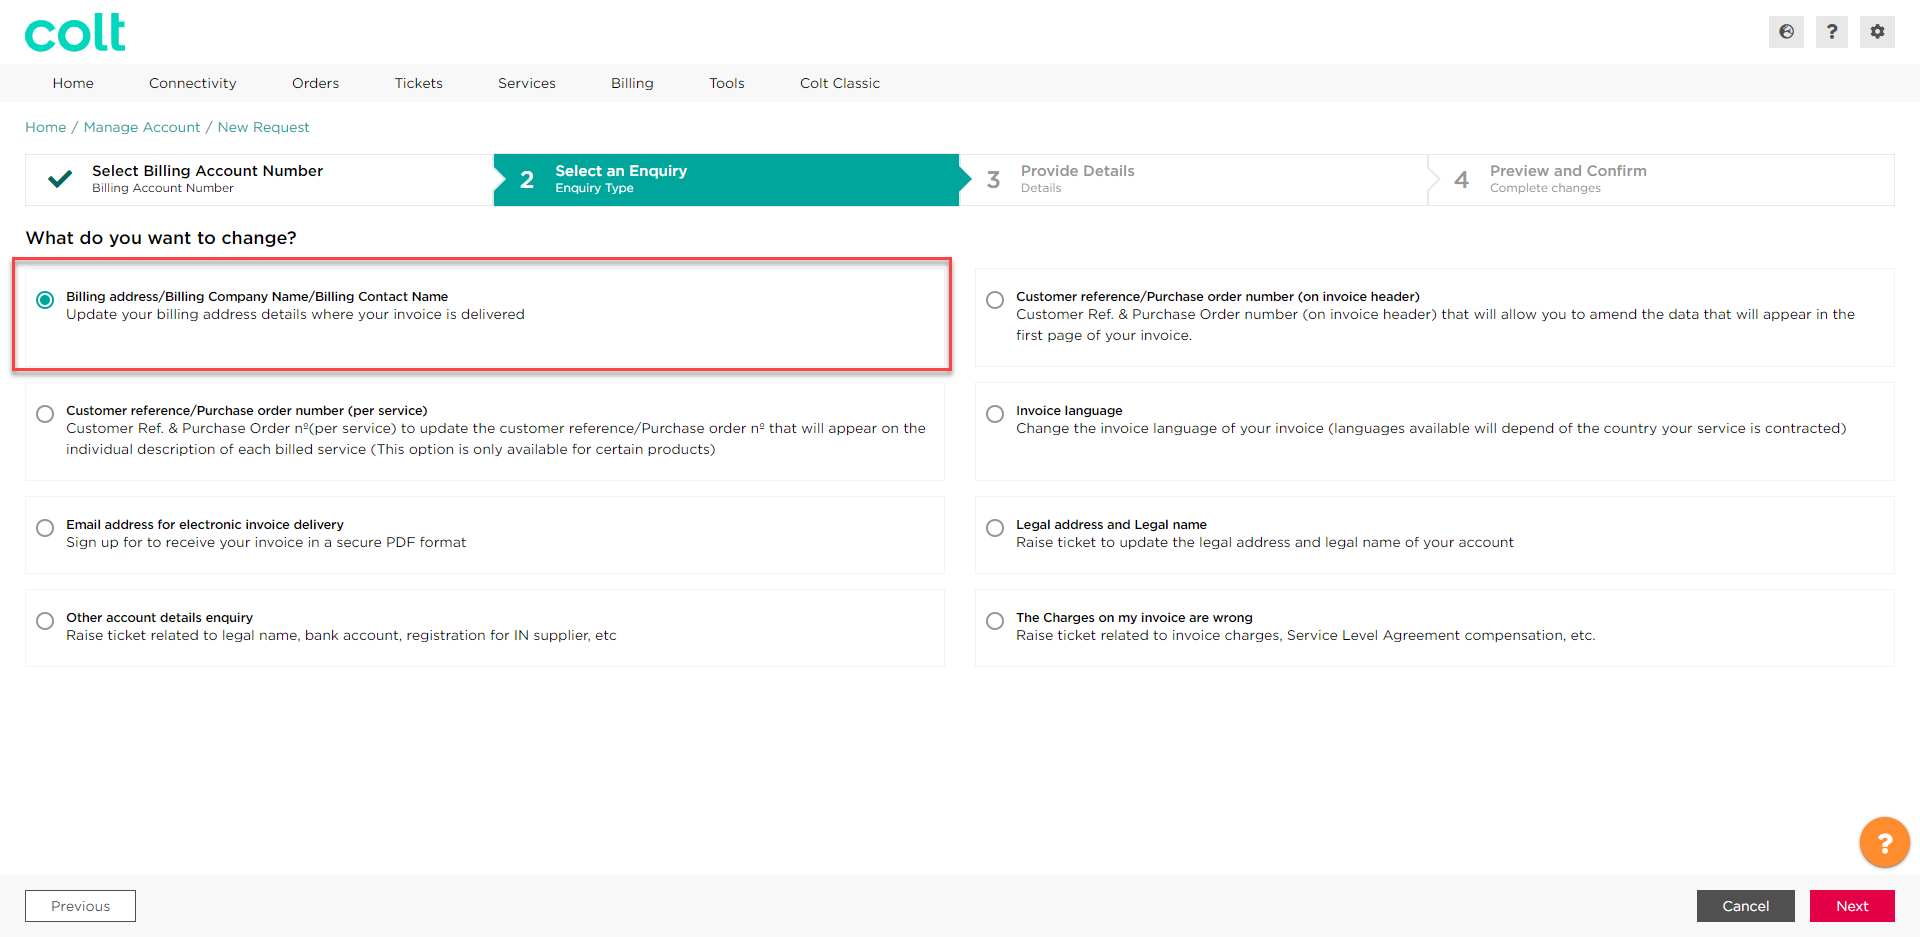
3- Select the type of change you want to request then click Next
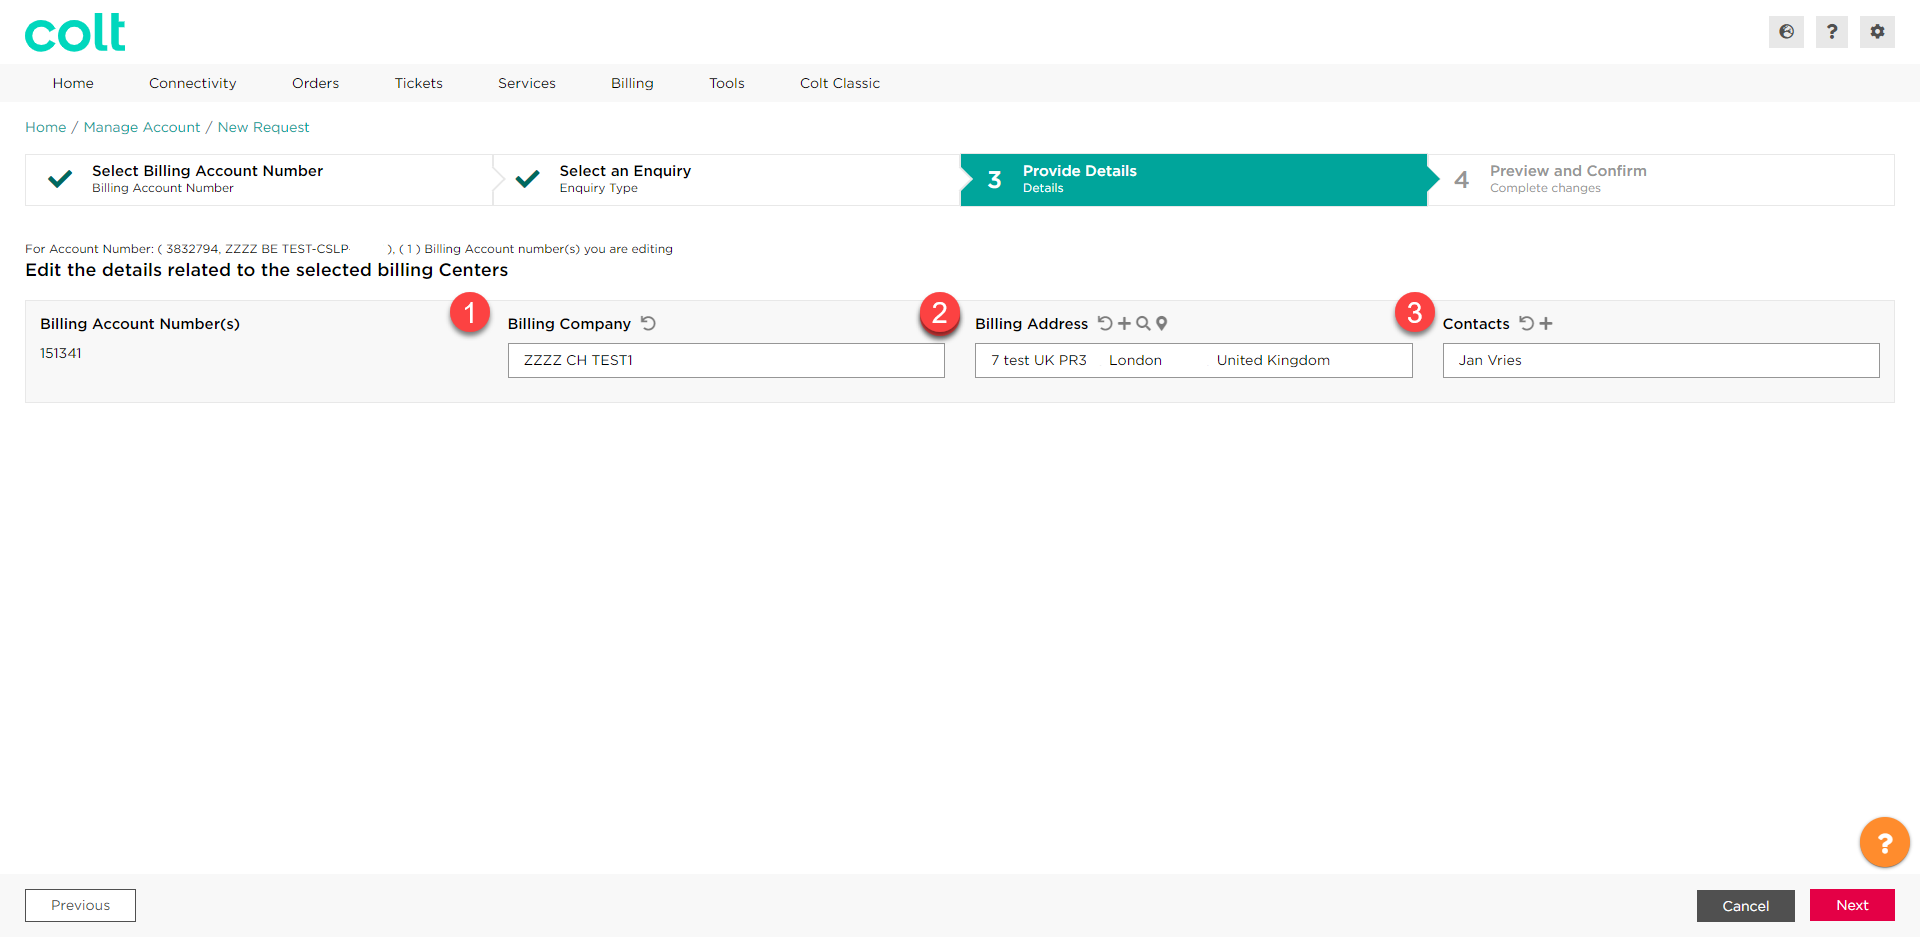
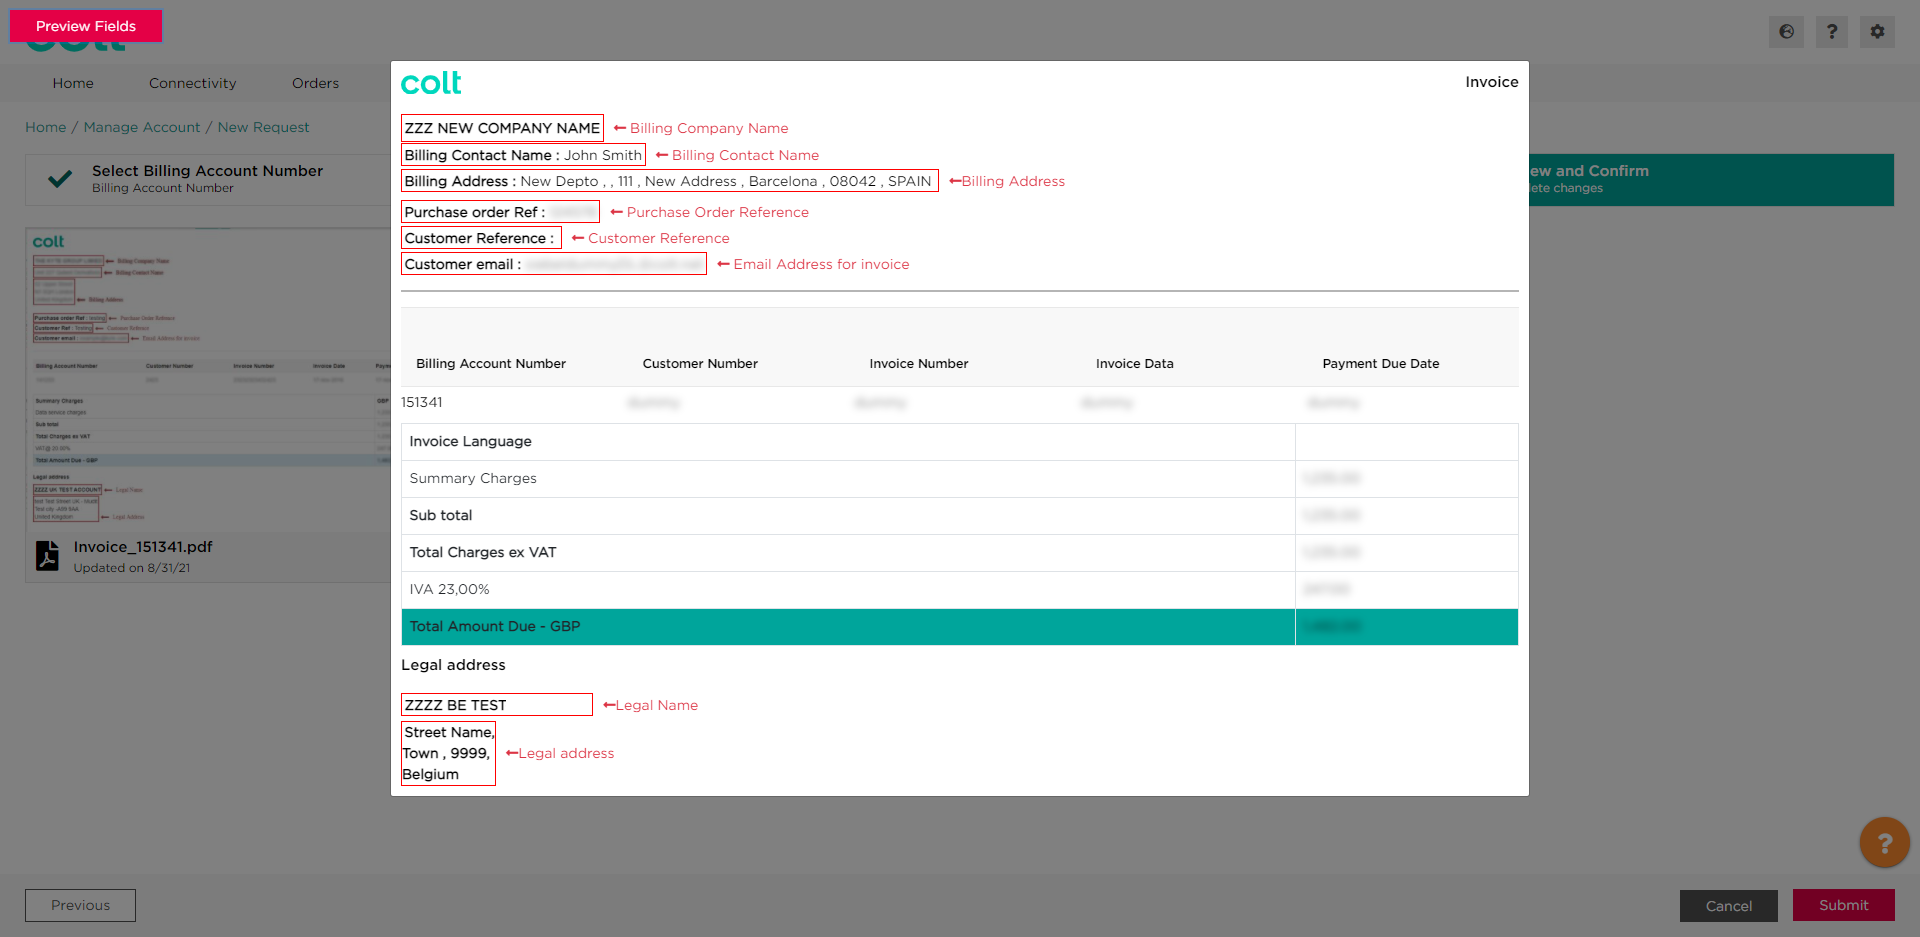
4- The next screen you can update the following details
- Billing Company (1) This is the Company name that will appear in invoice delivery address in the invoice header
- Billing Address (2) This is the invoice delivery address we will appear in the invoice header
- Use the to add a new address
- Use the to search for an existing address
- Use the to use the current legal address as billing address
- Contacts (3) This is the contact person that will appear in the Billing address of the invoice
- Use to add a new contact
- Use the to refresh the field to the original values
Click Next
5- A preview of your invoice will be displayed. Please check if details are correct then click Submit
6- A confirmation pop up will appear, click yes to confirm

7 – A confirmation page will confirm that your request is successfully submitted
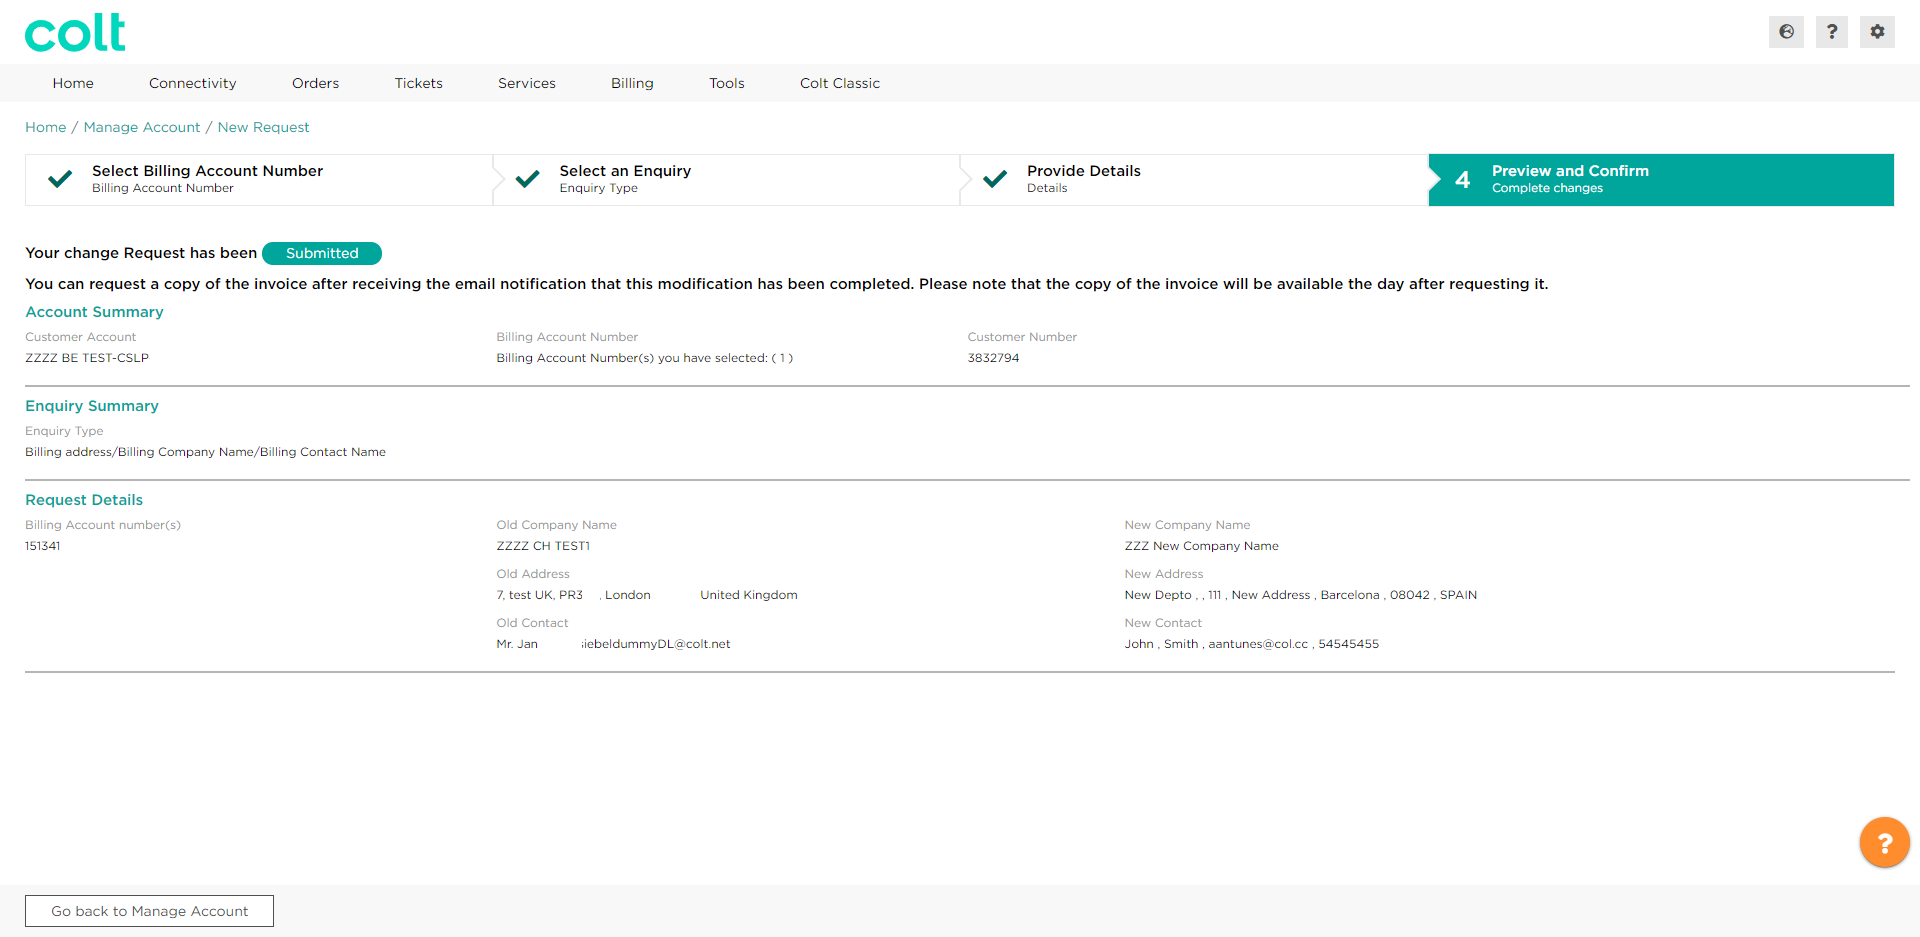
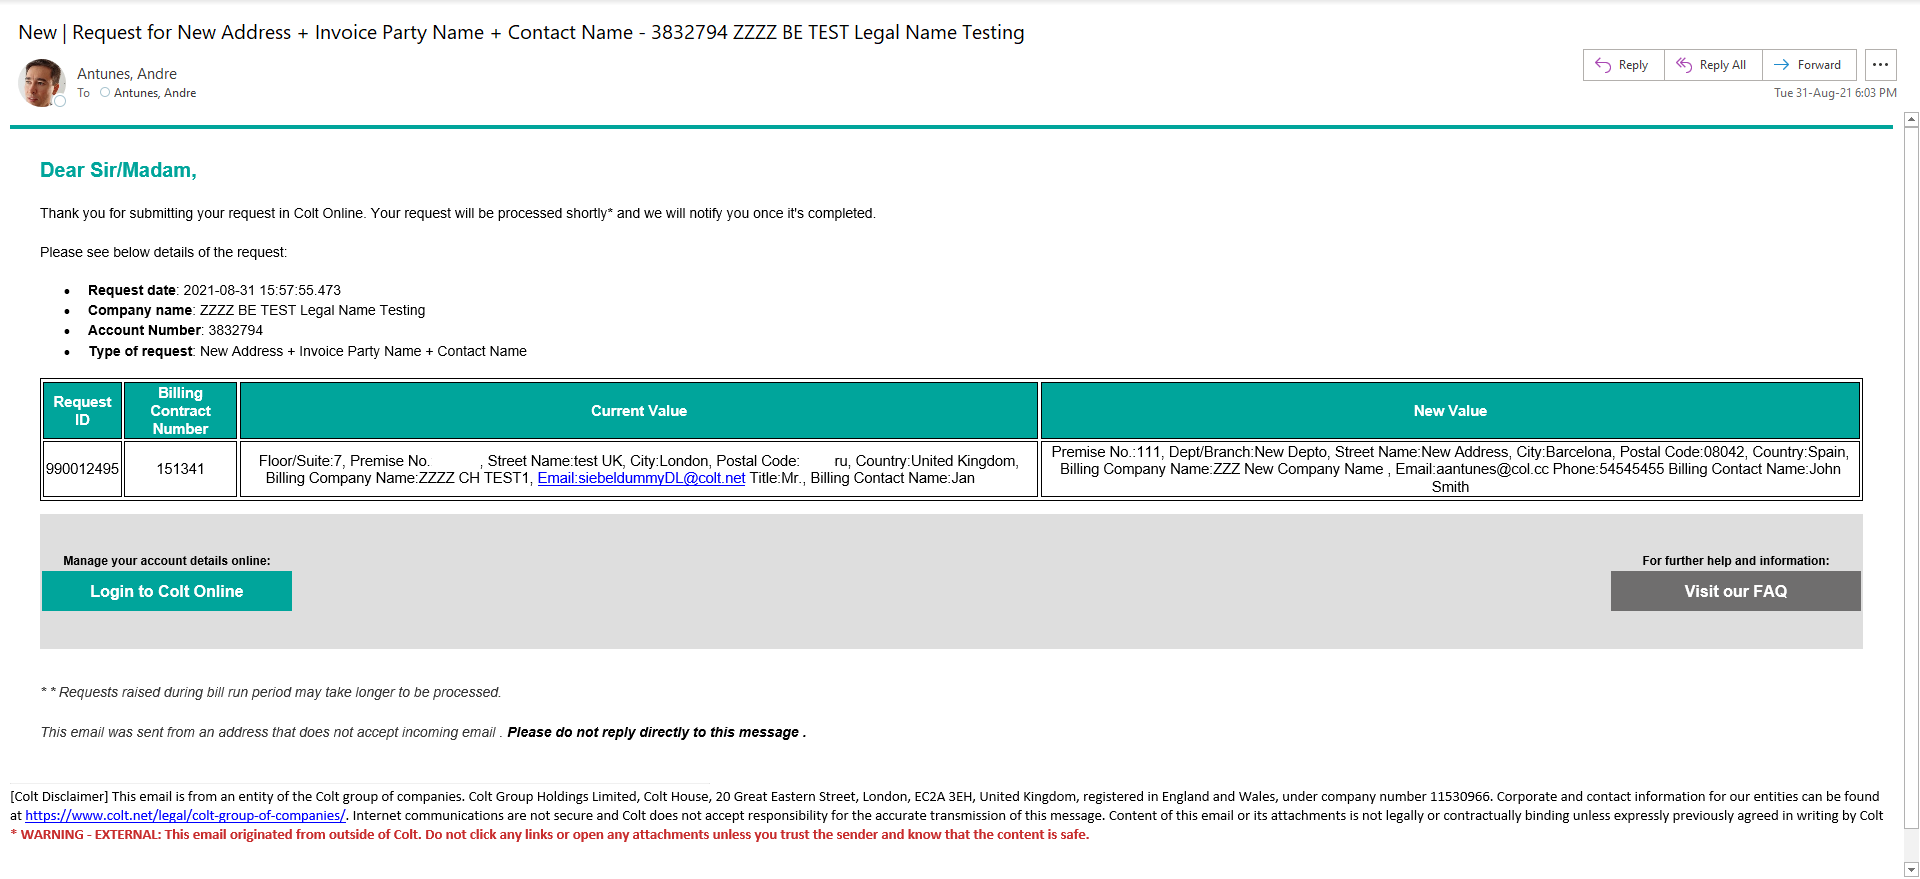
A notification will be sent to your mailbox with the details of your request.
Watch the video below for a short demo