How to update the Customer Reference and Purchase Order number ?
- How to update your profile settings?
- How to enable Single Sign On for Colt Online?
- What options are available in Colt Online?
- Which notifications/subscriptions are available in the contact management module?
- How do subscriptions and the contact management module in colt online work?
- How can I view the notifications/subscriptions that I am set up to receive from colt?
- What is Planned Works ?
- What is the Order Management Portal?
- CLI Presentation
- Colt Versa SD WAN & SASE – External Service Guide
- Getlink LDN Access Procedure
- Dedicated Cloud Access External Service Guide
- Colt Operator Connect Management Portal for Partners
- Assign a role to an existing user
- Remove the role of a user
- Modify the account group of the user
- Create a new users and assign the IPG role
- Ethernet VPN- External Service Guide
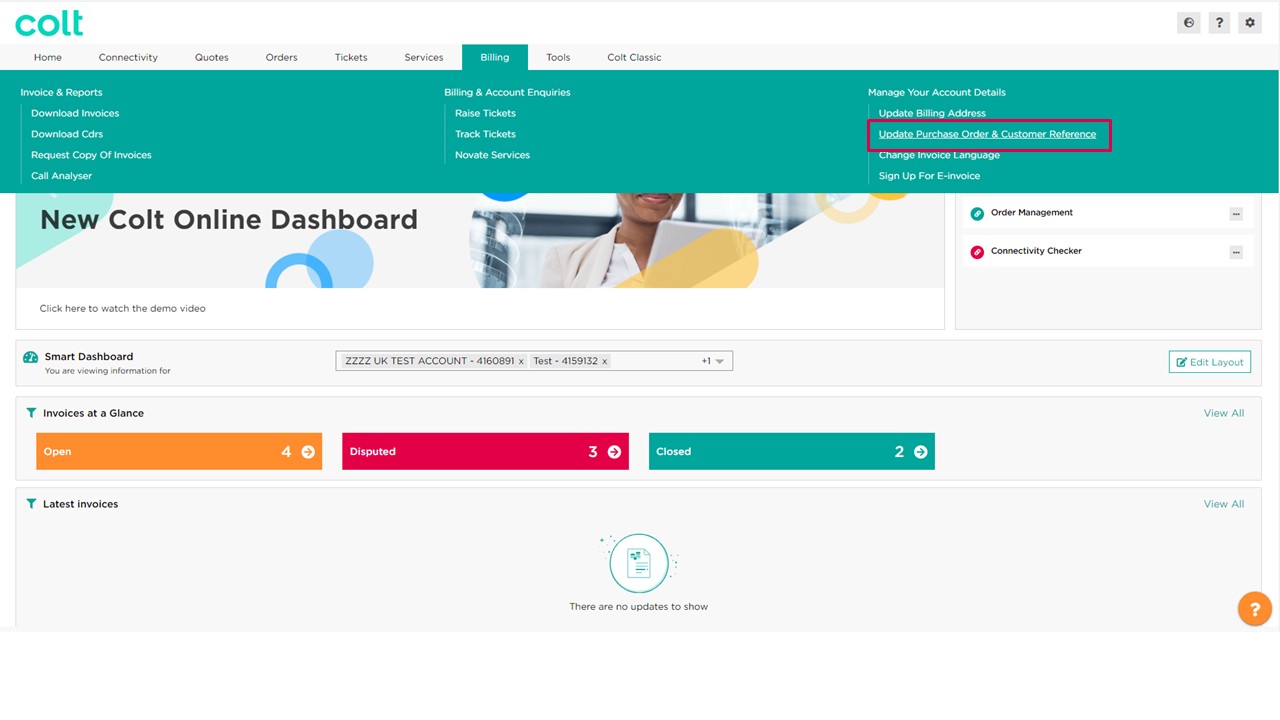
How to update the Customer Reference and Purchase Order number?
On the Menu bar navigate to Billing and click on the option “Update Purchase Order & Customer Reference”.
1. This will open the Manage Account page, select the customer number to change by clicking on “New Request”.
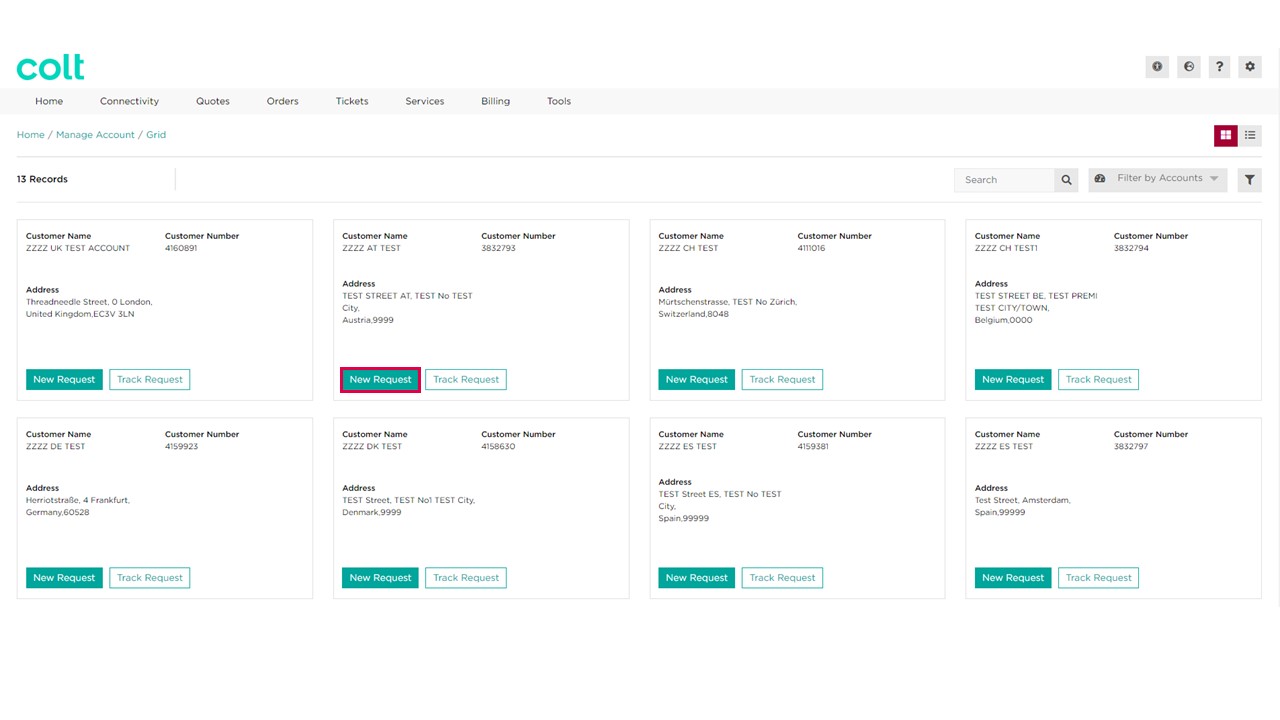
2. Colt online will display the list of billing account numbers related to the customer number selected on the previous screen.
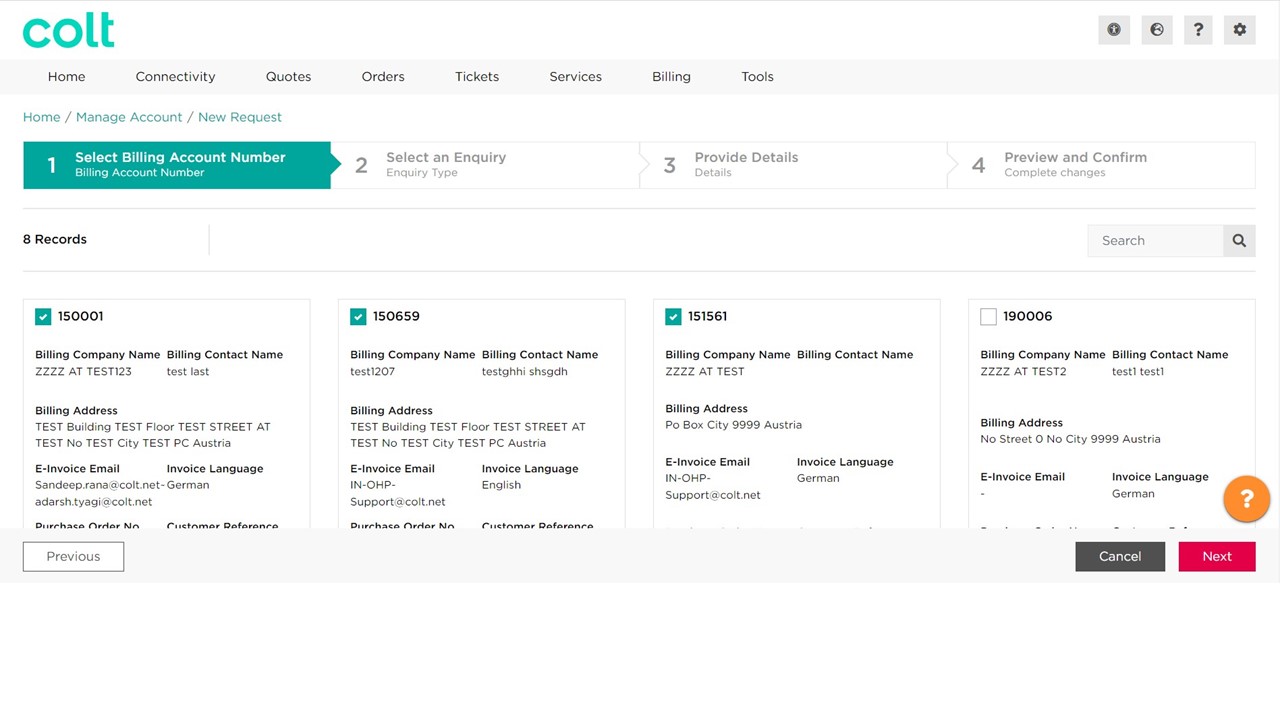
This page will allow you to see the current billing account details such as Billing address (including Billing company name and Billing Contact name), e-invoice email, Customer Reference, Purchase Order number and Invoice Language. Use the search box to filter the data is required.
Select one or multiple Billing Account Numbers you would like to update and click “Next”.
3. Select what you want to change, in our case, it’s Customer Ref. & Purchase Order number and click the “Next” button.
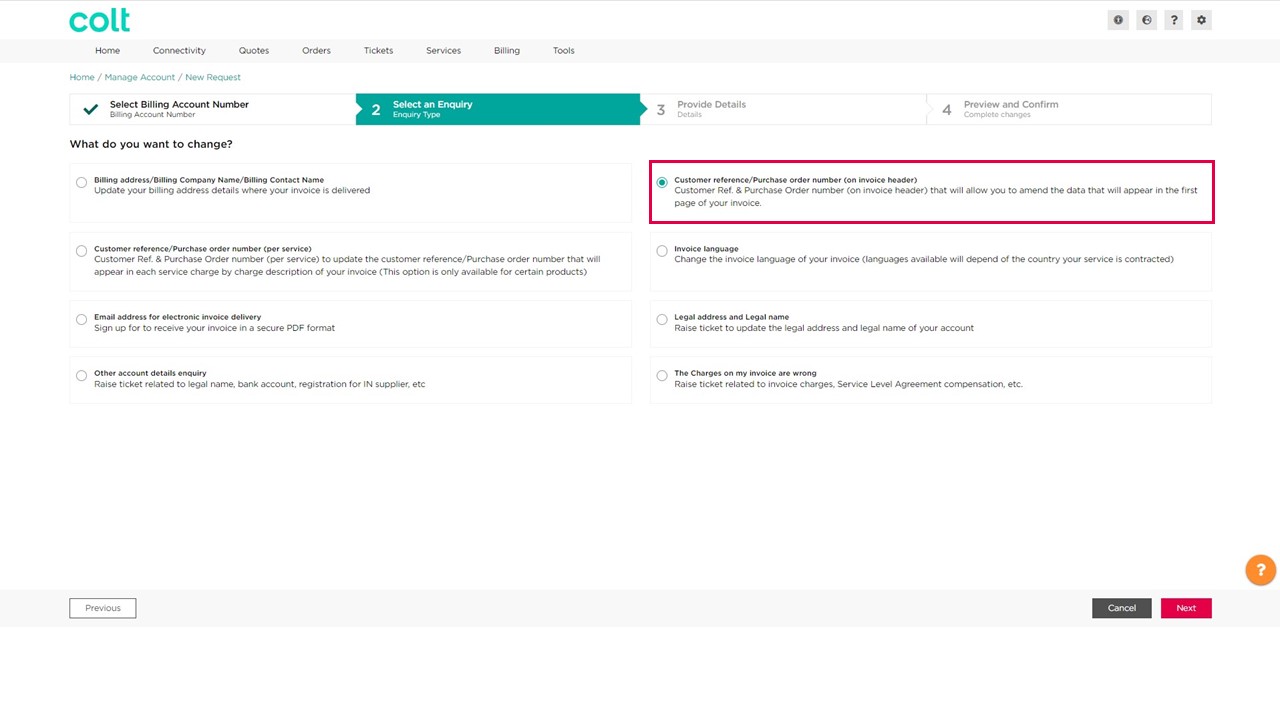
Note: In case there is a change request in progress then Colt Online will display the following message: This request is already in progress. Please wait until it is completed to raise a new request.

4. The page below will allow you to see the current Customer Reference set in each Billing Account number and provide the New Customer Reference. You should also provide the Start date and End Date of your Customer Reference. You can also keep the current value and click next to update the Purchase order number details
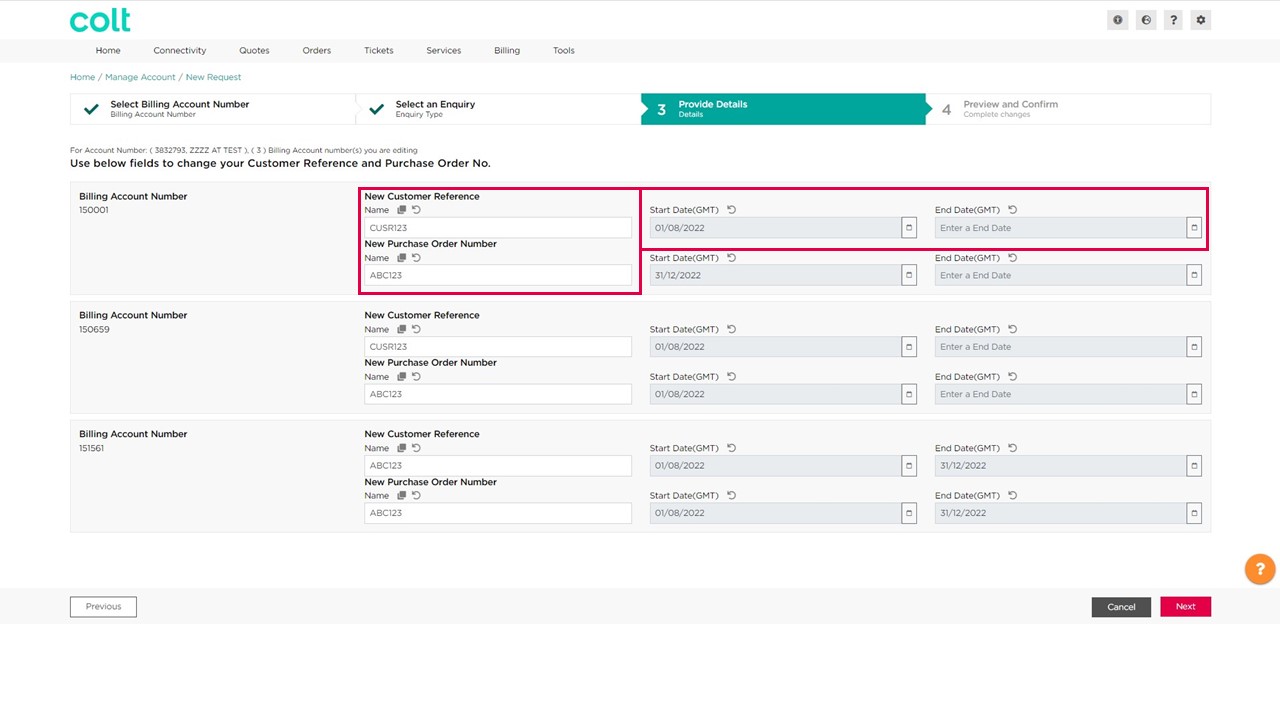
Note: The Purchase Order nº filed cannot be greater than 36 characters
6. The next page will show you a preview of your invoice with the changes requested. Click the Billing Account number you would like to preview.
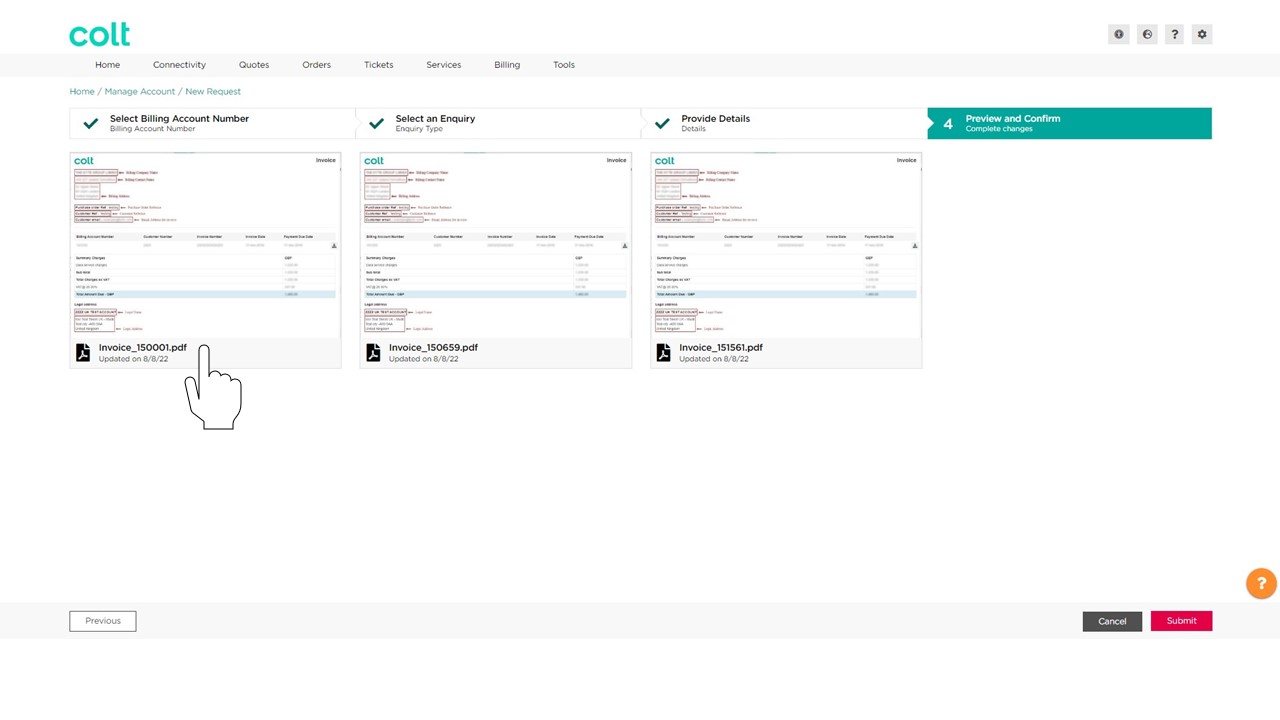
7. Preview the Invoice and click out of the pop-up window when done.
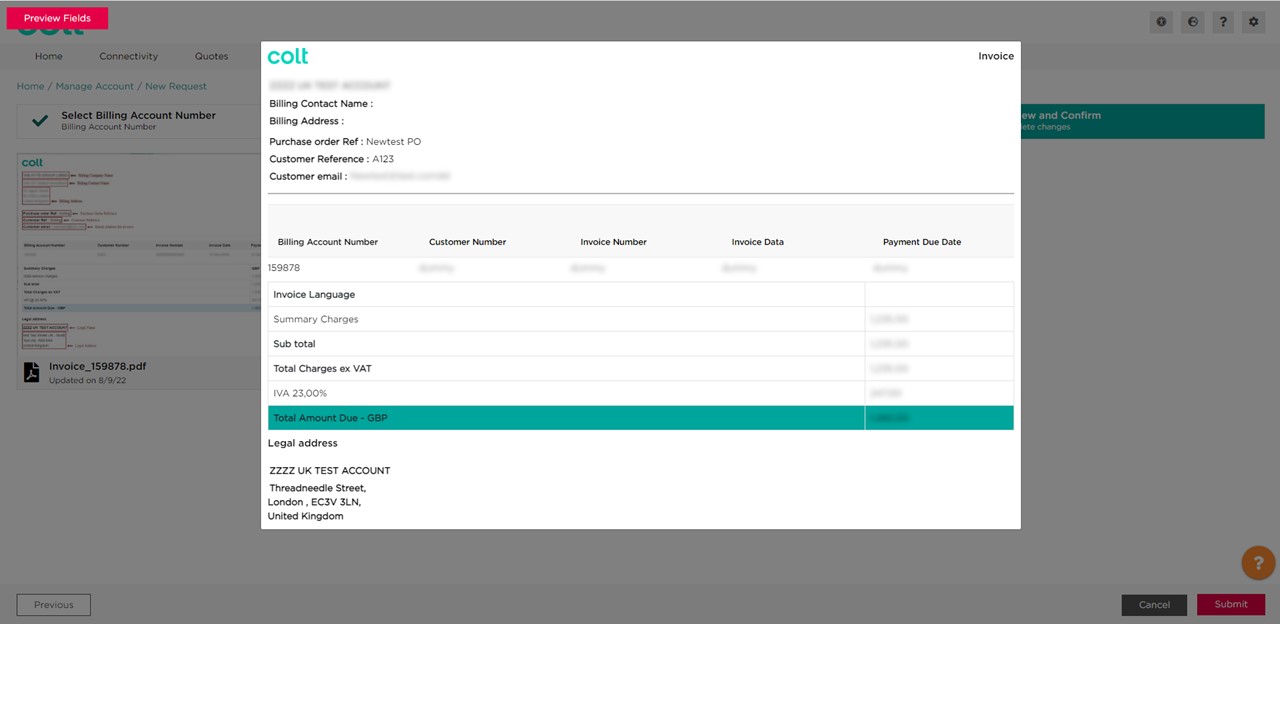
Note: This page is just an example of how the changes will look like in your invoice. In case of multiple changes with different values then the preview page will just show one example.
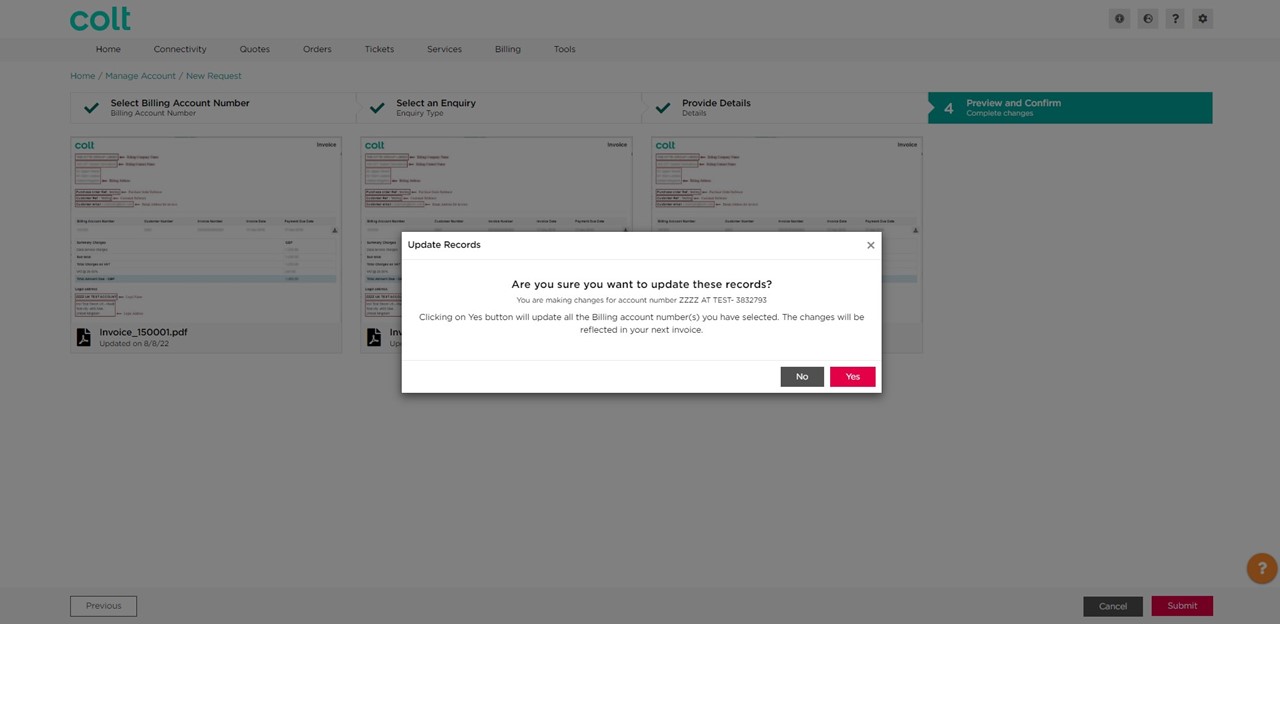
7. After the preview please click the “Submit” button to continue and pop-up window will open, where you need to confirm the update of these records. Click Yes or No to confirm the changes.
8. Now you can see that your changes have been submitted successfully
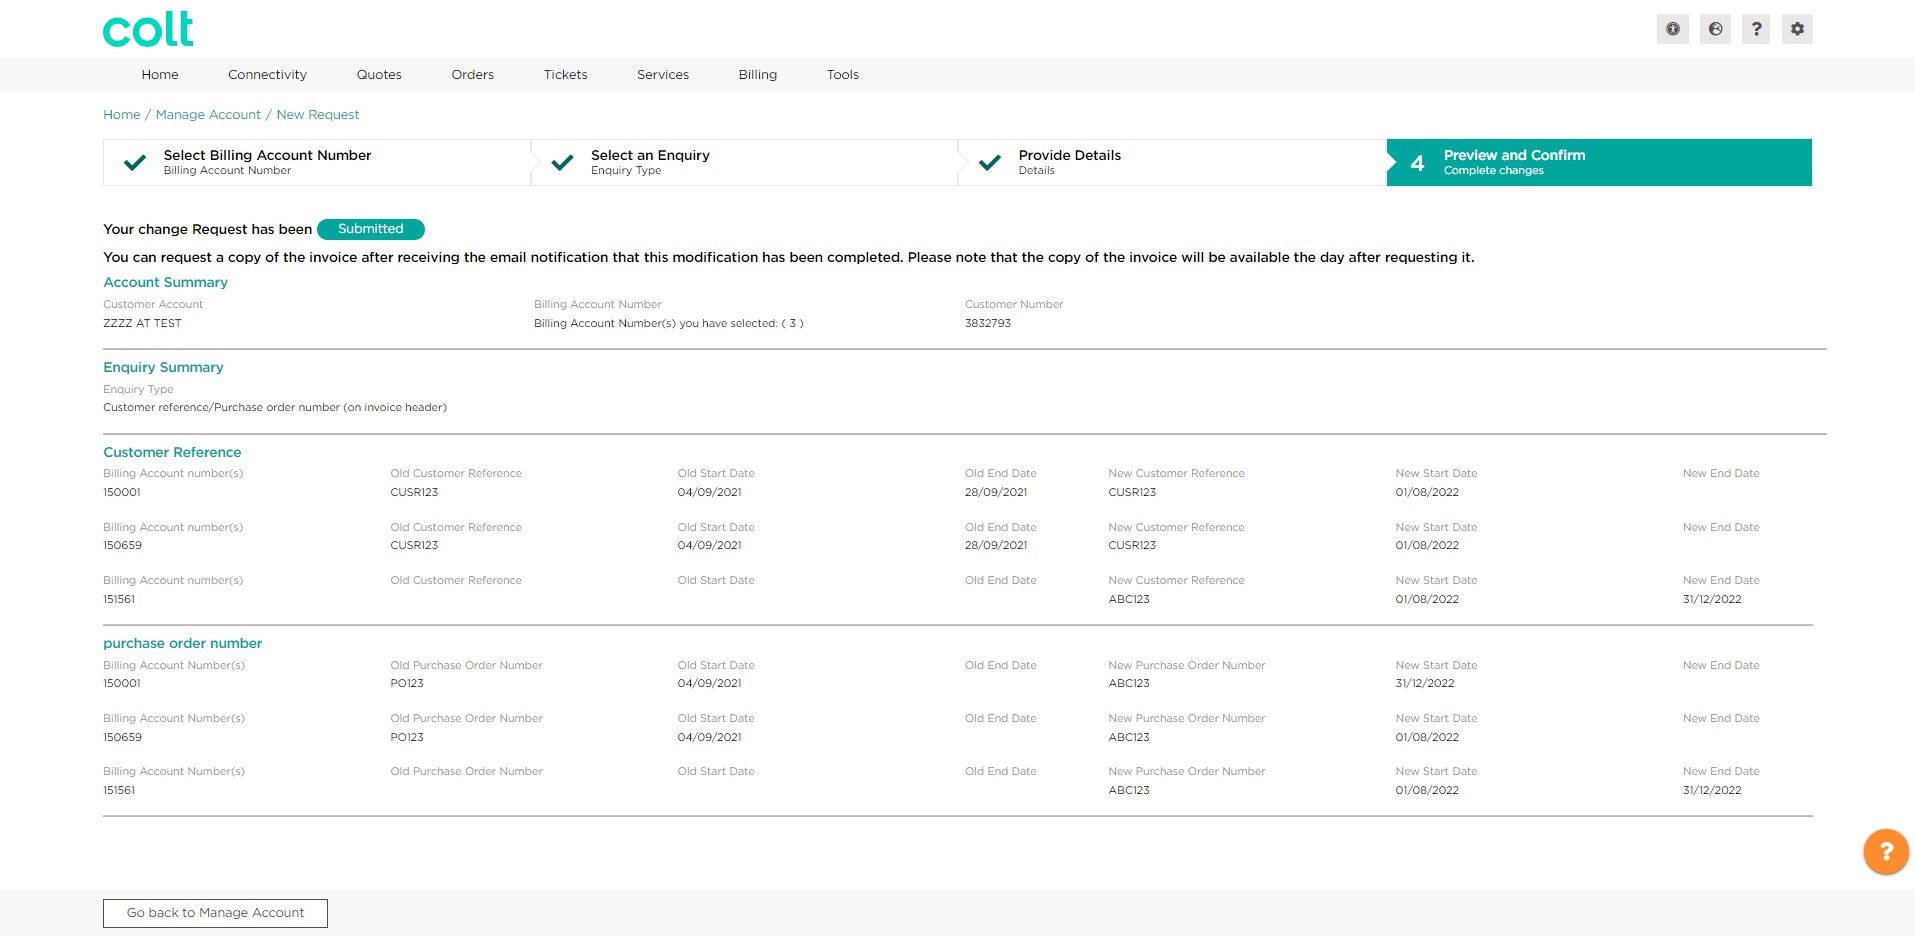
9. Track your request from the Manage Account Page by clicking on the button “Track Request” for the relative customer number.

10. Tracking your Request make it easy to identify, which request is completed, in progress or new. On average a request is completed within the next 10 minutes.
![]()
Note: Only when the request is completed, will it be possible to request a copy of the invoice with the new details.