- How to update your profile settings?
- How to enable Single Sign On for Colt Online?
- What options are available in Colt Online?
- Which notifications/subscriptions are available in the contact management module?
- How do subscriptions and the contact management module in colt online work?
- How can I view the notifications/subscriptions that I am set up to receive from colt?
- What is Planned Works ?
- What is the Order Management Portal?
- CLI Presentation
- Colt Versa SD WAN & SASE – External Service Guide
- Getlink LDN Access Procedure
- Dedicated Cloud Access External Service Guide
- Colt Operator Connect Management Portal for Partners
- Assign a role to an existing user
- Remove the role of a user
- Modify the account group of the user
- Create a new users and assign the IPG role
- Ethernet VPN- External Service Guide
There are 3 ways in which a new contact can be added, depending on which area of the contact management a user is in and outlined in the below sections:
- via the Account Level Contact Management pages; Add Contact pop up
- via the Set Subscription Journey; Add New Contact
- via the dedicated Set Subscription (By User) Journey
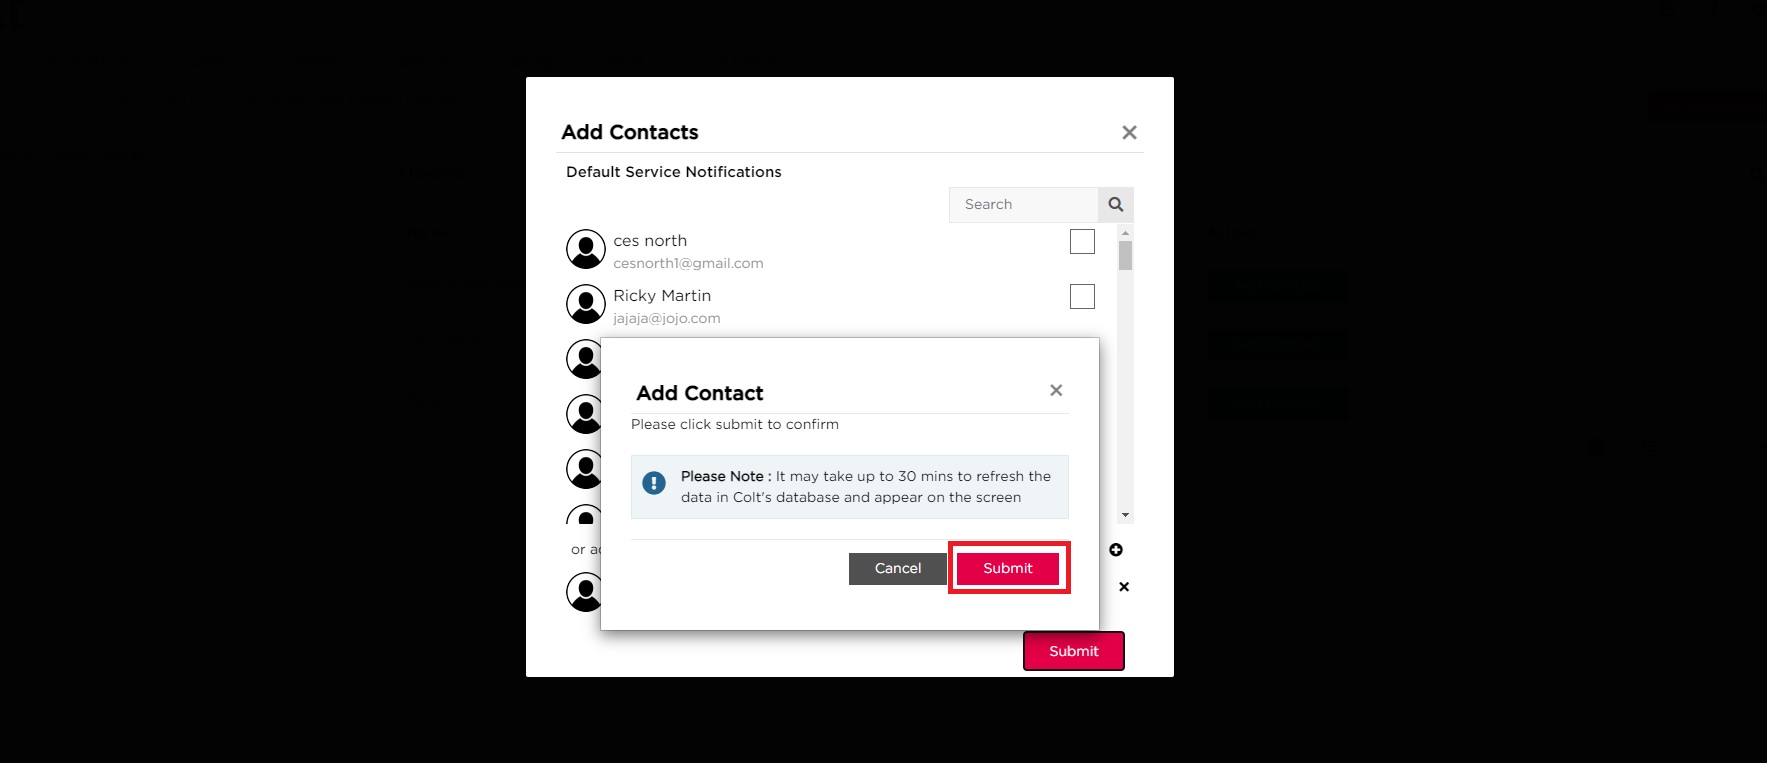
When a new contact is added to the database, that person will receive an email notification asking them to verify their email address (unless the new contact is set up as a Group contact)
Note: to remove a contact, please reach out to your service manager who will request our internal support teams to remove the contact from the account
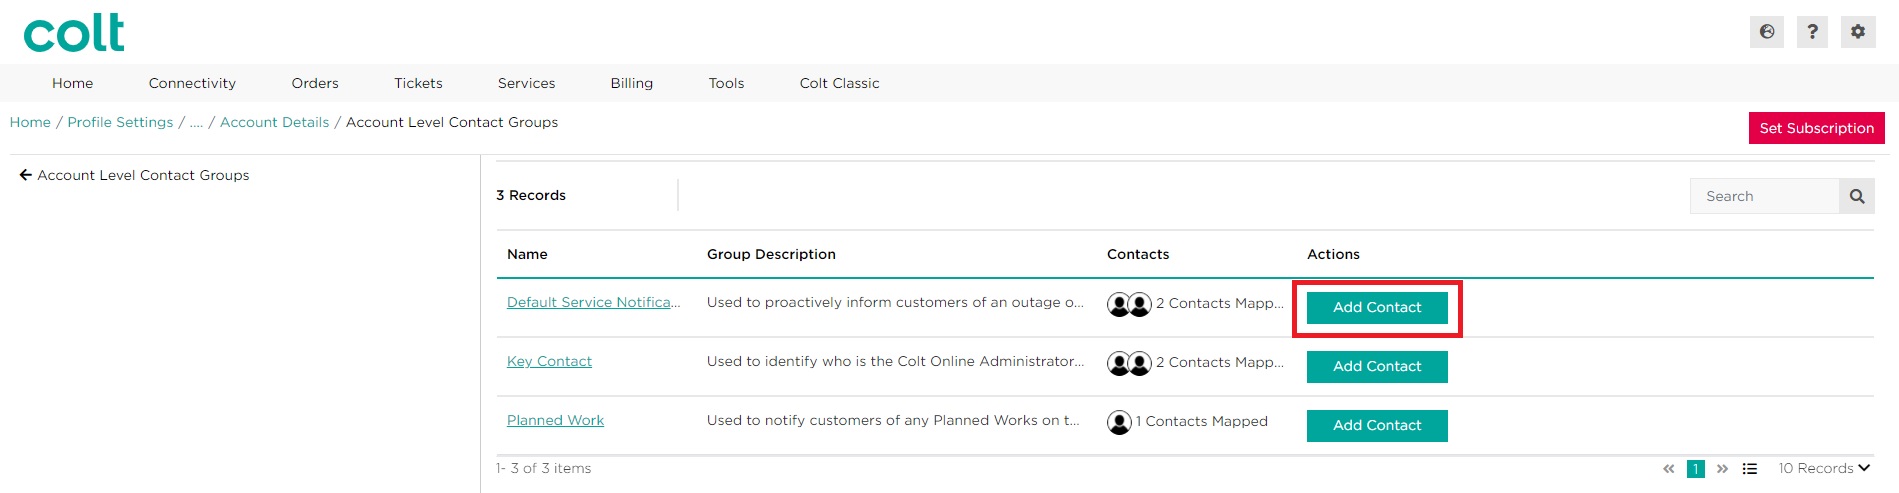
Approach 1 – via the Account Level Contact Management pages; Add Contact pop up
Whilst viewing the subscriptions set up on an Account, it is possible to Add additional contacts with the selected subscription type directly in that section. Please refer to this section for detailed step by step.
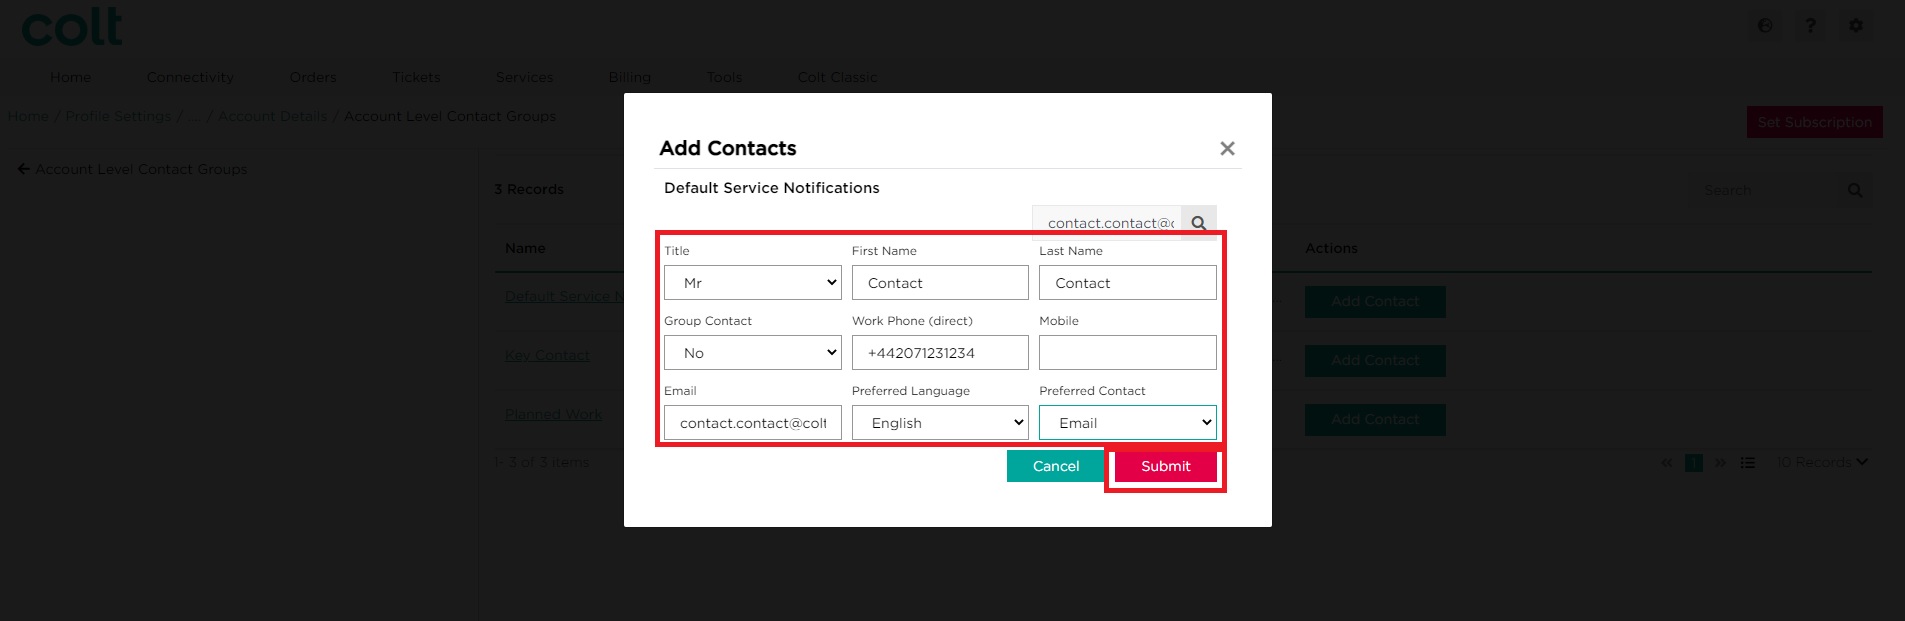
Sometimes, the required contact will not be available in the initial list (if it has not already previously associated to the Customer Number) or may be a new starter in your organisation. To Add new contacts from this area, please follow the below steps.
- Select Add Contact
- Use the search bar to look for the contact using the email address. If there are no results showing, click on the Add contact Button
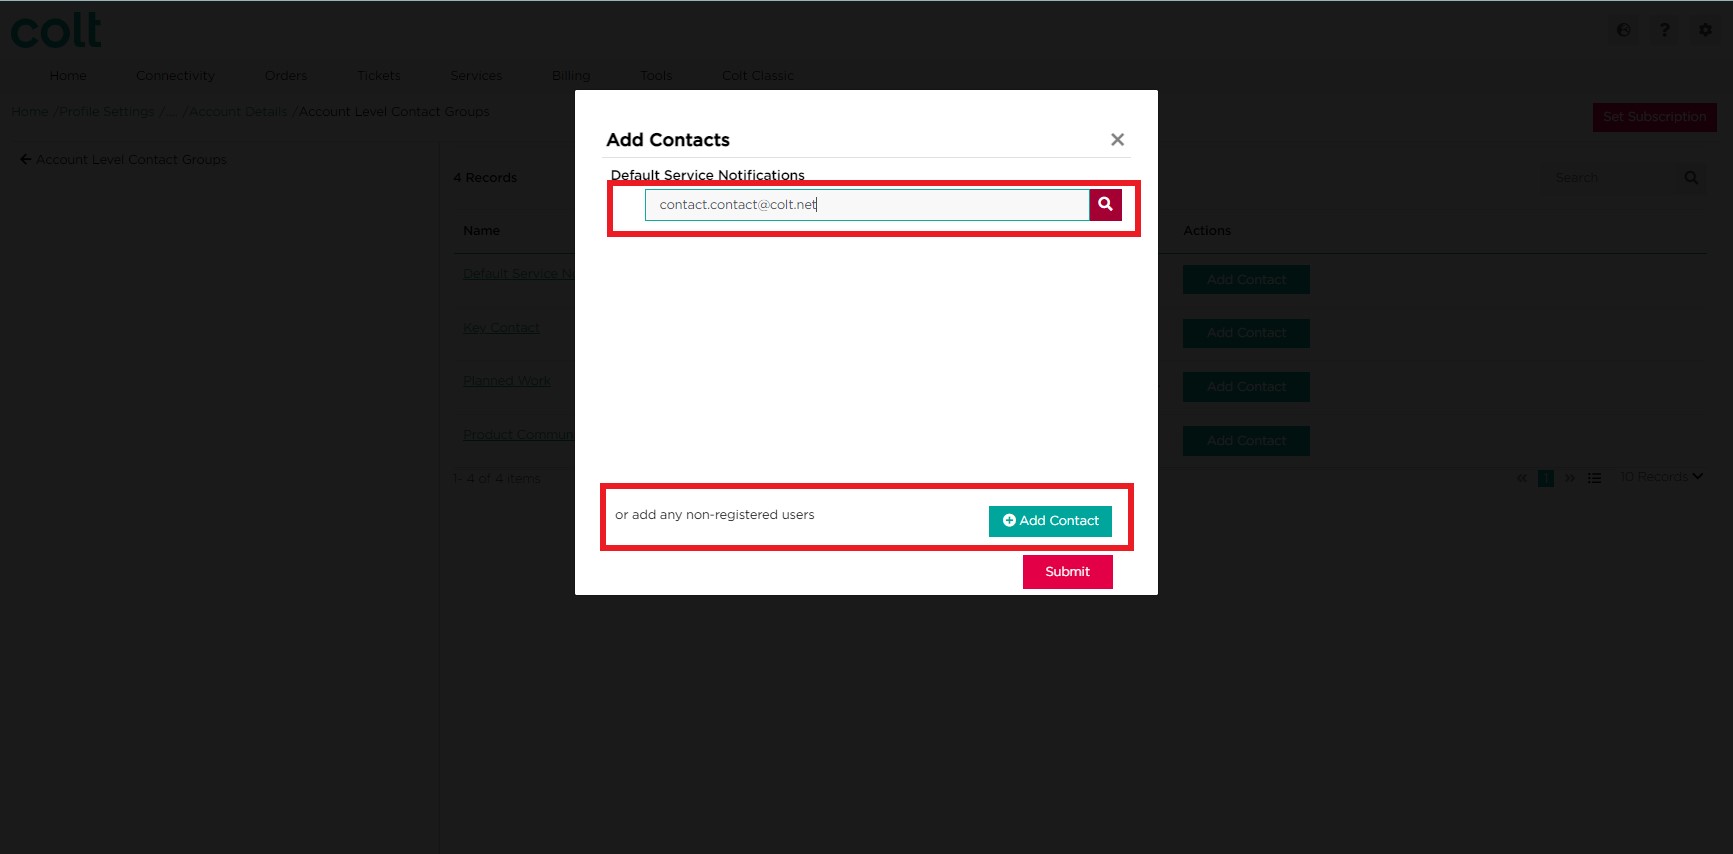
- A new pop up with appear. Try searching again using the same email address as before
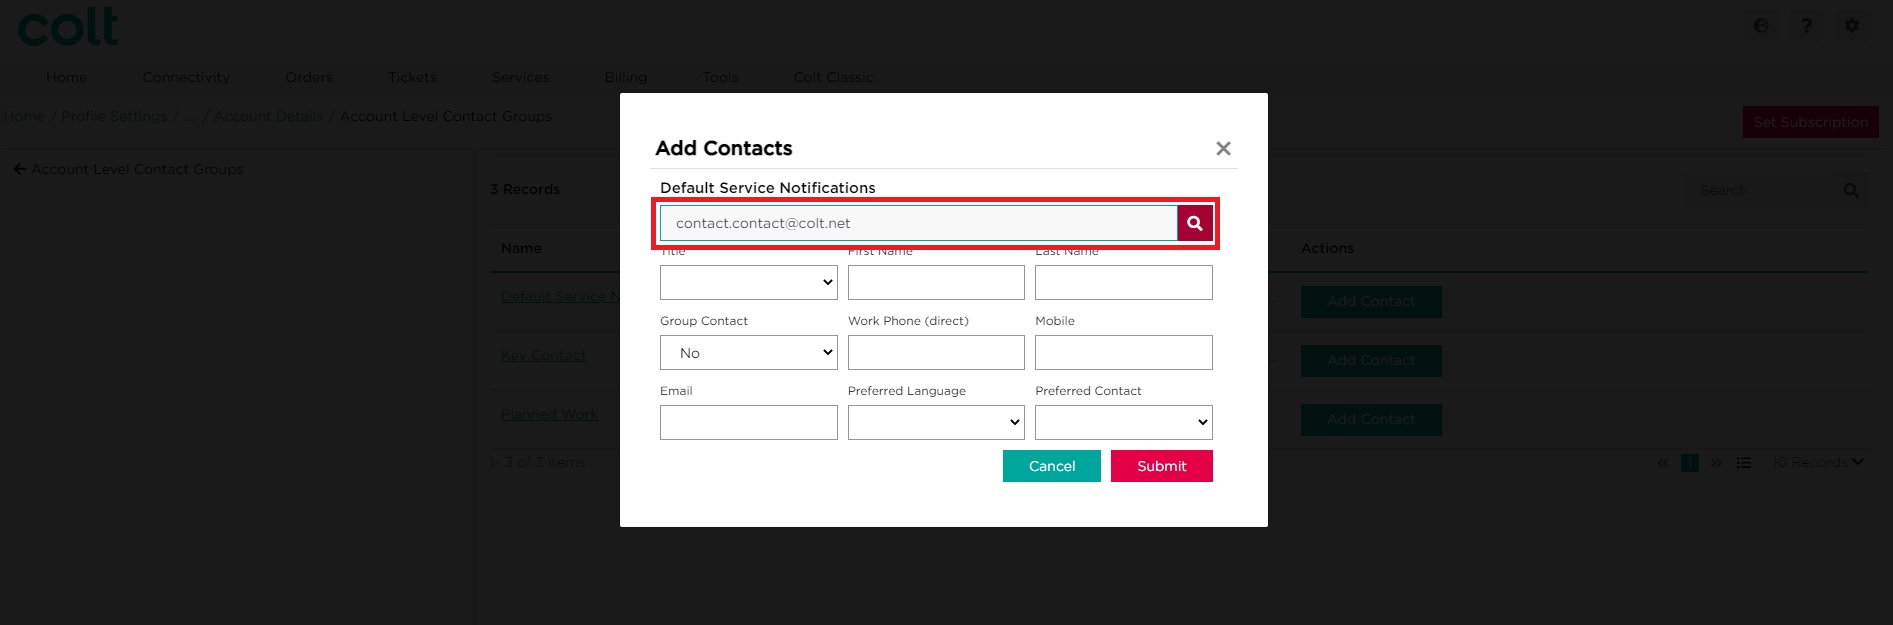
- If no results are returned, complete all the fields as required. Click on Submit
- The new contact will appear at the bottom of the list. If you are happy with this, click on Submit
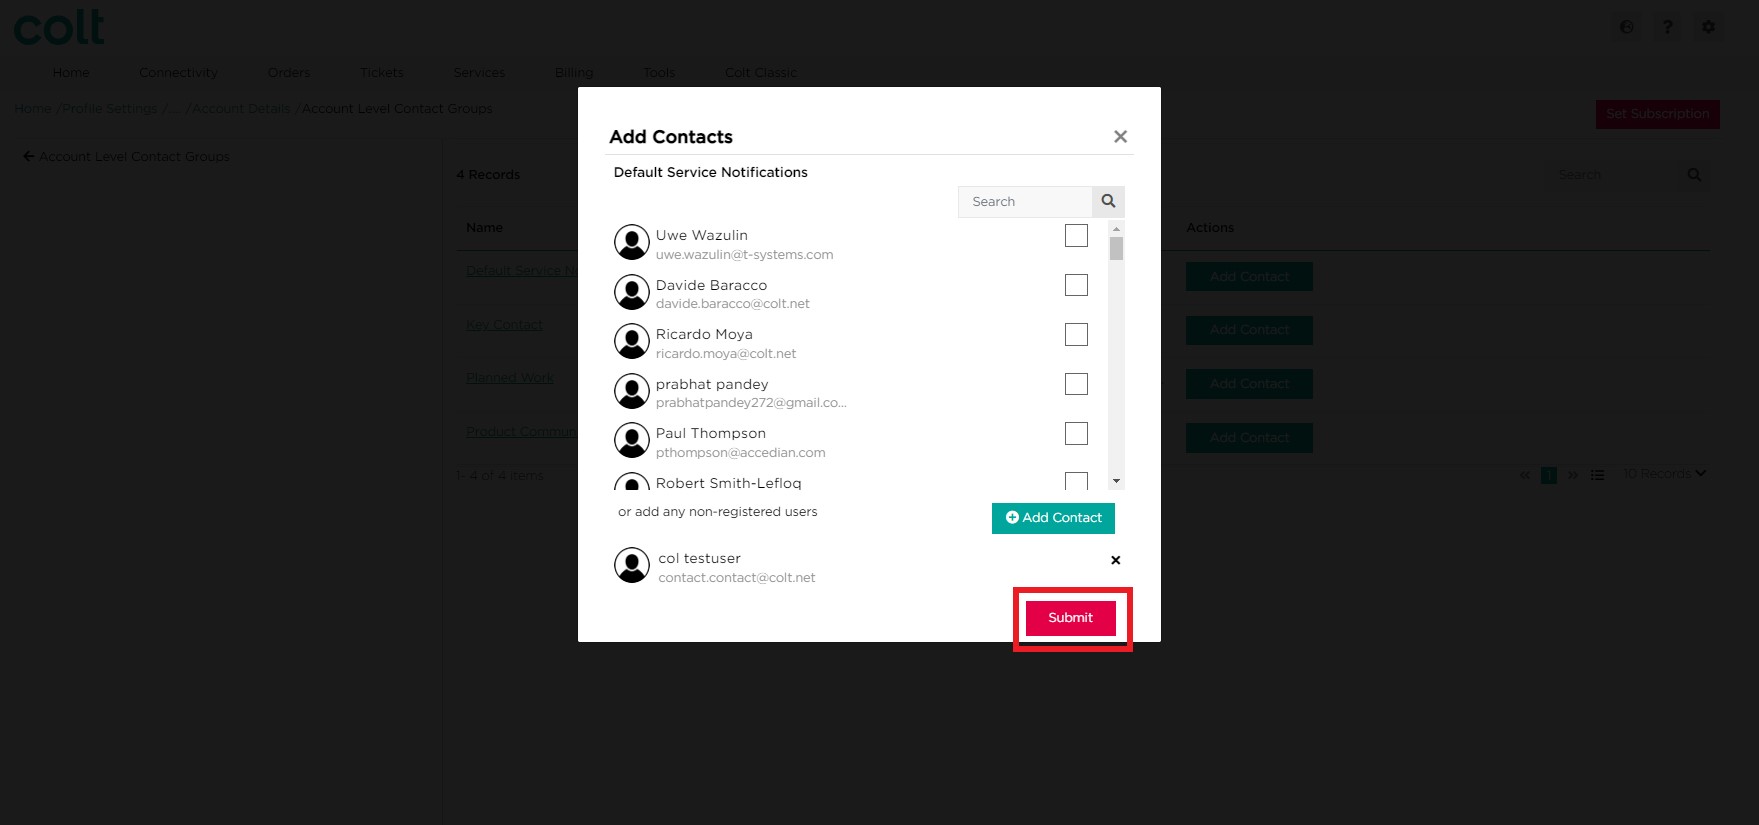
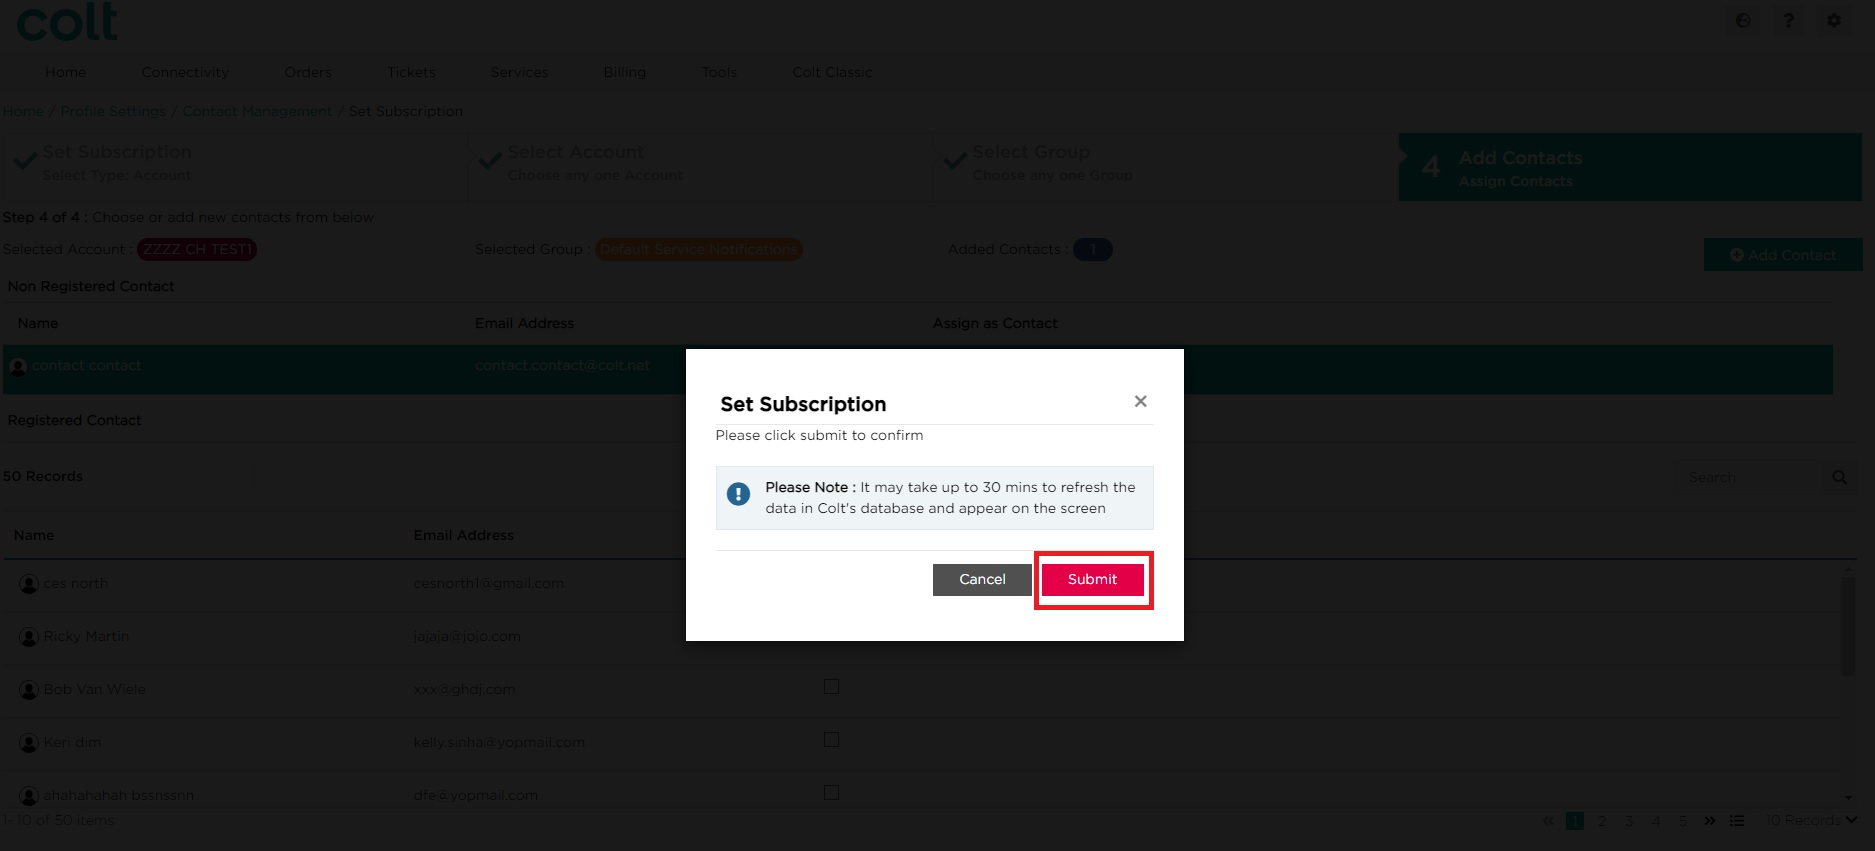
- Click on Submit to confirm your changes. Alternatively, click on Cancel
Approach 2 – via the Set Subscription Journey; Add New Contact
To Add new contacts via the Set Subscription journey, follow the below steps.
- At the “Add Contacts” step of the journey, if the required contact is not available in the list, click on Add Contacts
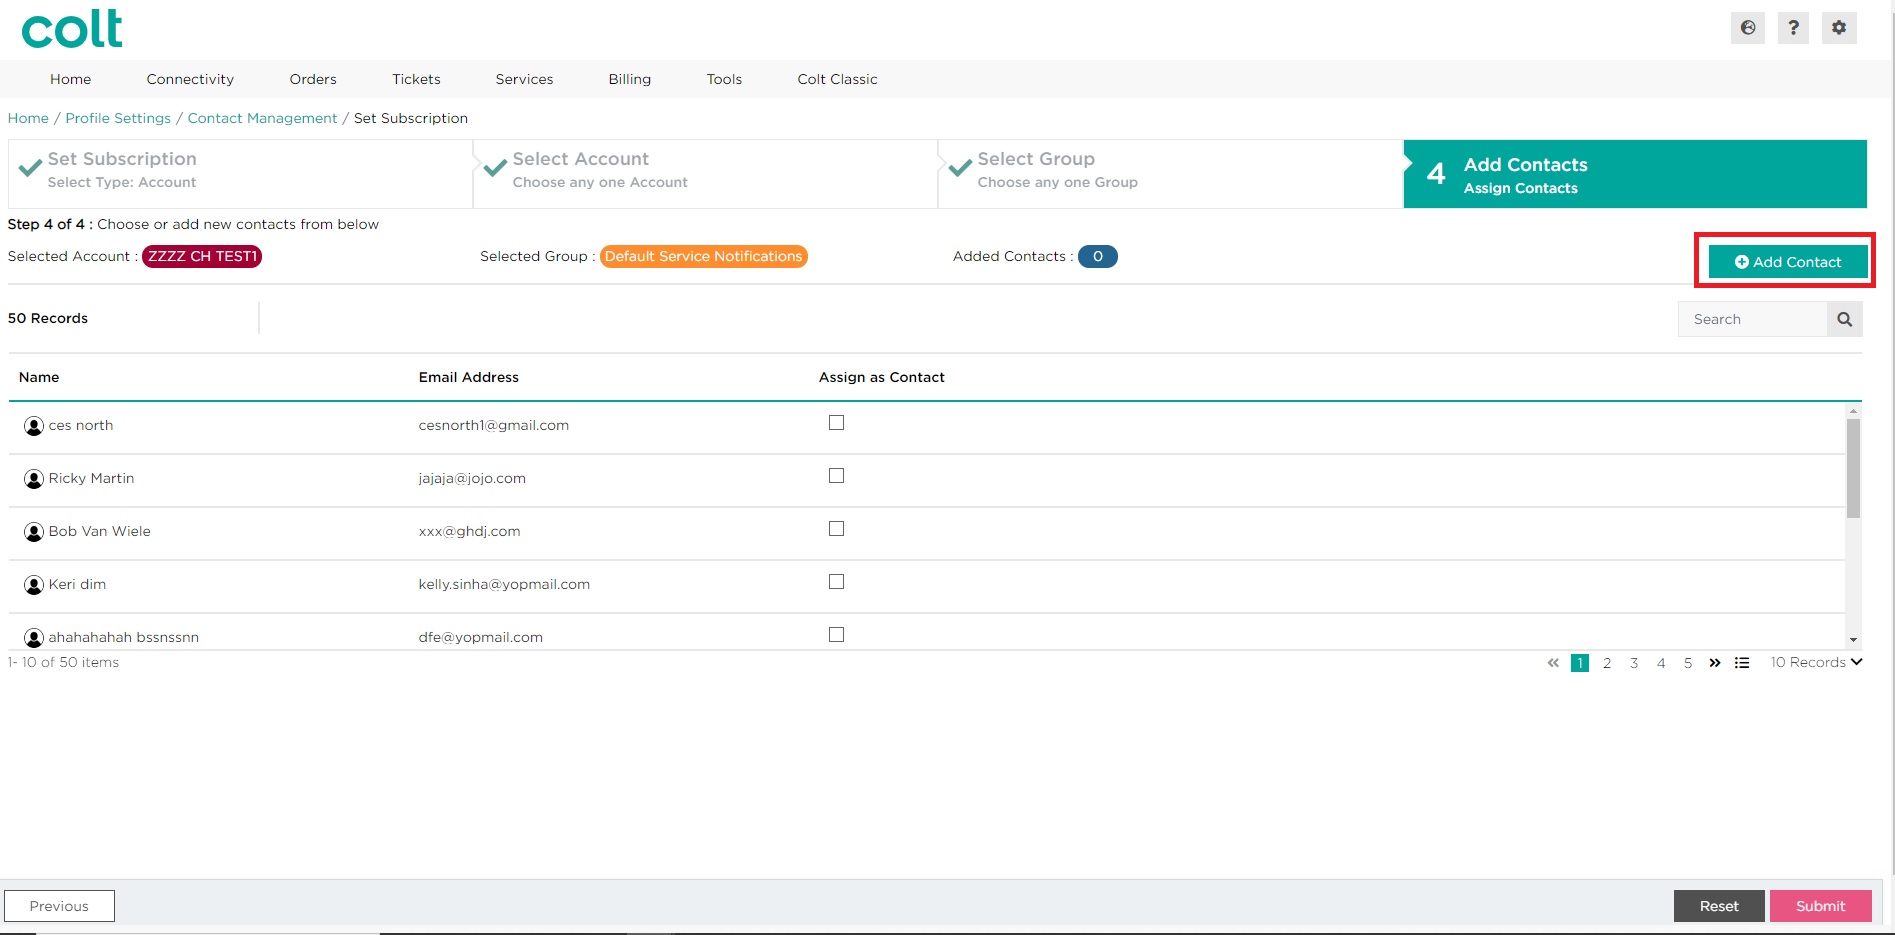
- A pop up window will appear. Try searching again using the same email address as before
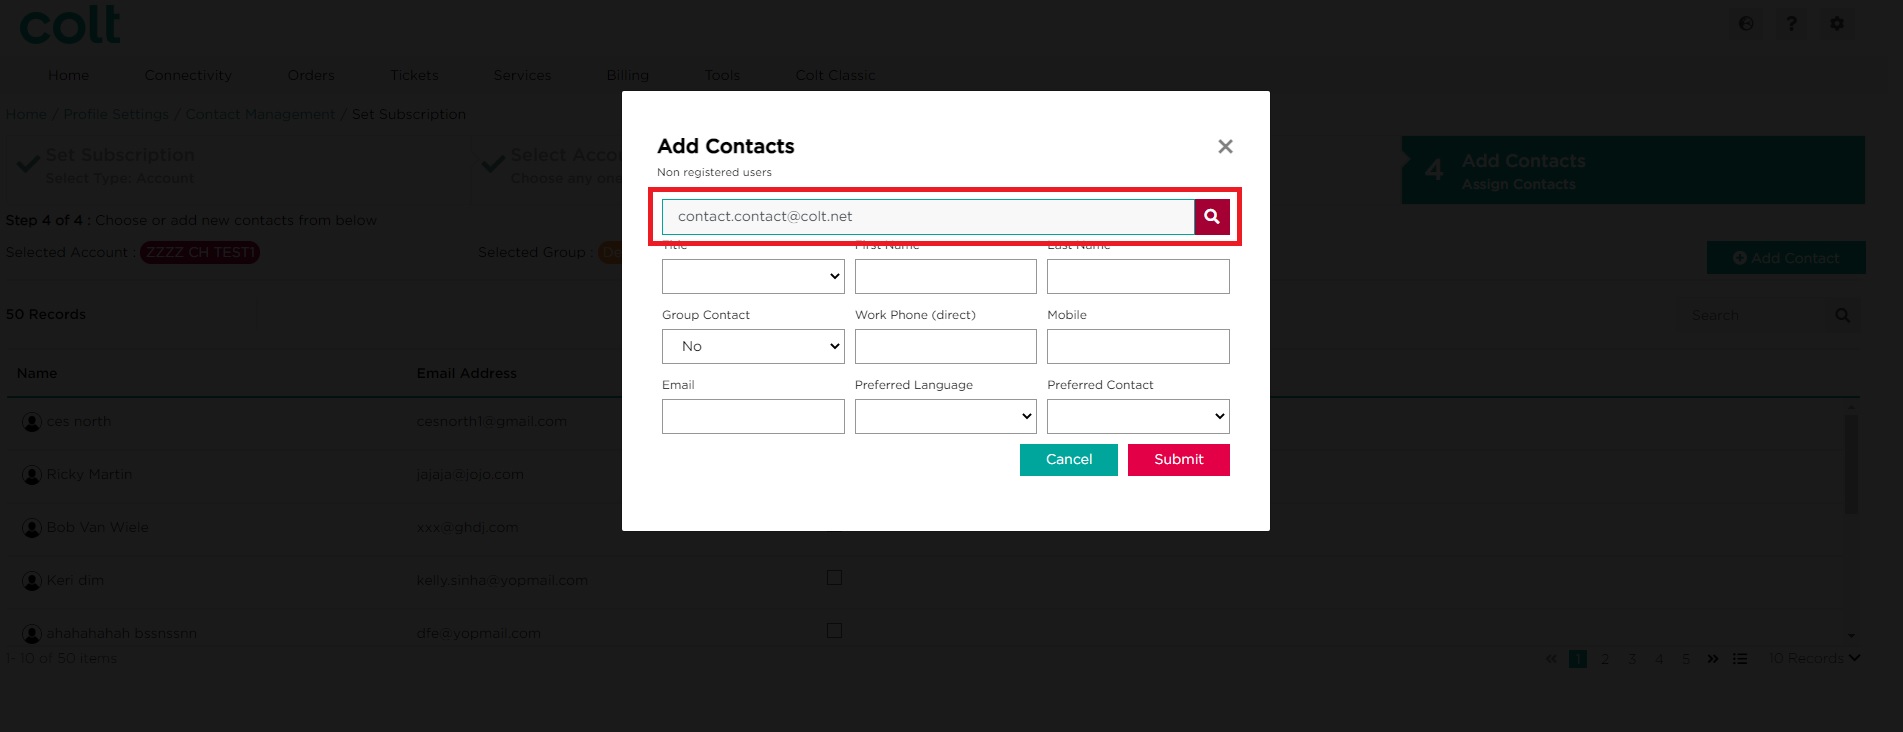
- If no results are returned, complete all the fields as required. Click on Submit
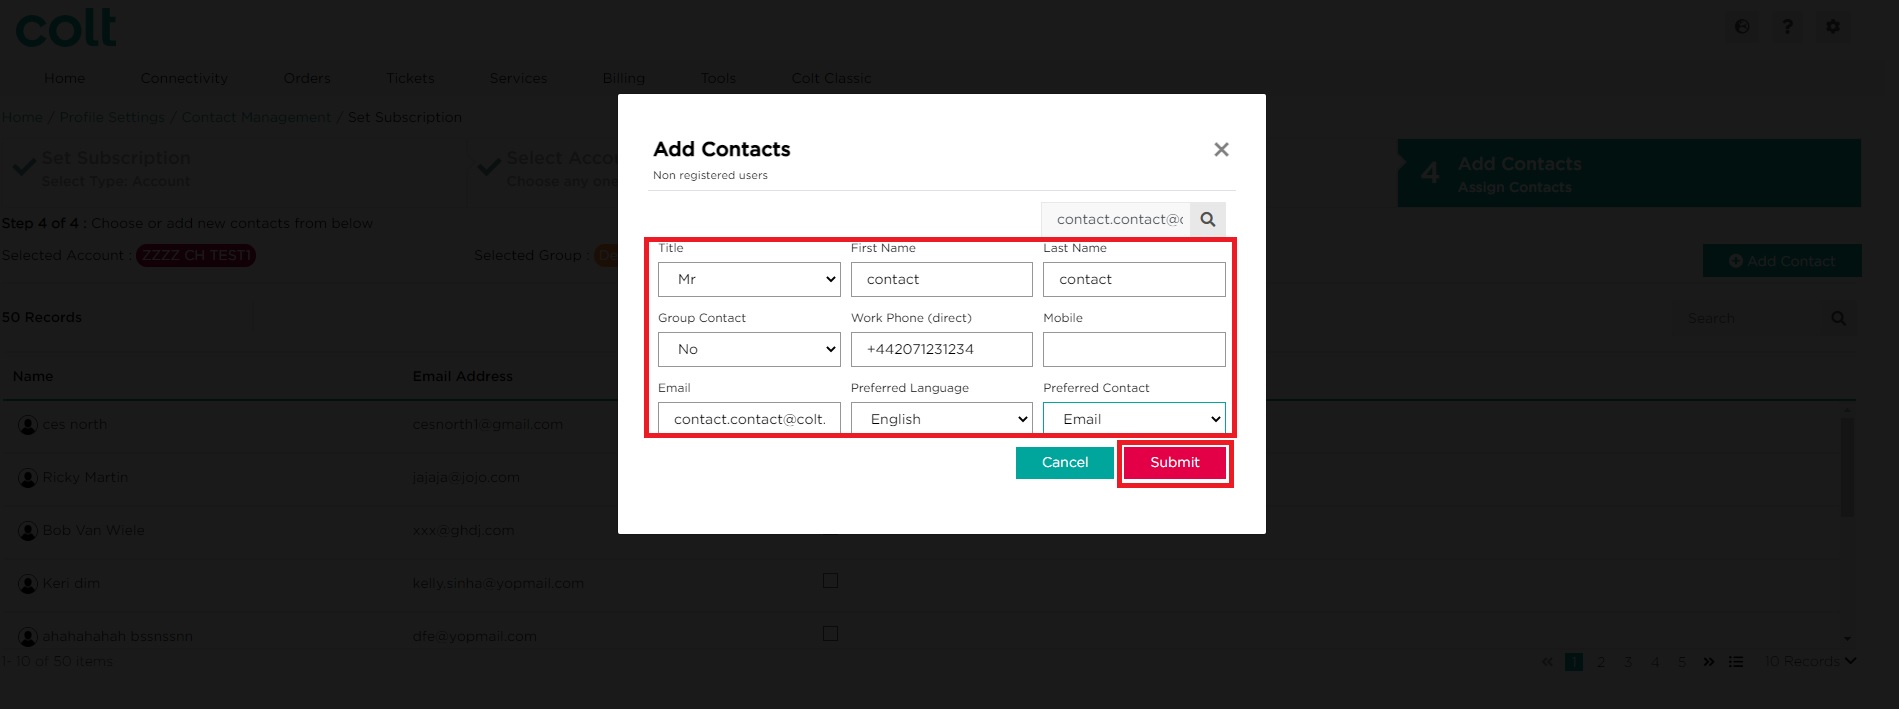
- The new contact will appear at the bottom of the list. To add another new contact, repeat step 3. When you are happy to proceed, click on Submit
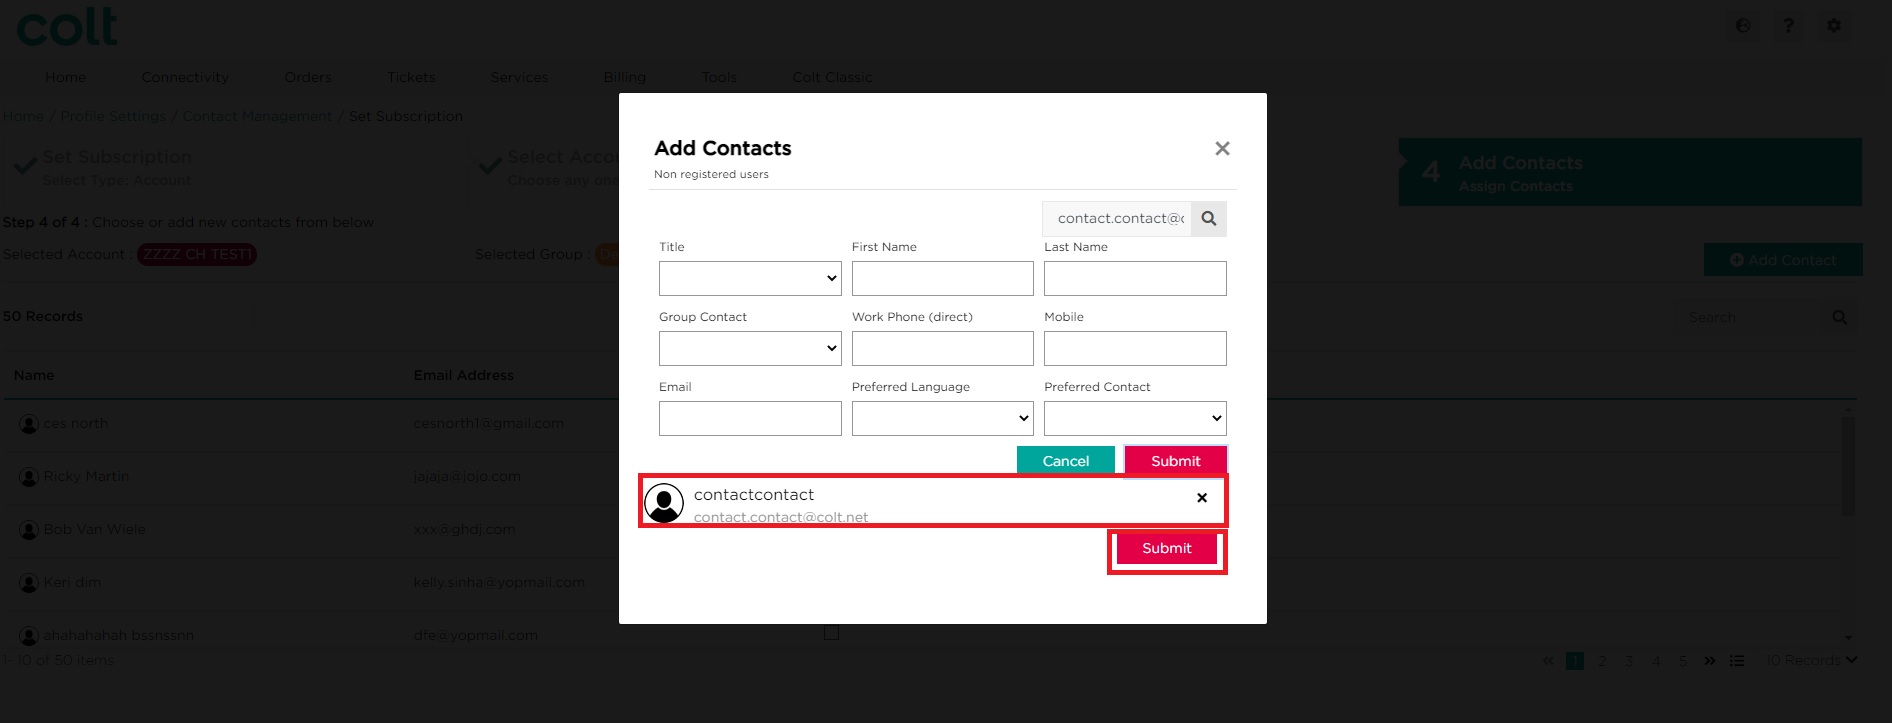
- New contacts will appear at the top of the list. When you are happy to proceed, click on Submit.
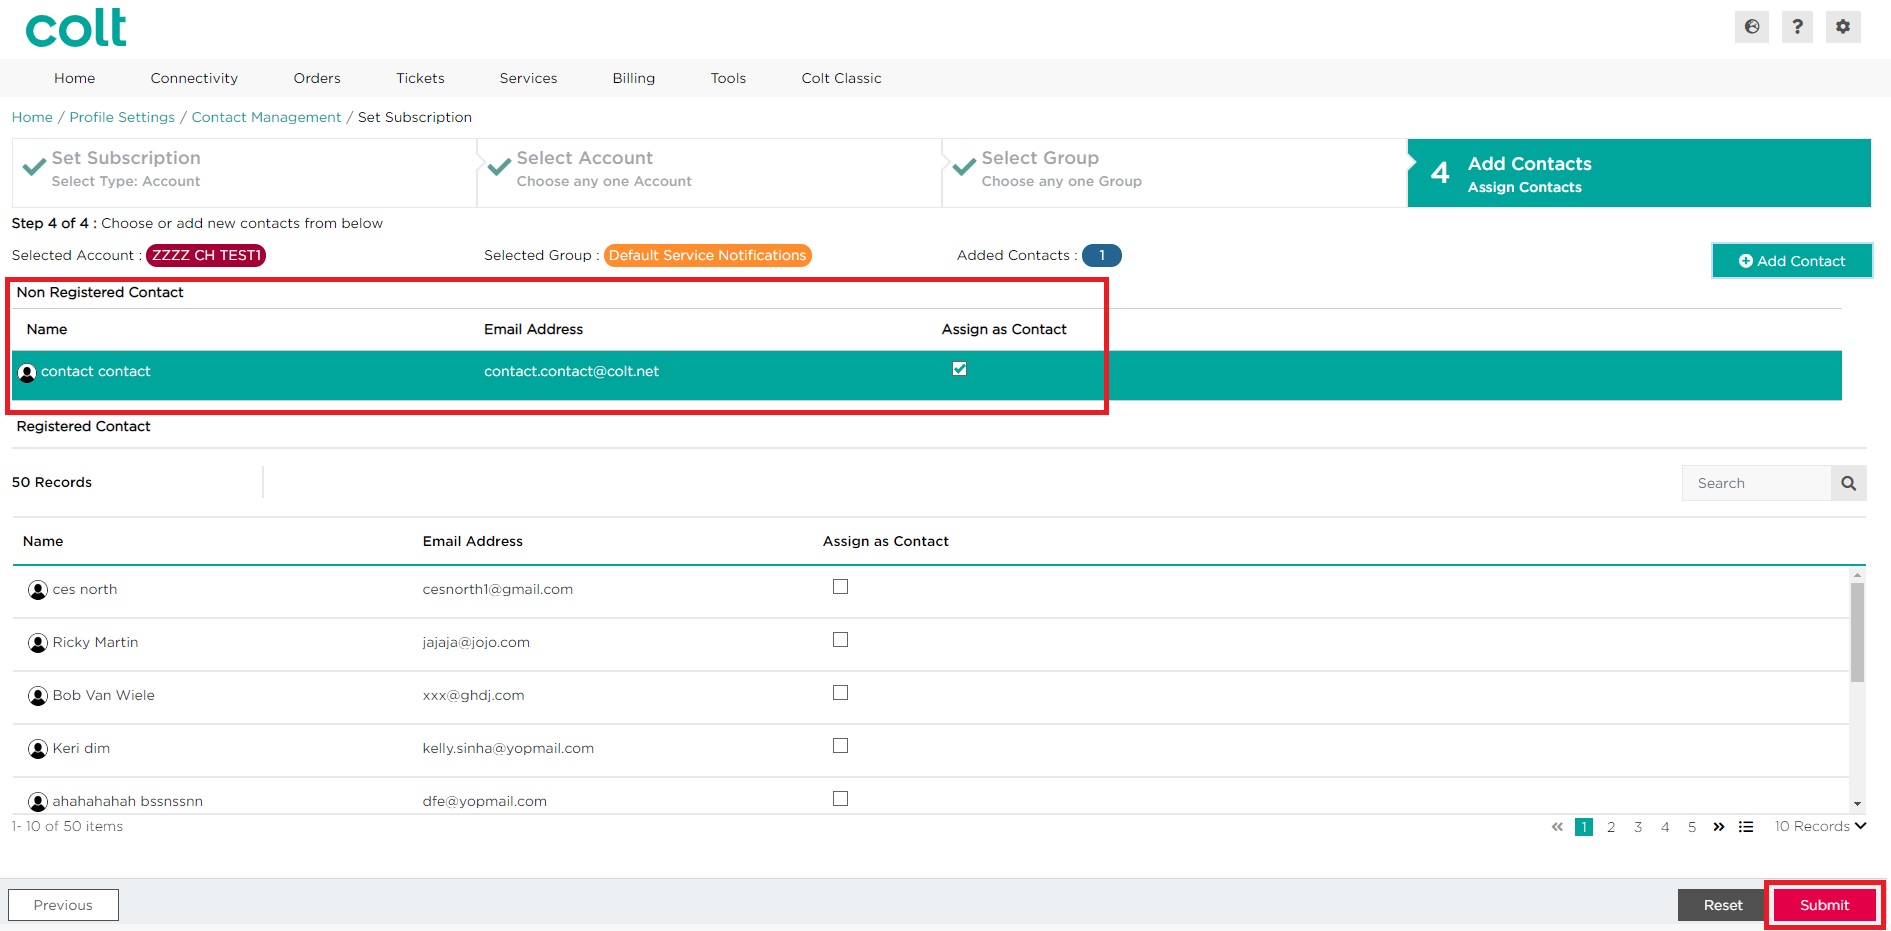
- Click on Submit to confirm your changes. Alternatively, click on Cancel
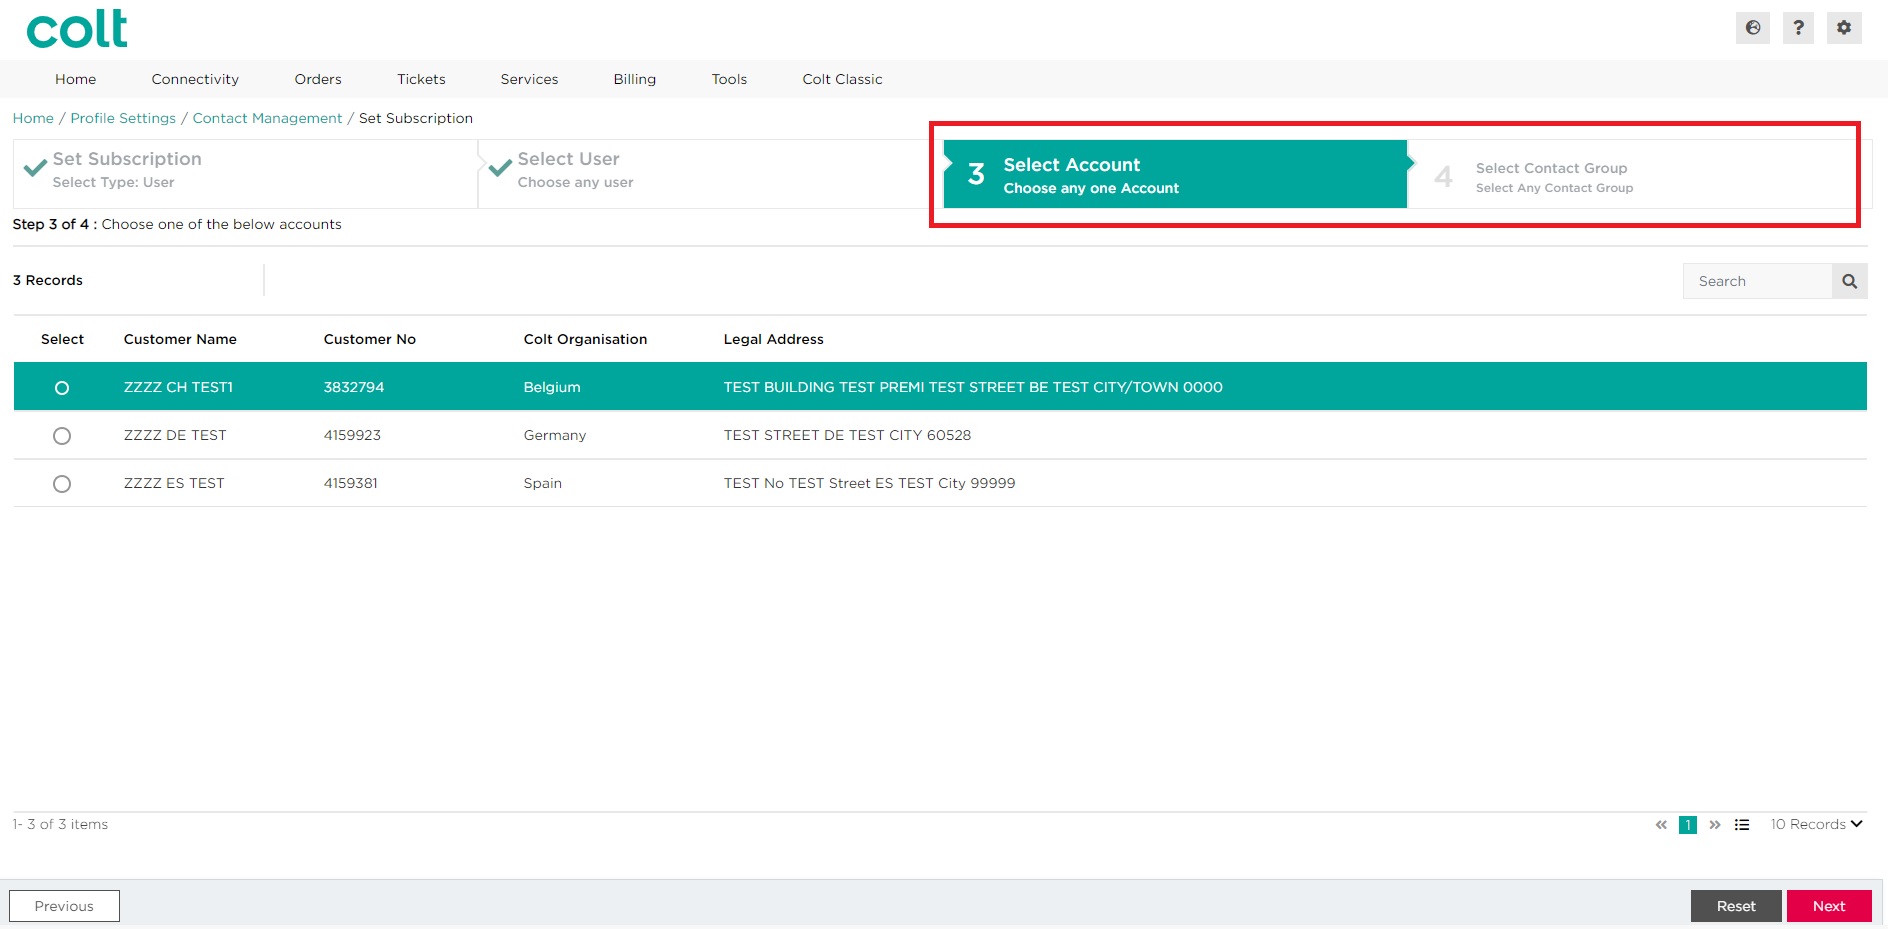
Approach 3 – via the dedicated Set Subscription (By User) Journey
To Add new contacts via the dedicated Set Subscription (By User) journey, follow the below steps.
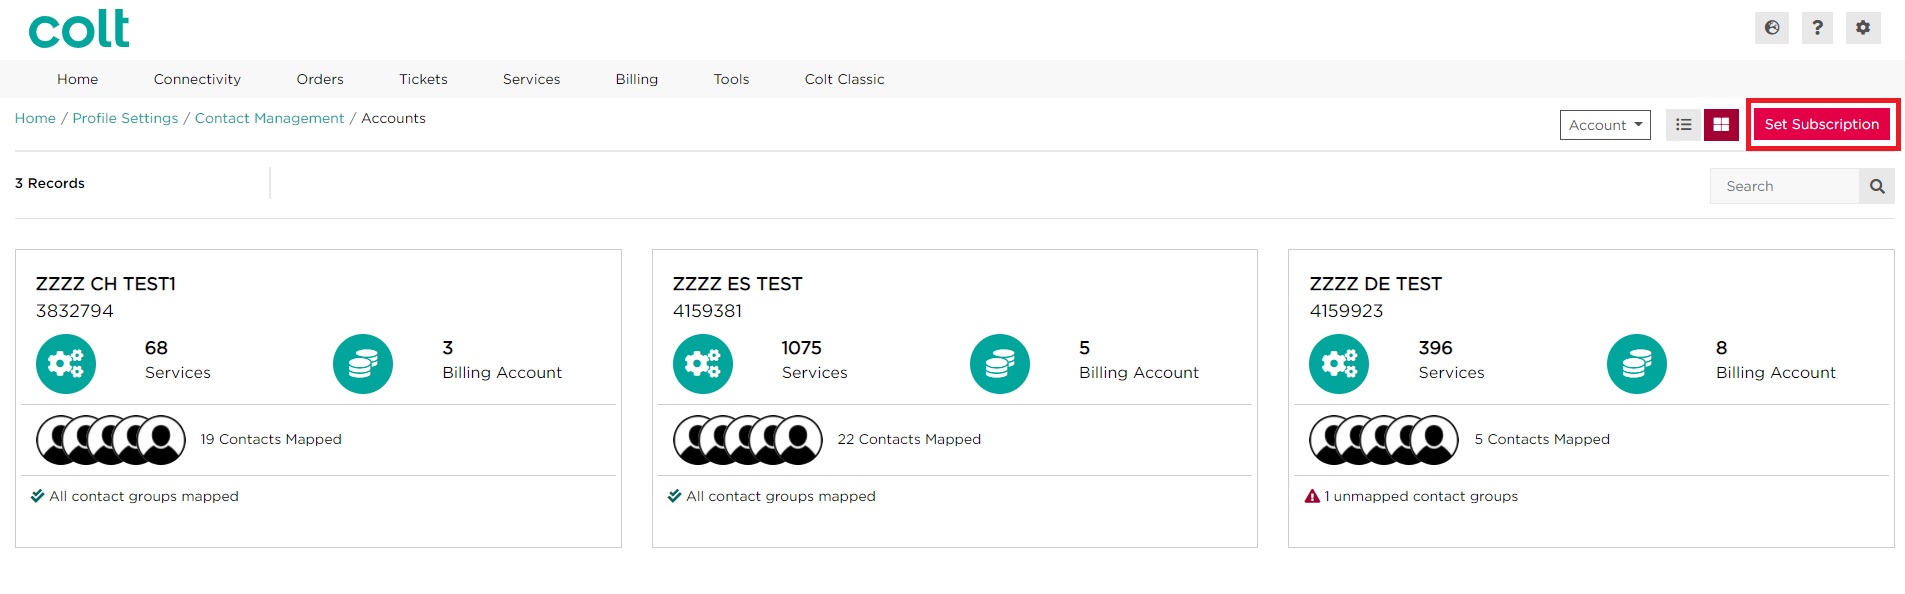
- Click on Set Subscription
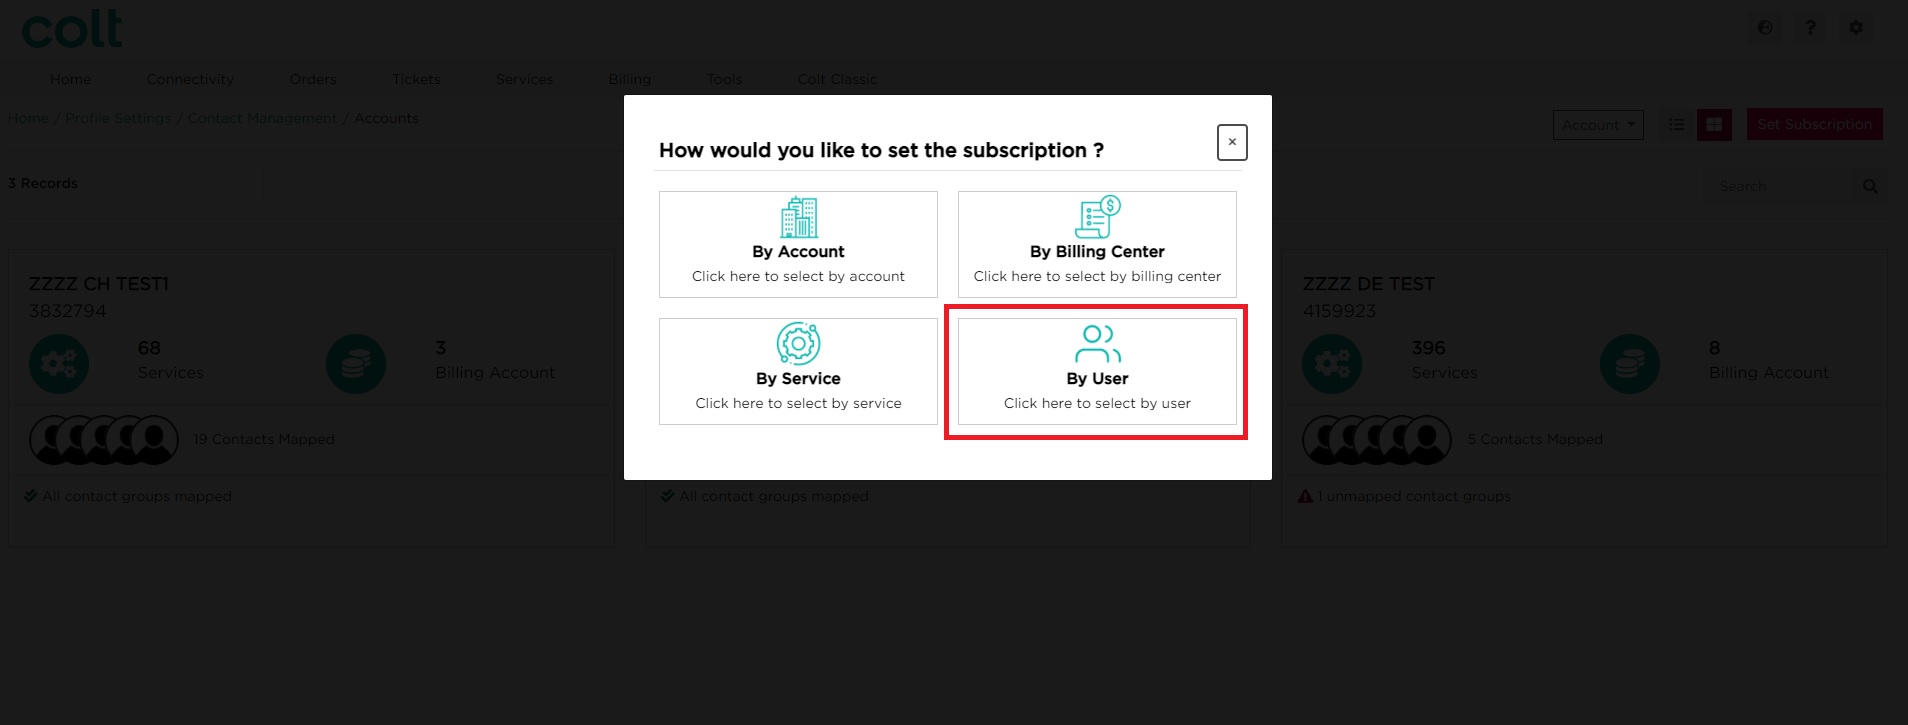
- Select By User
- Use the search bar to look for the contact using the email address.
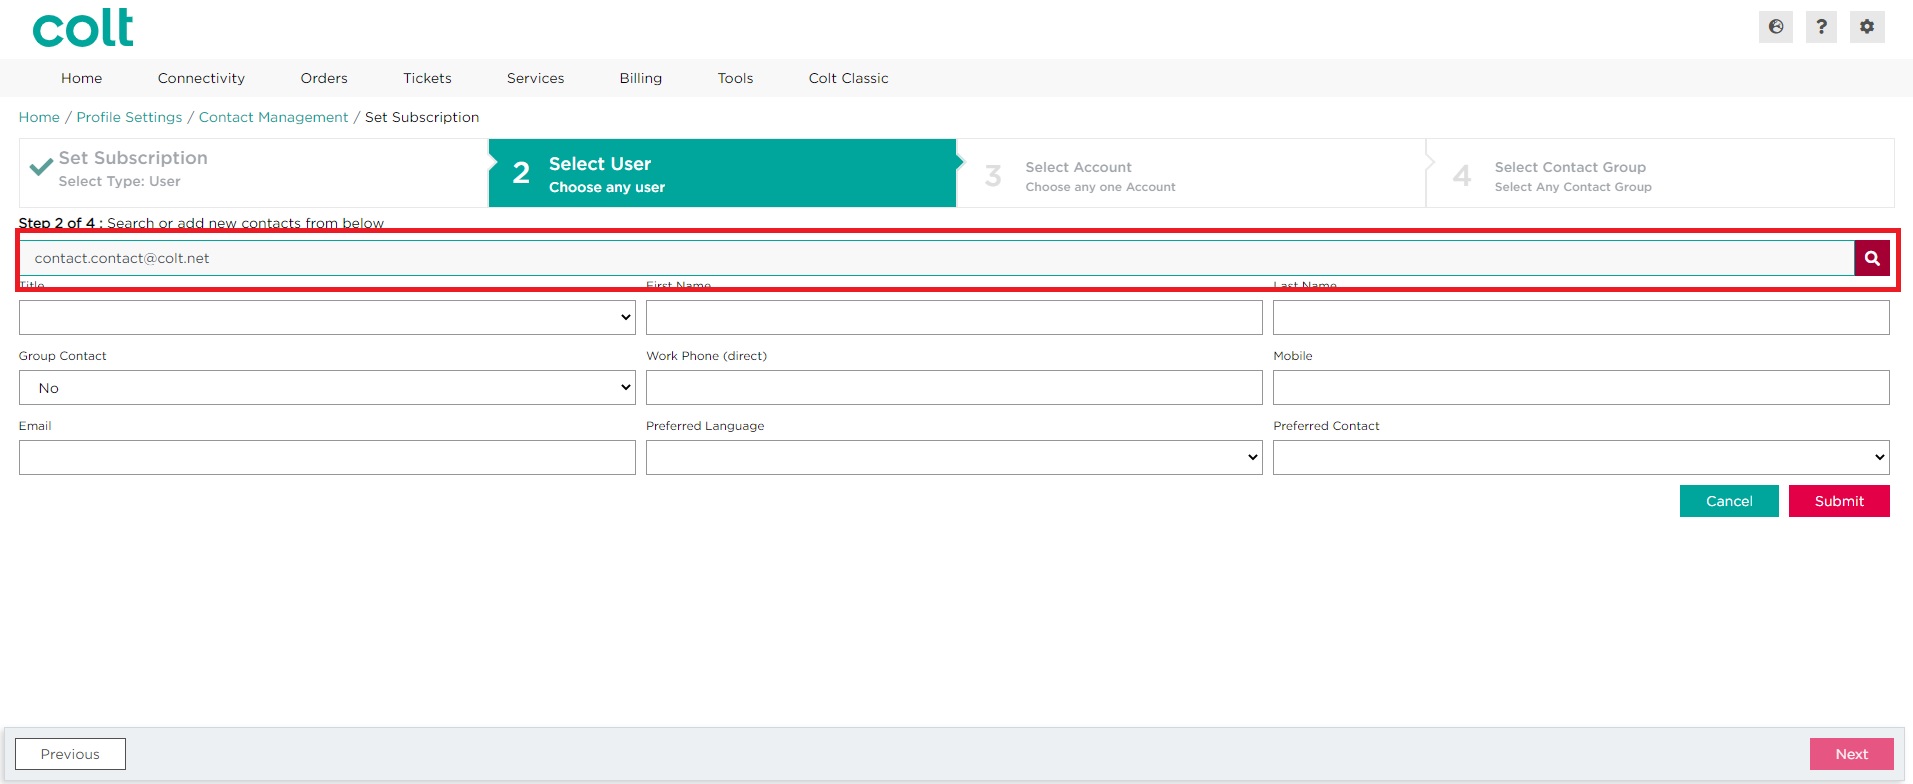
- If no results are returned, complete all the fields as required
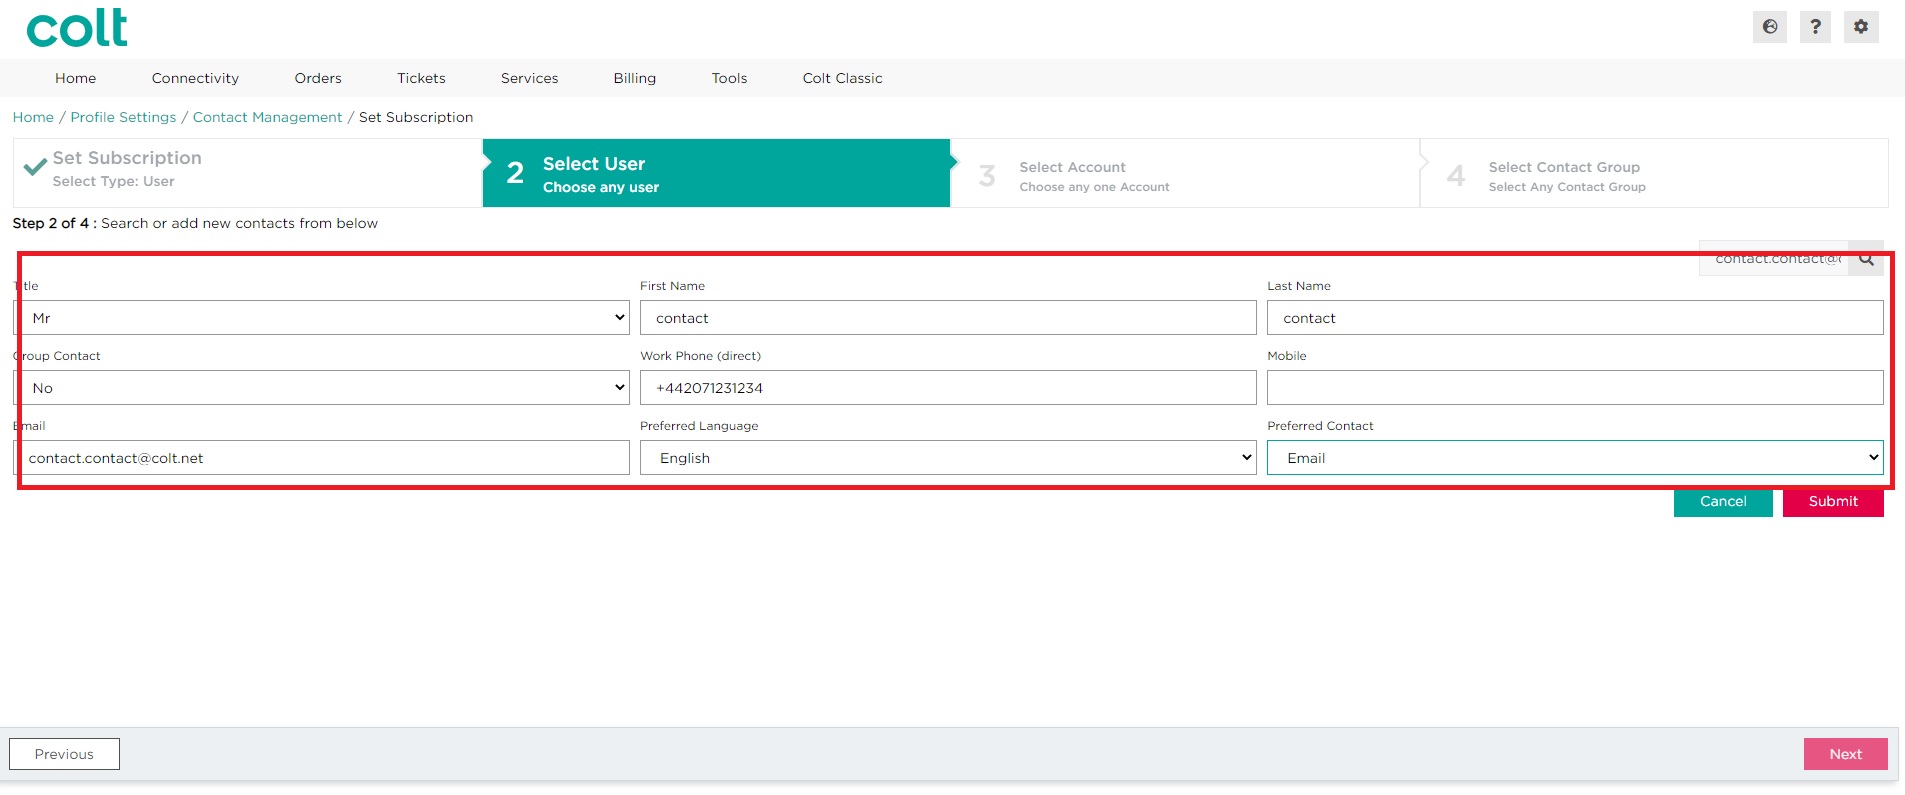
- Click on Submit. The new contact will appear at the bottom of the screen. Click on Next
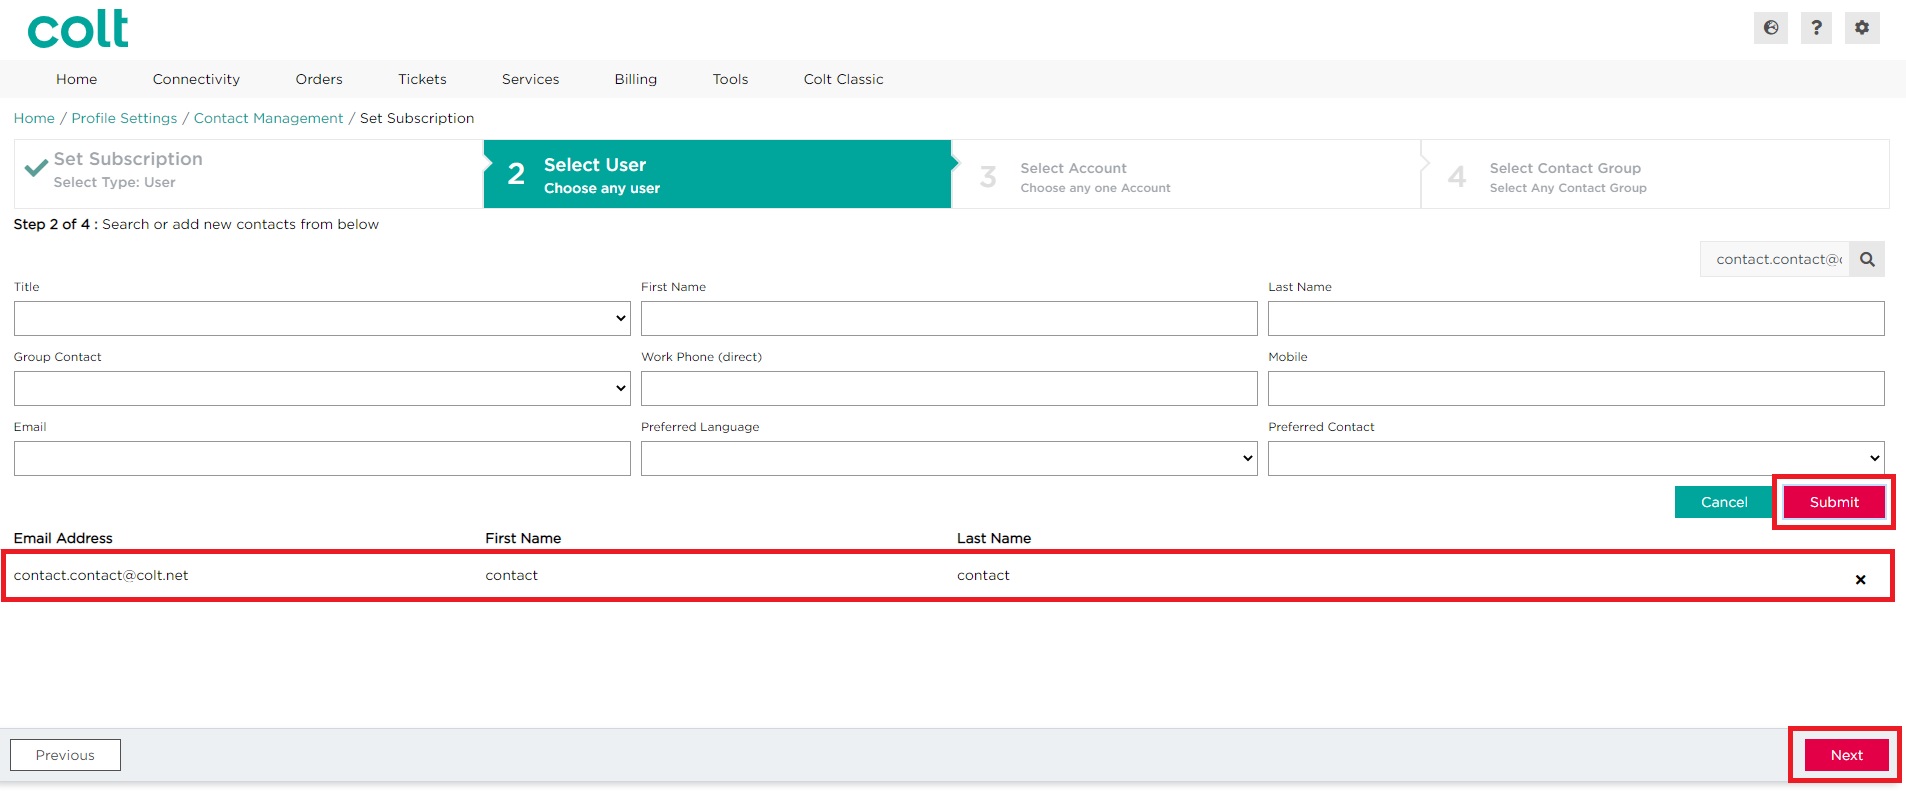
- Continue with the rest of the journey, which will allow you to select a Customer Number (OCN Account), then an Account Level subscription