How can I edit the notifications/subscriptions other people in my organisation receives from colt?
- How to update your profile settings?
- How to enable Single Sign On for Colt Online?
- What options are available in Colt Online?
- Which notifications/subscriptions are available in the contact management module?
- How do subscriptions and the contact management module in colt online work?
- How can I view the notifications/subscriptions that I am set up to receive from colt?
- What is Planned Works ?
- What is the Order Management Portal?
- CLI Presentation
- Colt Versa SD WAN & SASE – External Service Guide
- Getlink LDN Access Procedure
- Dedicated Cloud Access External Service Guide
- Colt Operator Connect Management Portal for Partners
- Assign a role to an existing user
- Remove the role of a user
- Modify the account group of the user
- Create a new users and assign the IPG role
- Ethernet VPN- External Service Guide
This feature is available to Admin users only
From time to time, it may be necessary to change which notifications are sent to teams/individuals across your organisation.
There are two approaches admin users can take to edit the subscriptions. The approaches will work when amending the subscriptions for any level (e.g. Account or service levels).
- Approach 1 – Editing notifications/subscriptions via the Account Level Contact Management pages
- Approach 2 – Adding notifications/subscriptions via the Set Subscription Journey
In the examples provided below, we will be using the Account Level subscriptions; Default Service Notifications, which will mean editing who within the organisation will receive notifications for any proactive tickets on their service within the selected Customer Number
Approach 1 – Editing notifications/subscriptions via the Account Level Contact Management pages
Using this approach, an admin user can add and removed contacts within a contact group.
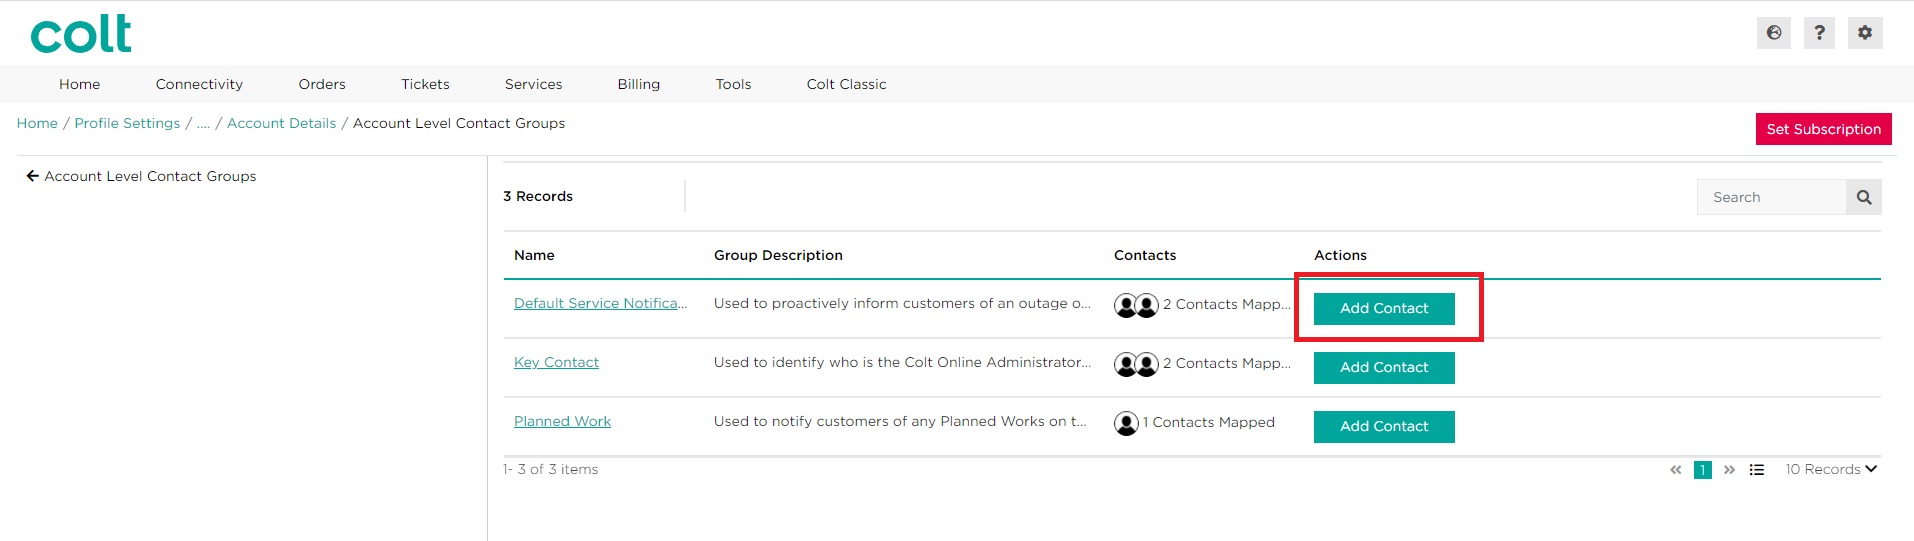
- Select the Customer Number of the subscriptions that you wish to edit. Please refer to the section here for details on how to navigate to the Account Level Contact Management pages. The initial view will provide a summary of how many contacts are already subscribed
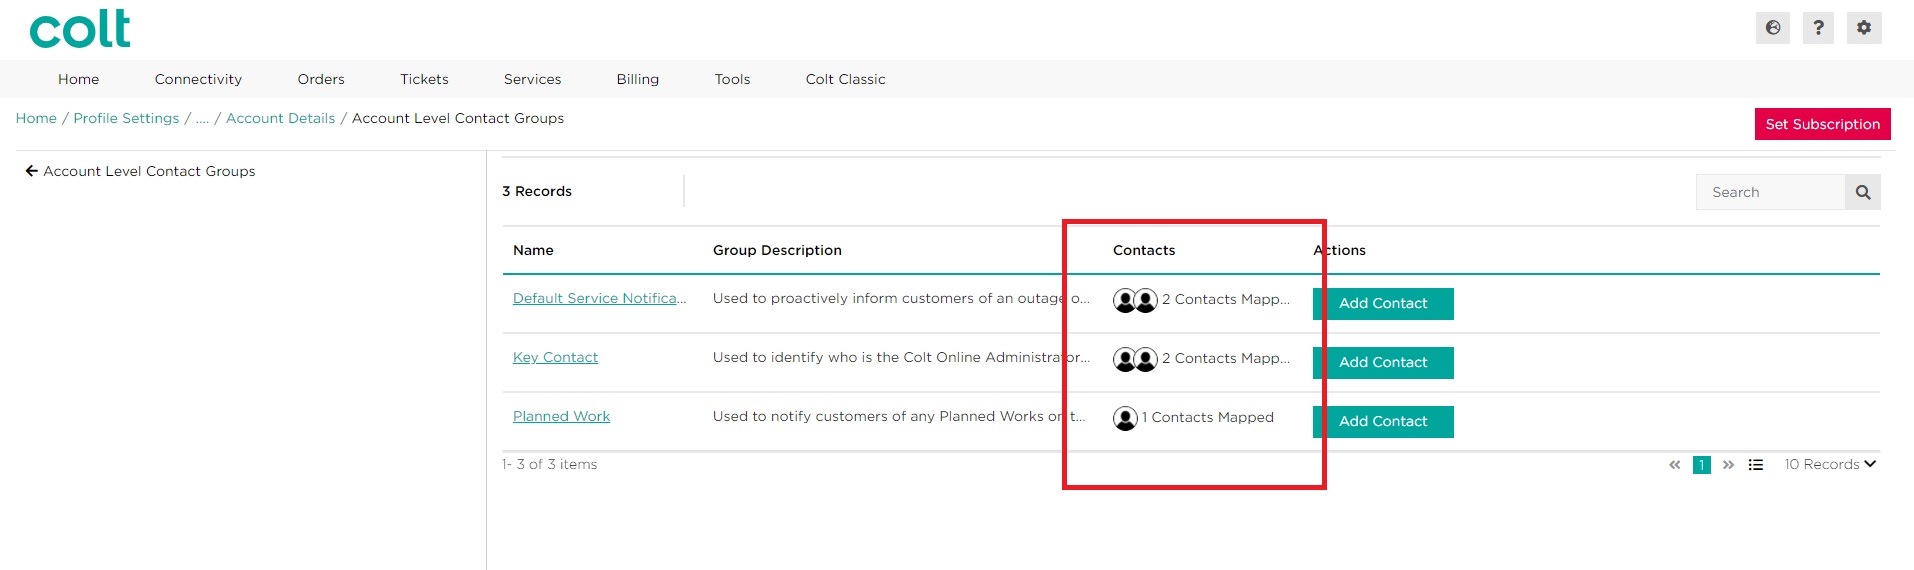
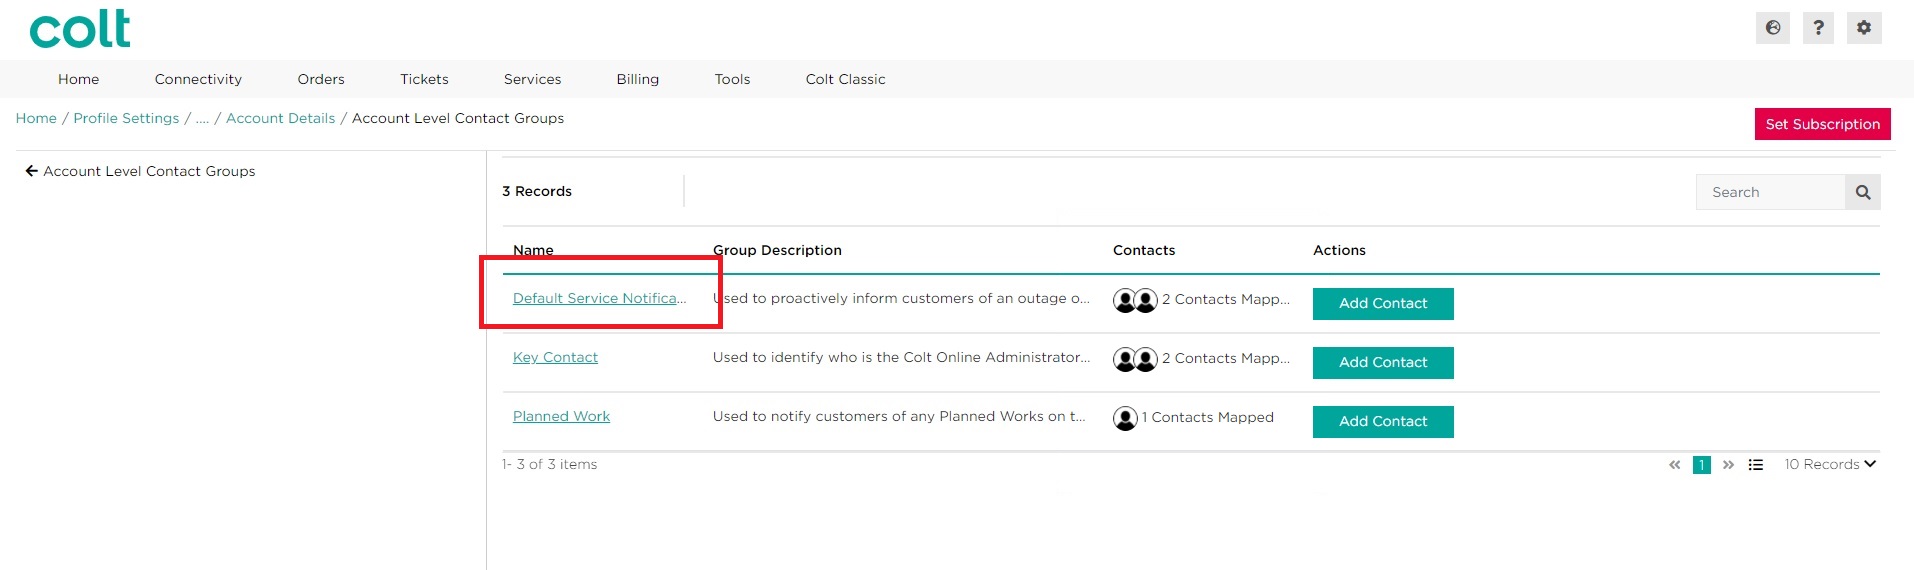
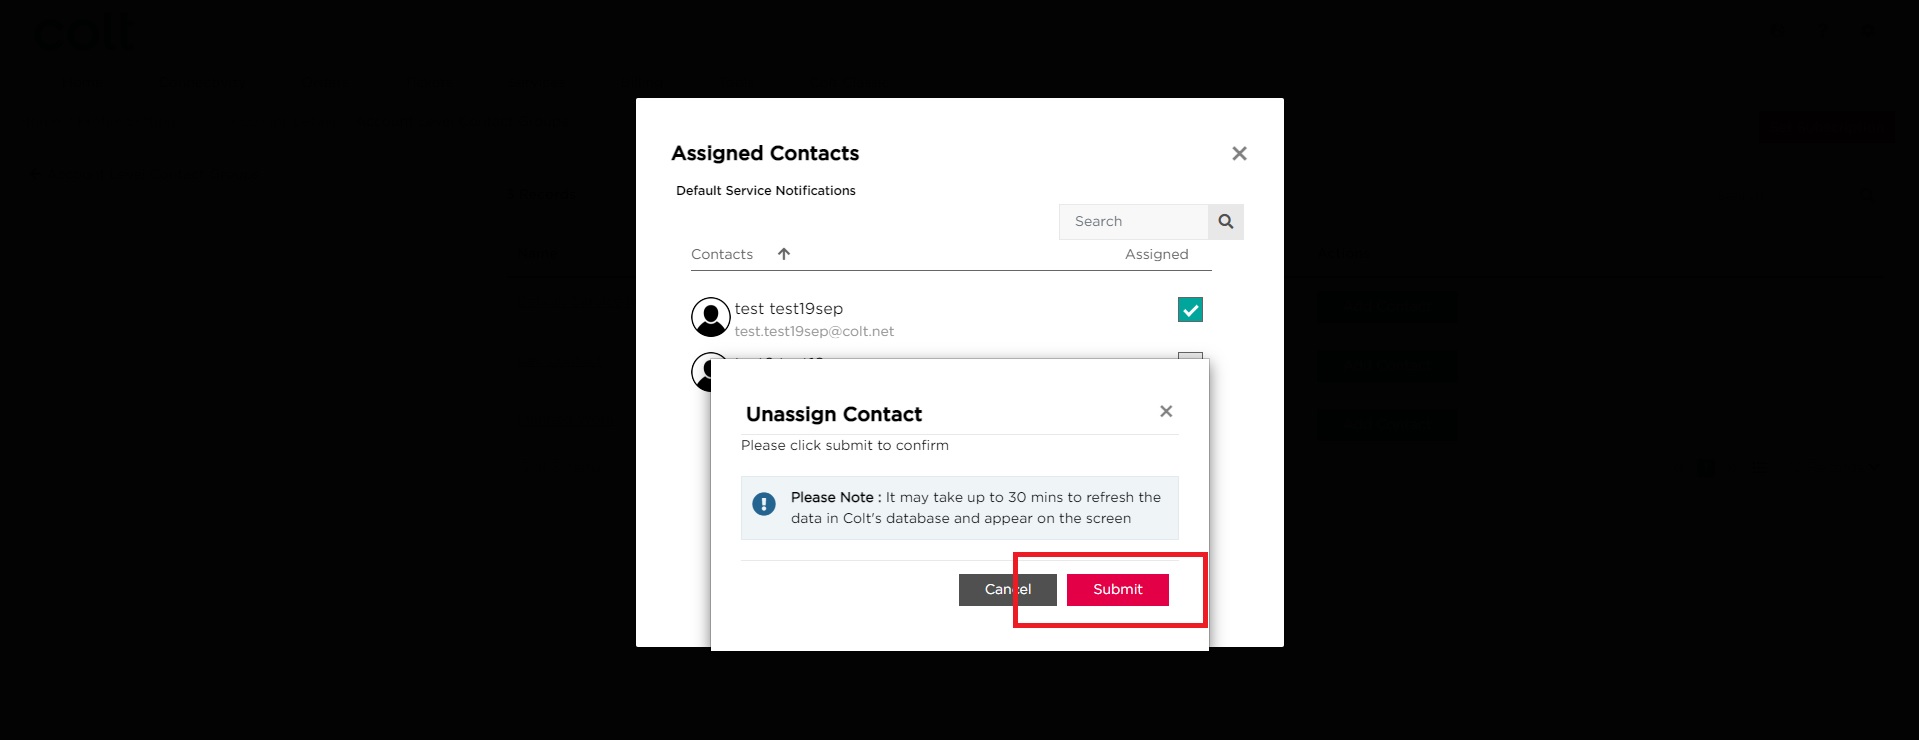
- Clicking on the Subscription name will display the list of contacts who are already set up to receive these notifications.
- To stop sending notifications to one of these contacts, unselecting the tickbox from the required contact and click on Submit. Alternatively, click on Cancel to return to the previous page.
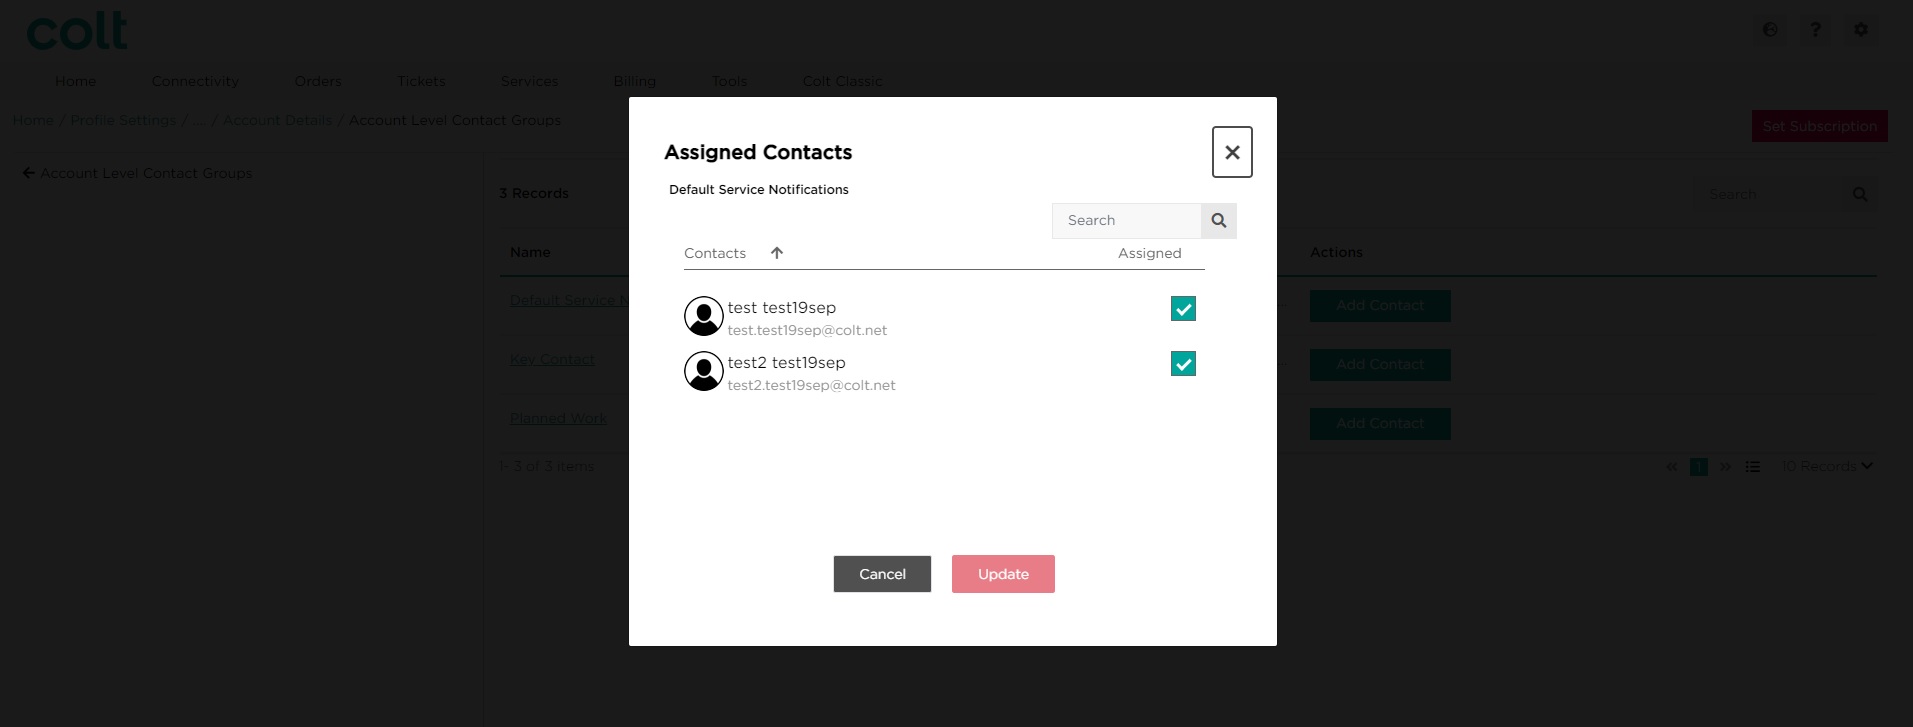
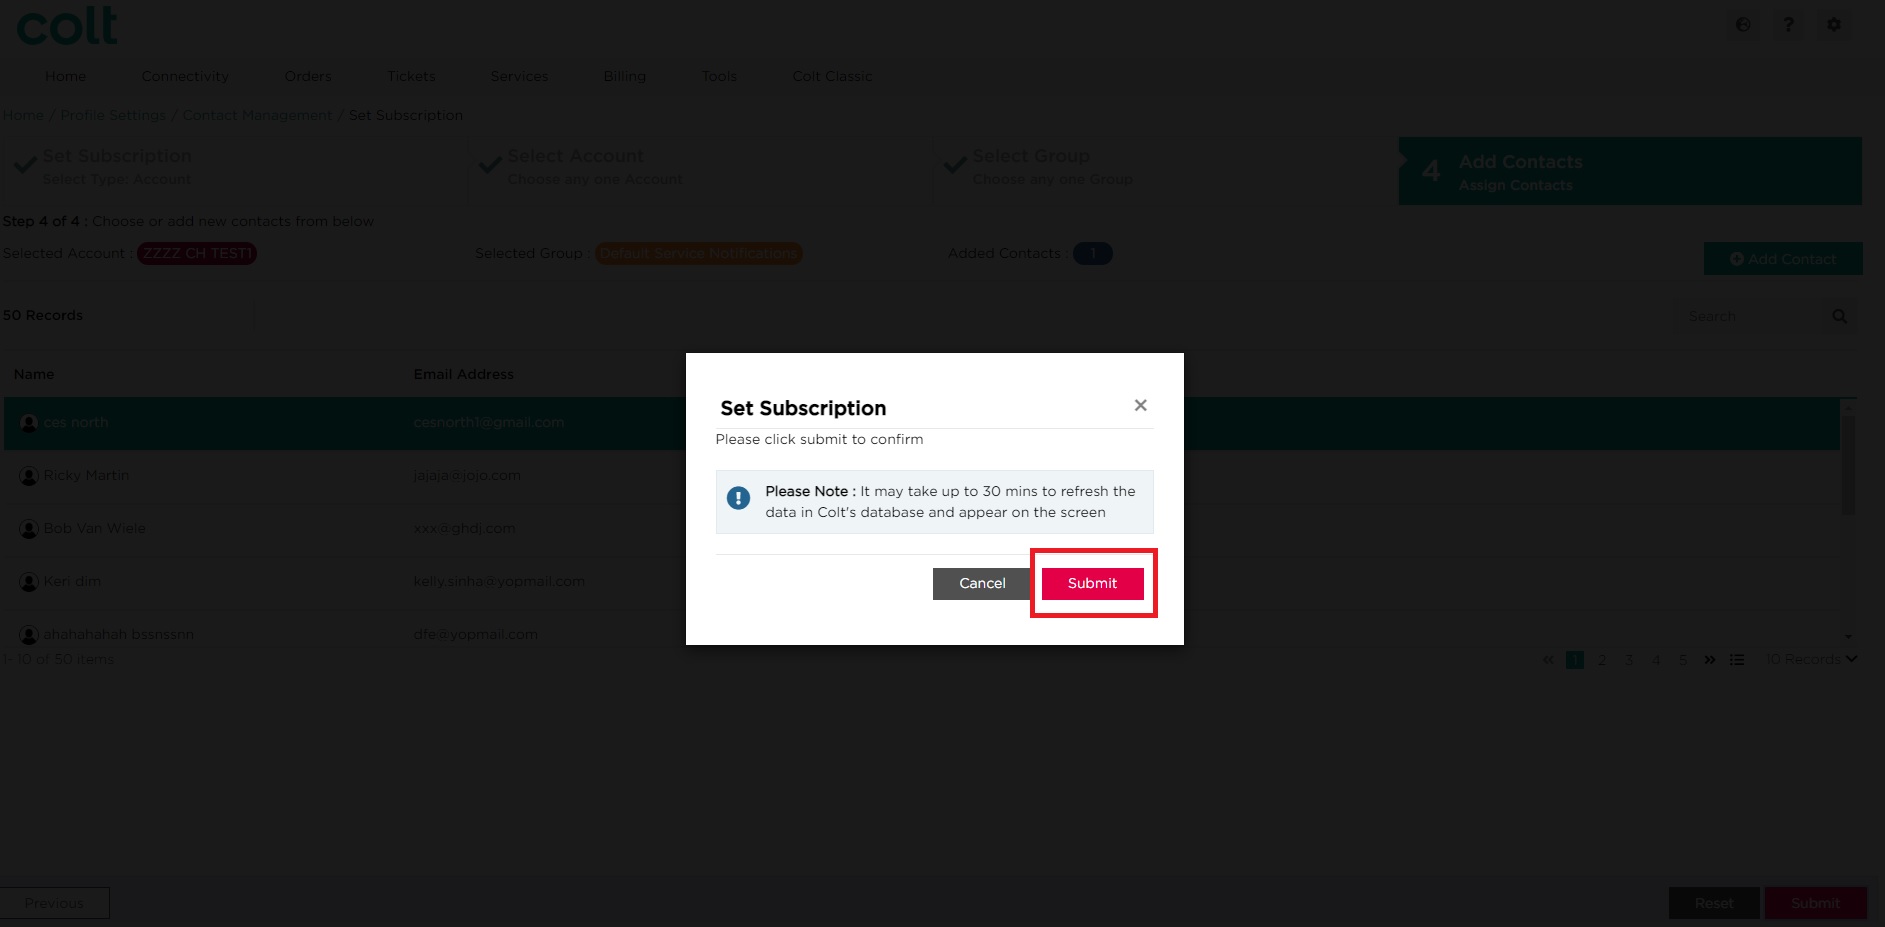
- Click on Submit to confirm your changes. Alternatively, click on Cancel.
- In order to Add a different contact to this subscription, click on Add Contact
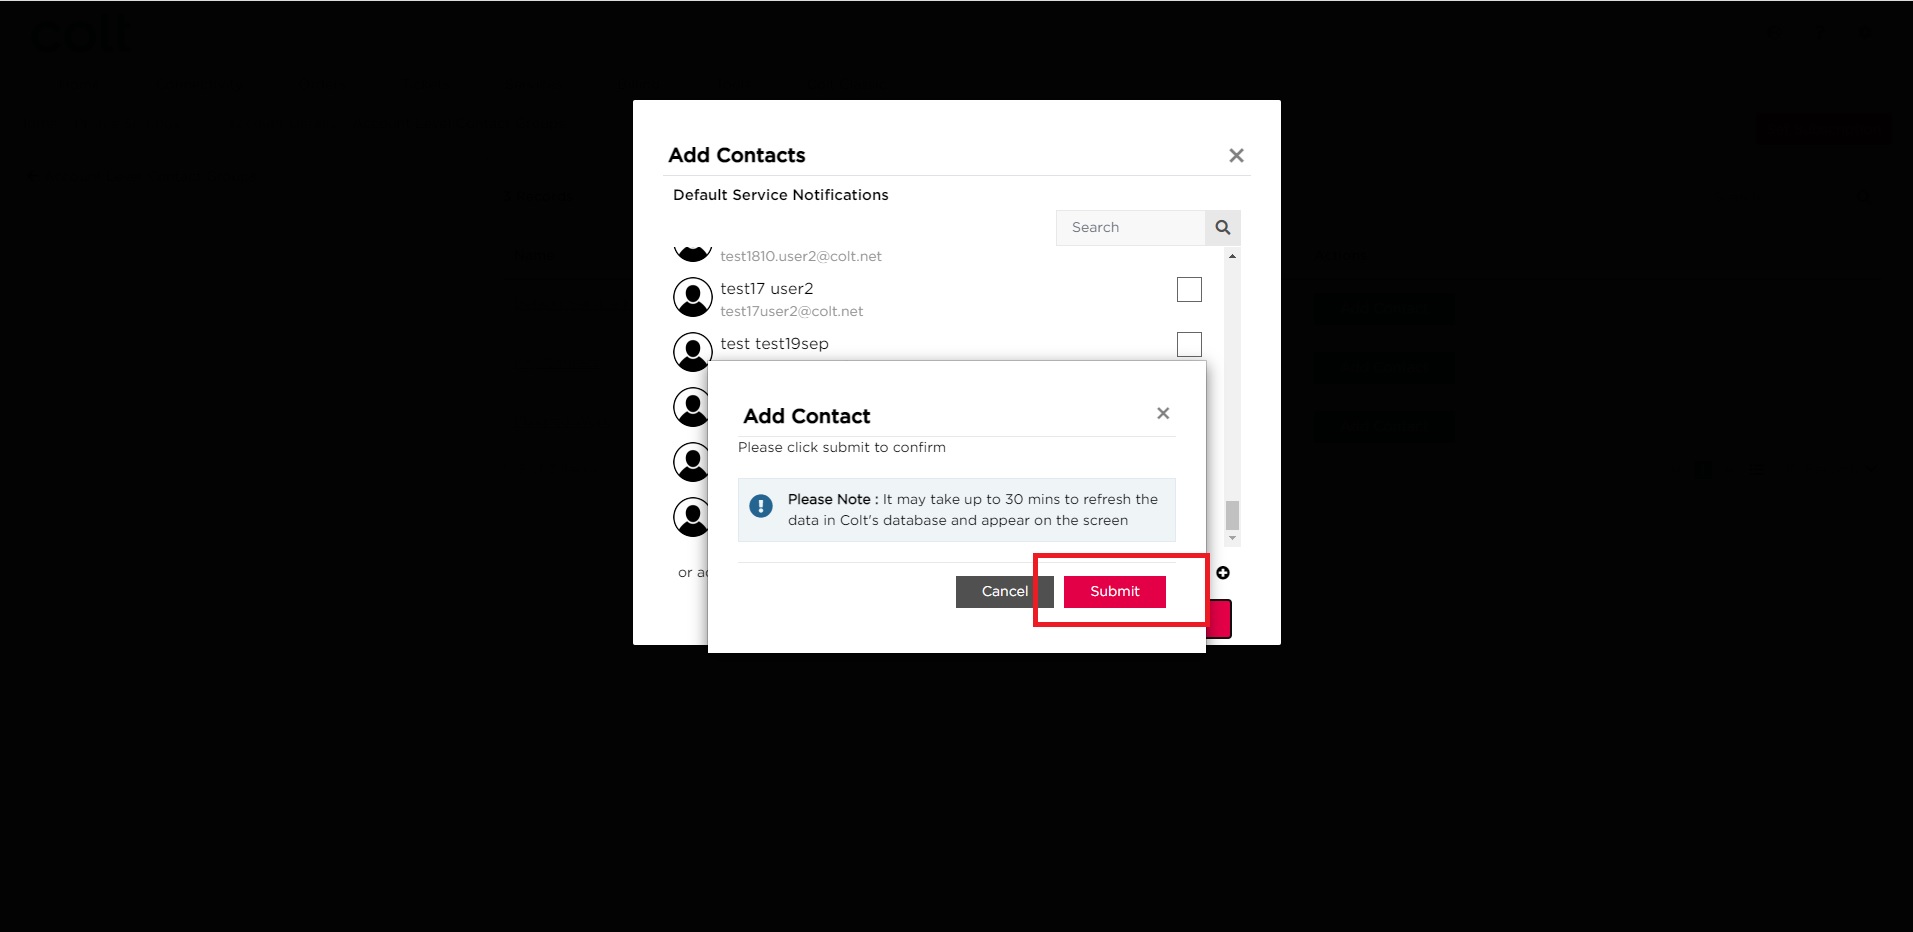
- Scroll or search for the contact that you wish to add. Select the required contact by clicking on the checkbox, then click on Submit. Note: If the required contact does not appear on the list, you may need to create a new contact. Please refer to the section here for more information on how to create a new contact

- Click on Submit to confirm your changes. Alternatively, click on Cancel
Approach 2 – Adding notifications/subscriptions via the Set Subscription Journey
The Set Subscription journey will allow you to add subscriptions to a contact only (refer to approach 1 for removing a contact from a specific notification/subscriptions contact group)
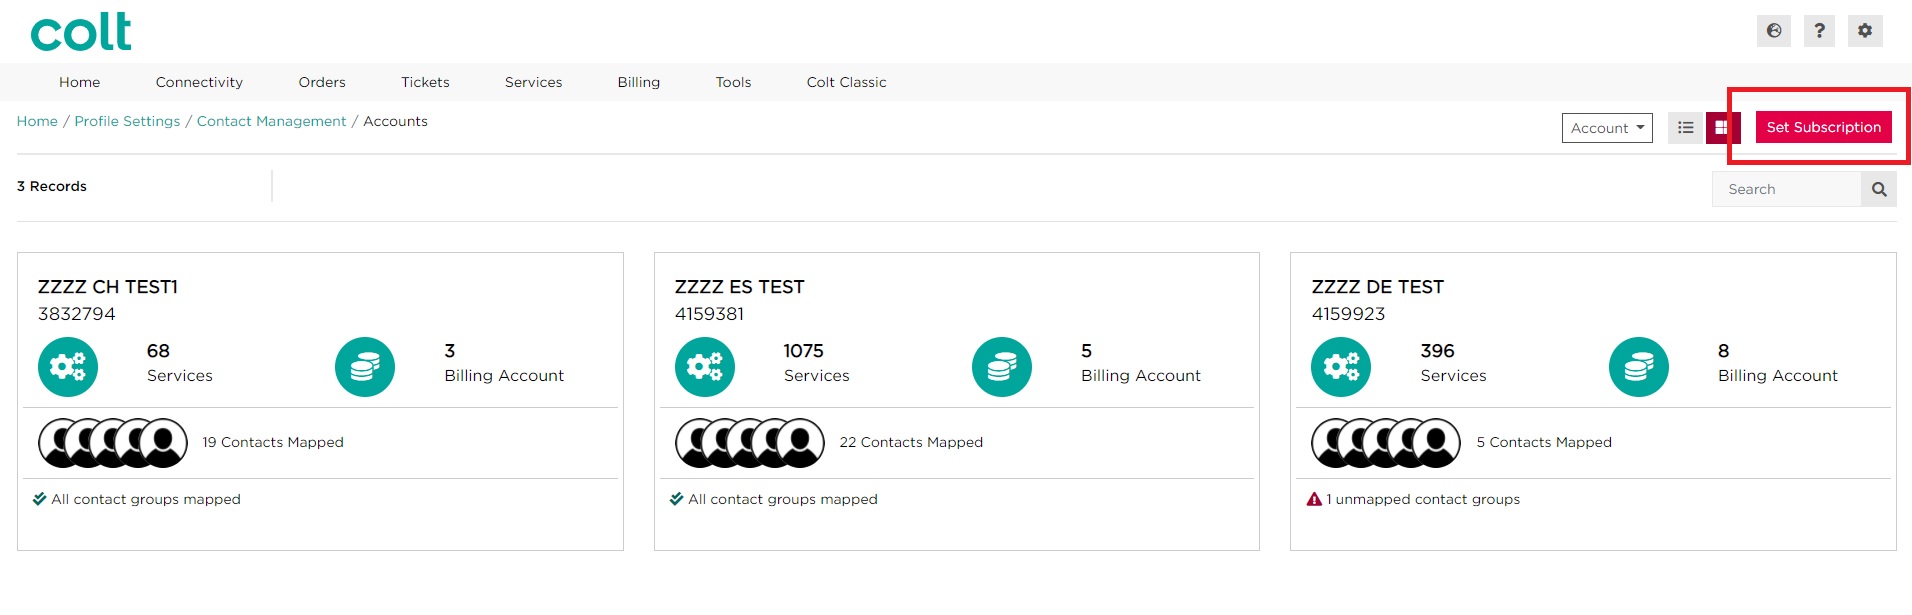
- The Set subscription journey can be triggered from any page of the contact management module, select the Set Subscription button
- Select what type of subscription you wish to set up (the most common will be By Account or By Service). Please refer to the section here, for more information on the different types of subscriptions available
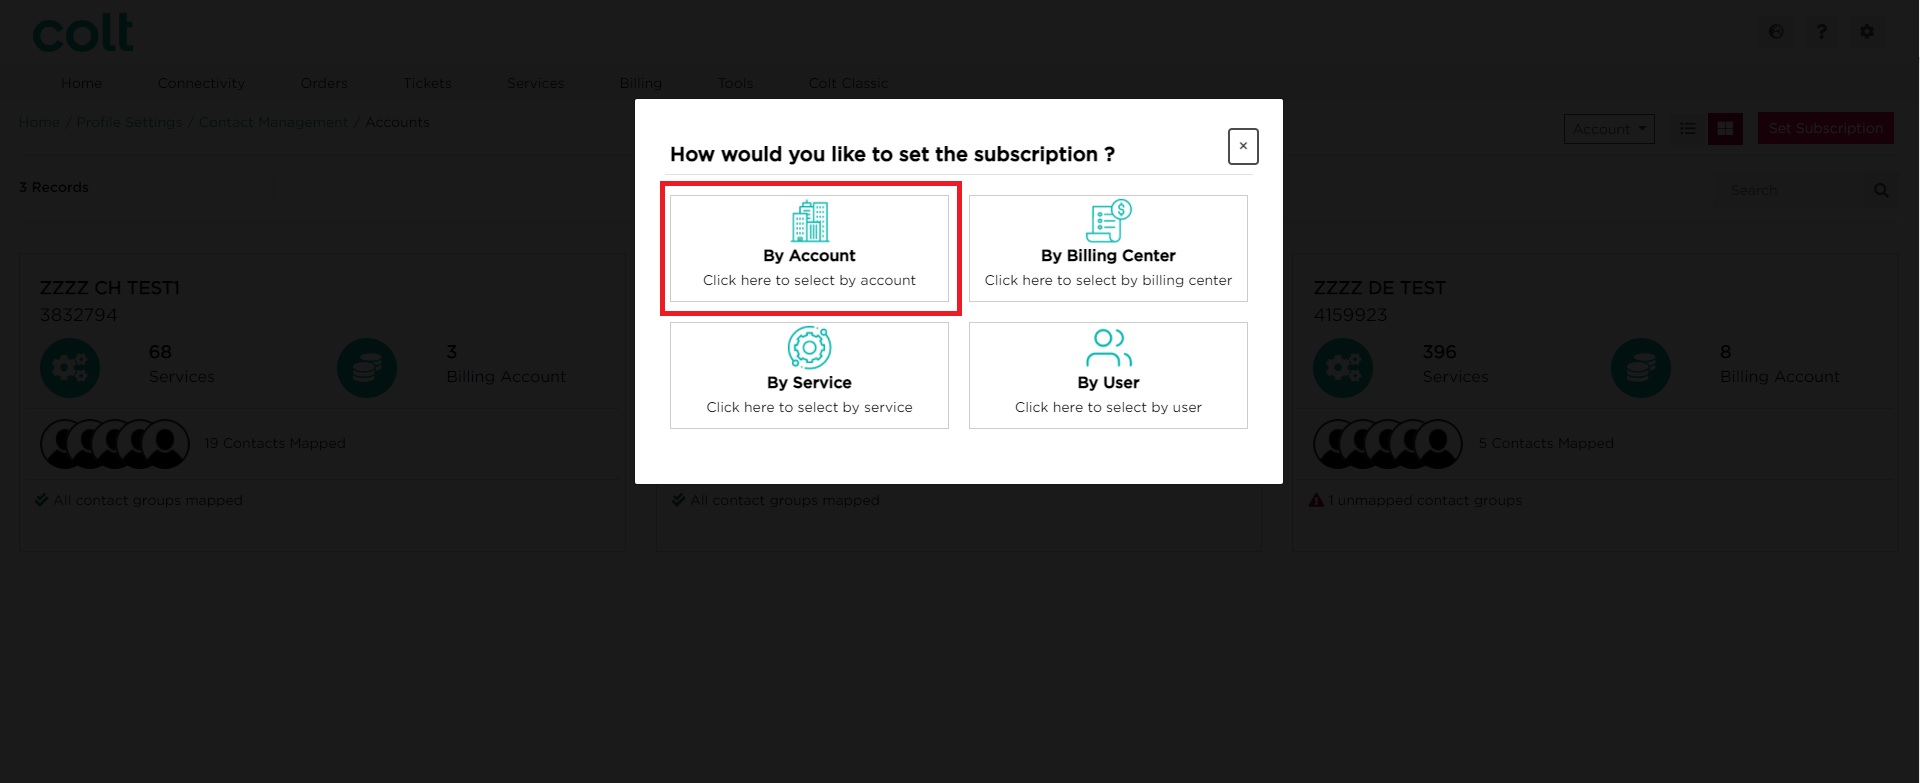
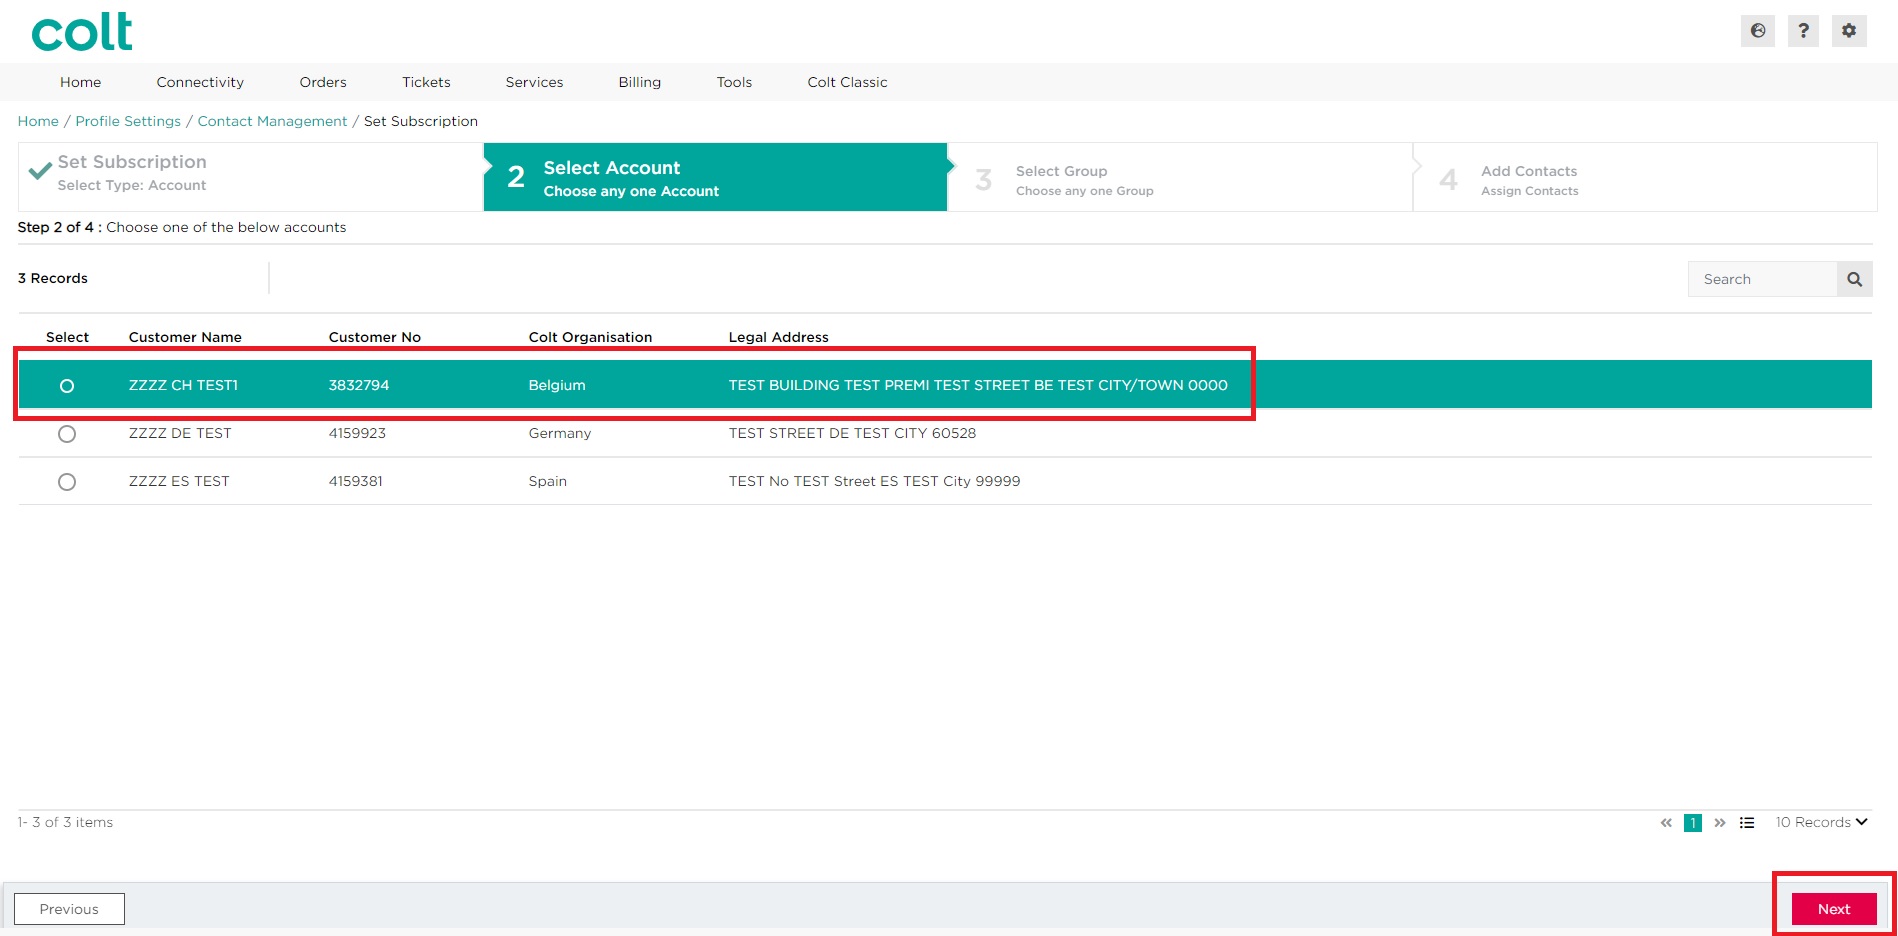
- As this example is setting up a contact for the Default Service Notification subscription, select By Account. This will take you to next step, where you will be required to select the Customer Number (Account). Click on Next
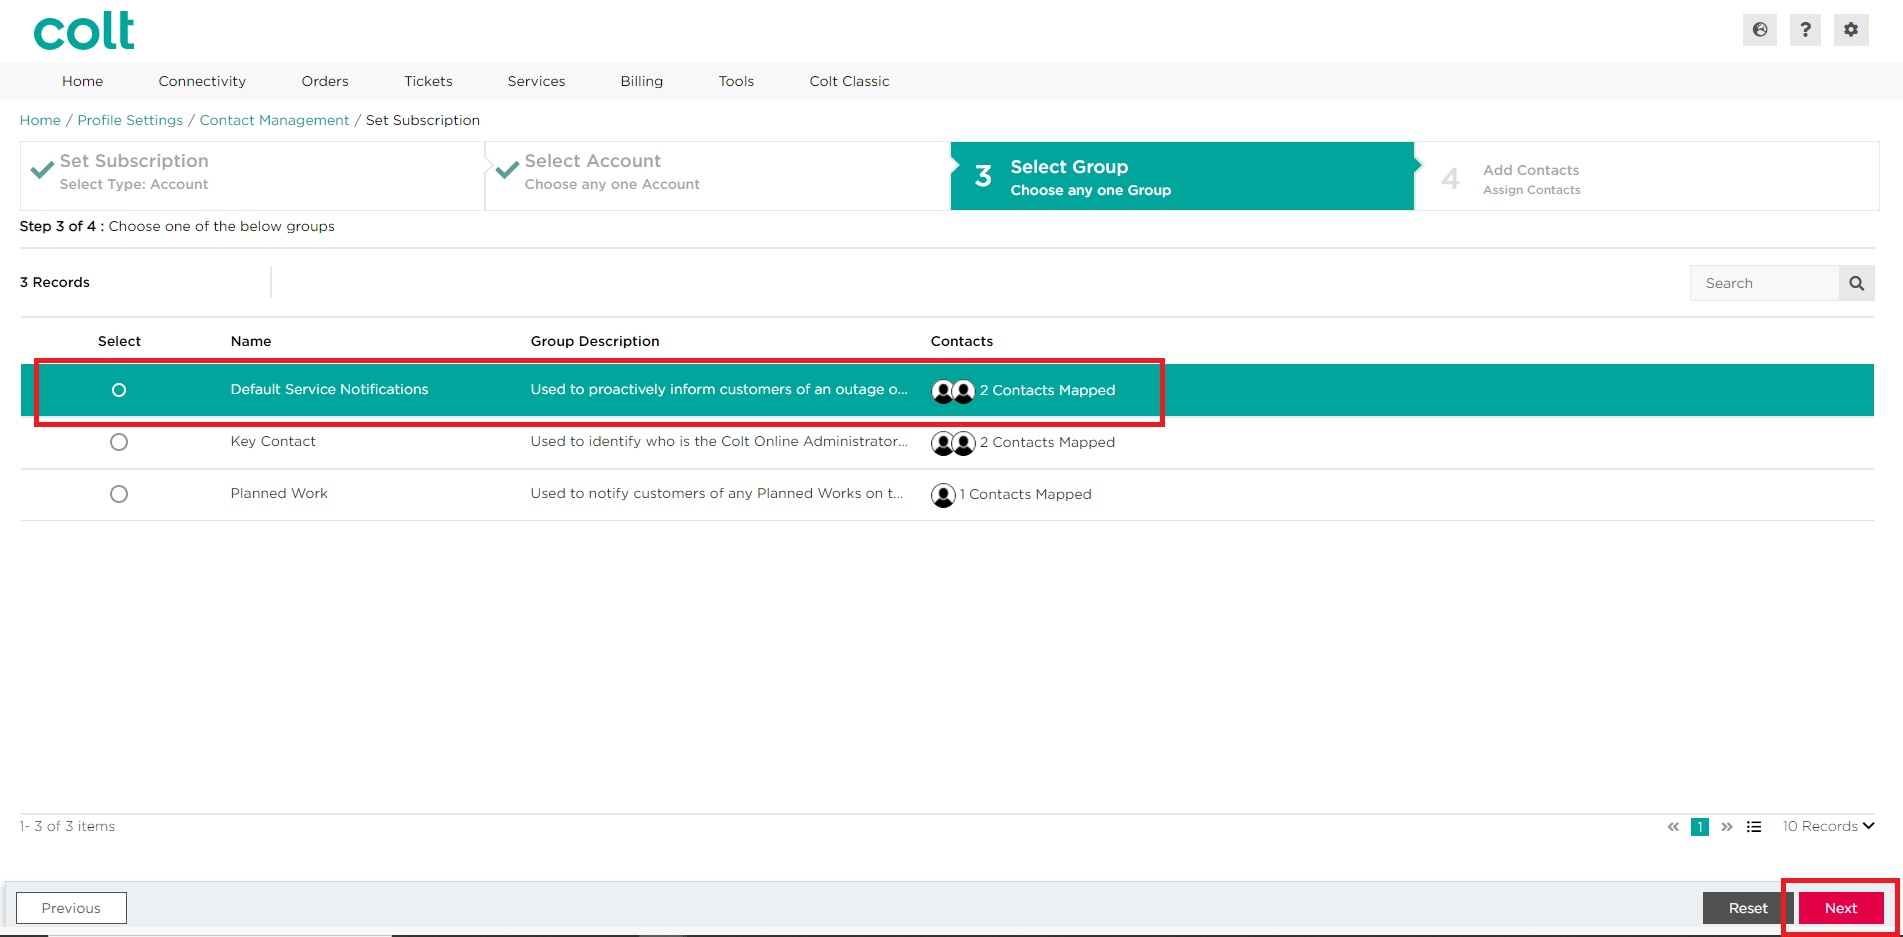
- Select Default Service Notifications. Click on Next.
- Scroll or search for the contact that you wish to add. Select the required contact by clicking on the checkbox, then click on Submit. Note: If the required contact does not appear on the list, you may need to create a new contact. Please refer to the section here for more information on how to create a new contact
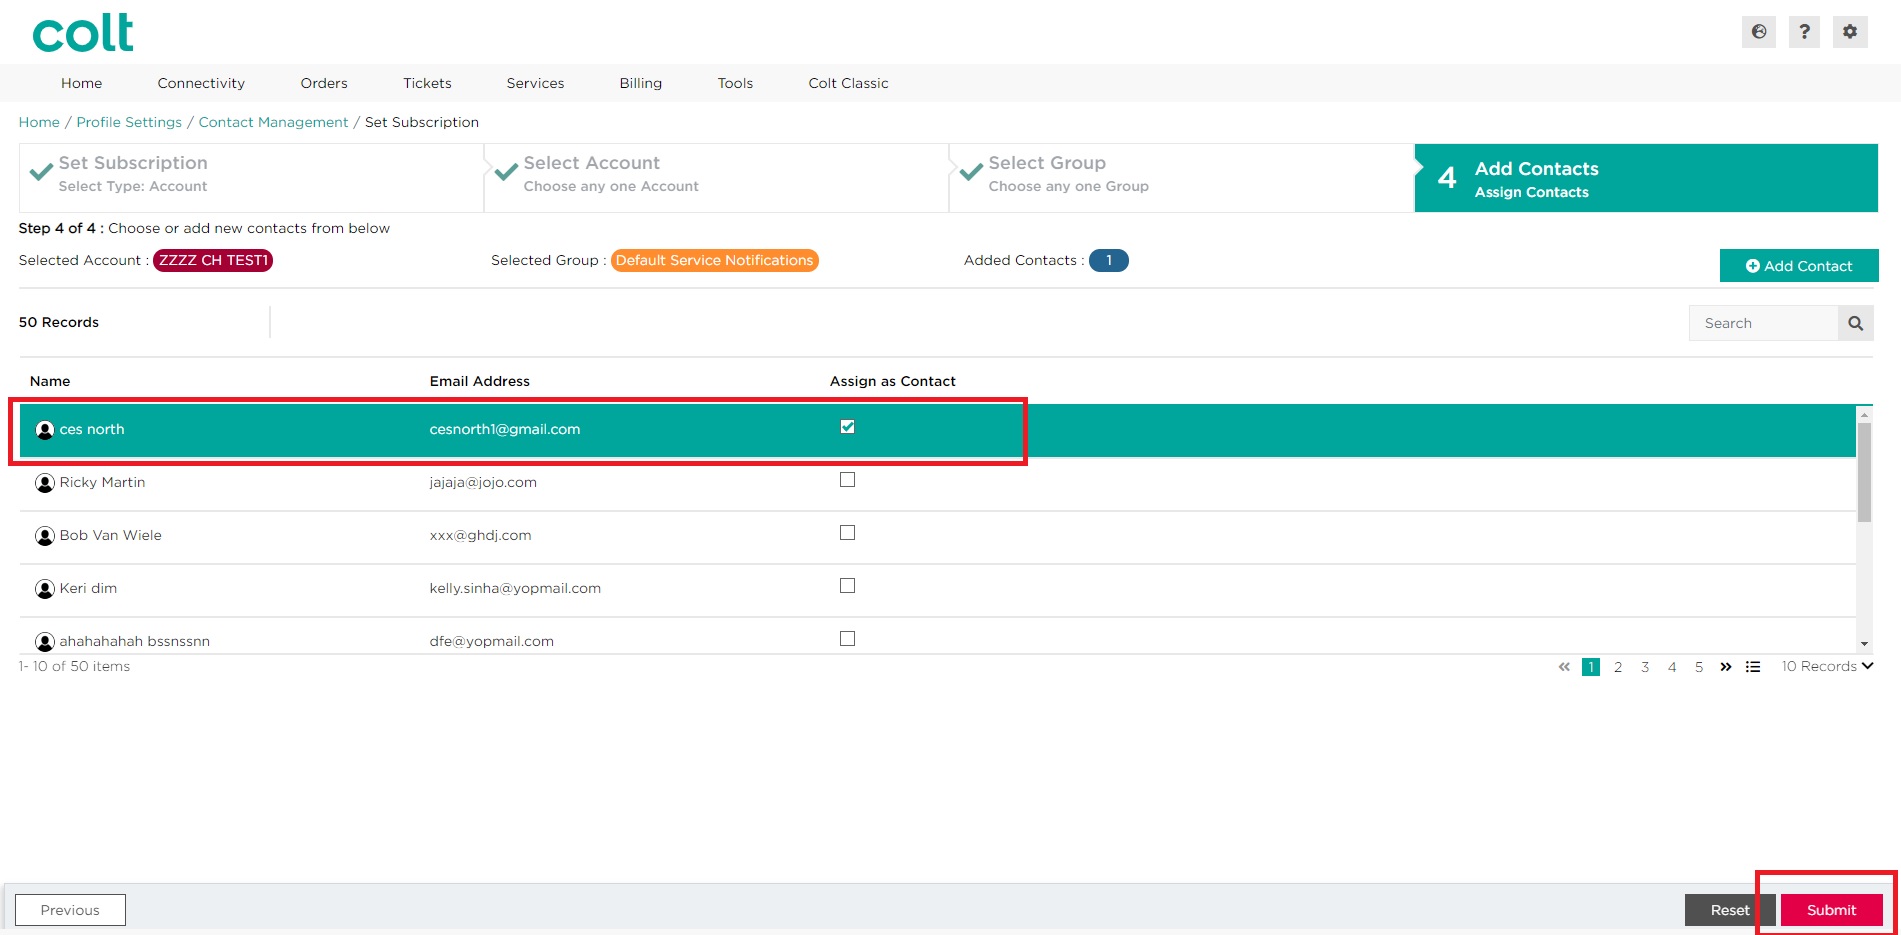
- Click on Submit to confirm your changes. Alternatively, click on Cancel