How do I set up to receive notifications about planned maintenance (Planned Works) on my service?
- How to update your profile settings?
- How to enable Single Sign On for Colt Online?
- What options are available in Colt Online?
- Which notifications/subscriptions are available in the contact management module?
- How do subscriptions and the contact management module in colt online work?
- How can I view the notifications/subscriptions that I am set up to receive from colt?
- What is Planned Works ?
- What is the Order Management Portal?
- CLI Presentation
- Colt Versa SD WAN & SASE – External Service Guide
- Getlink LDN Access Procedure
- Dedicated Cloud Access External Service Guide
- Colt Operator Connect Management Portal for Partners
- Assign a role to an existing user
- Remove the role of a user
- Modify the account group of the user
- Create a new users and assign the IPG role
- Ethernet VPN- External Service Guide
Planned Works subscriptions can be viewed and managed at Account Level via the contact management module*. This will mean that you will receive Planned Works notifications for any impacted service under your Customer Number (OCN Account). An example of this is shown below: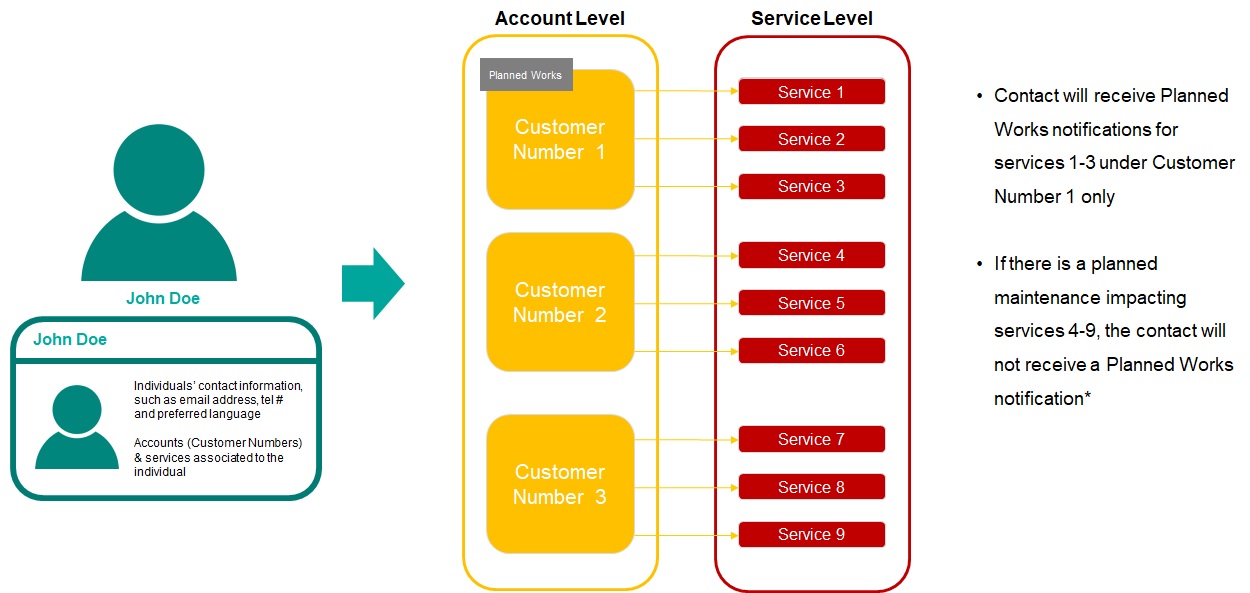
*For services contracted in Colt Japan, Singapore, Hong Kong and South Korea, please speak with your Service Manager
To sign up to the Planned Works, please follow the below steps:
Approach 1 – Subscribing to Planned Works via the Account Level Contact Management pages
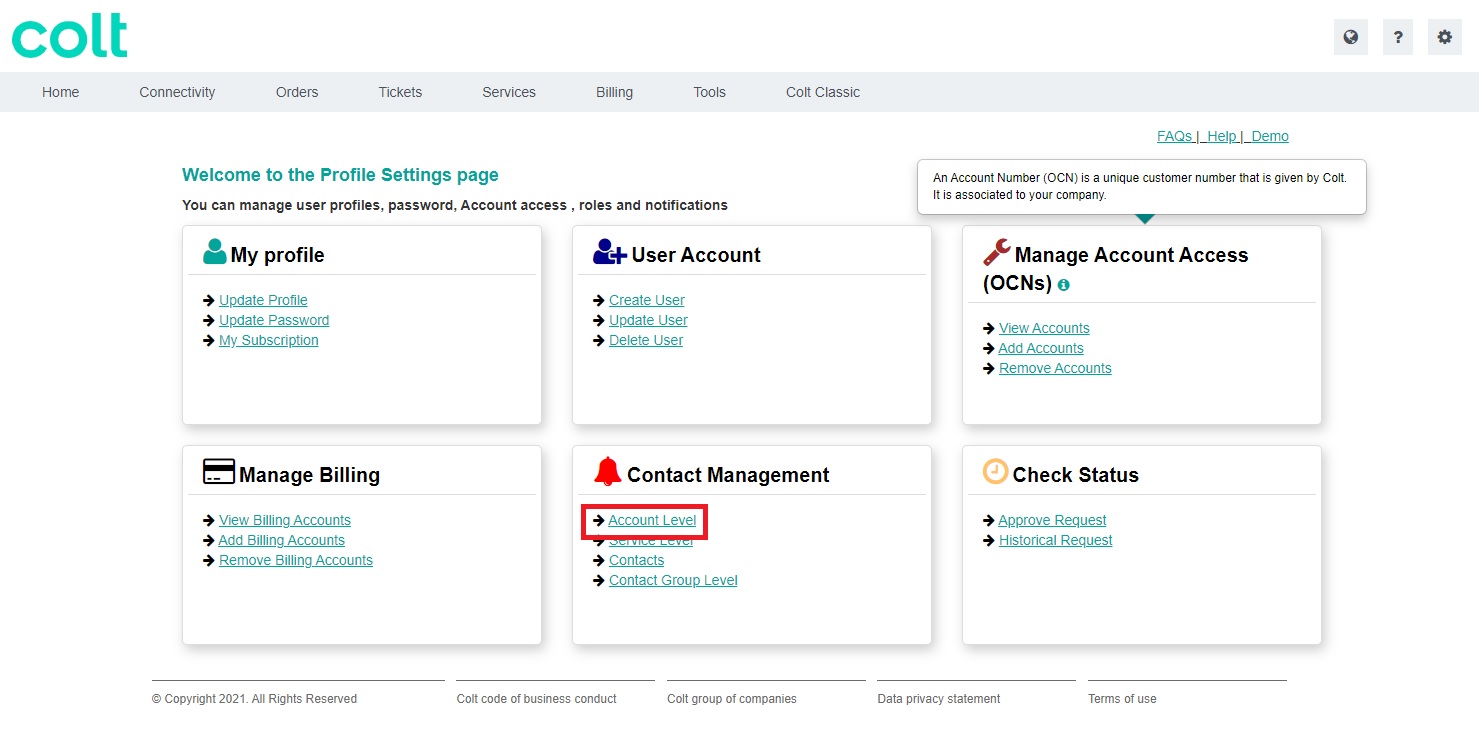
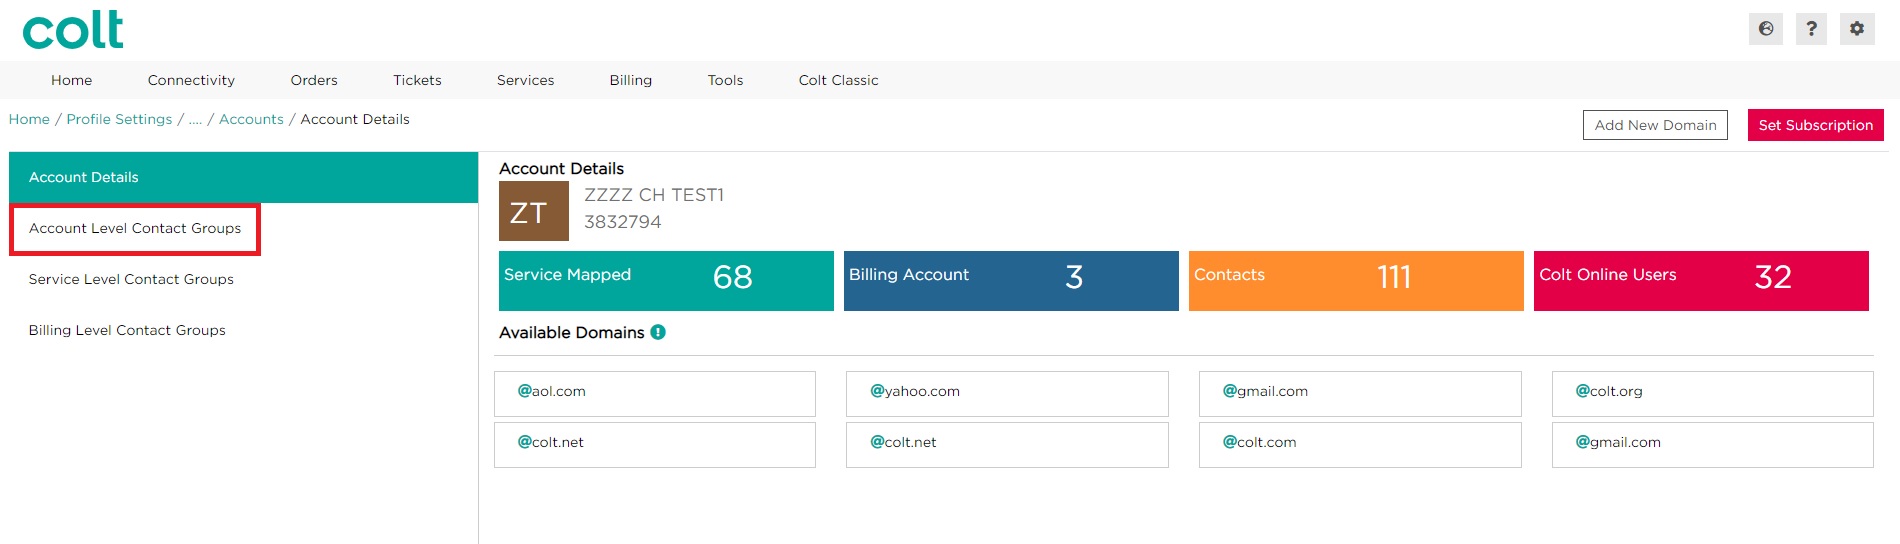
- Select Account Level
- Select the required Customer Number
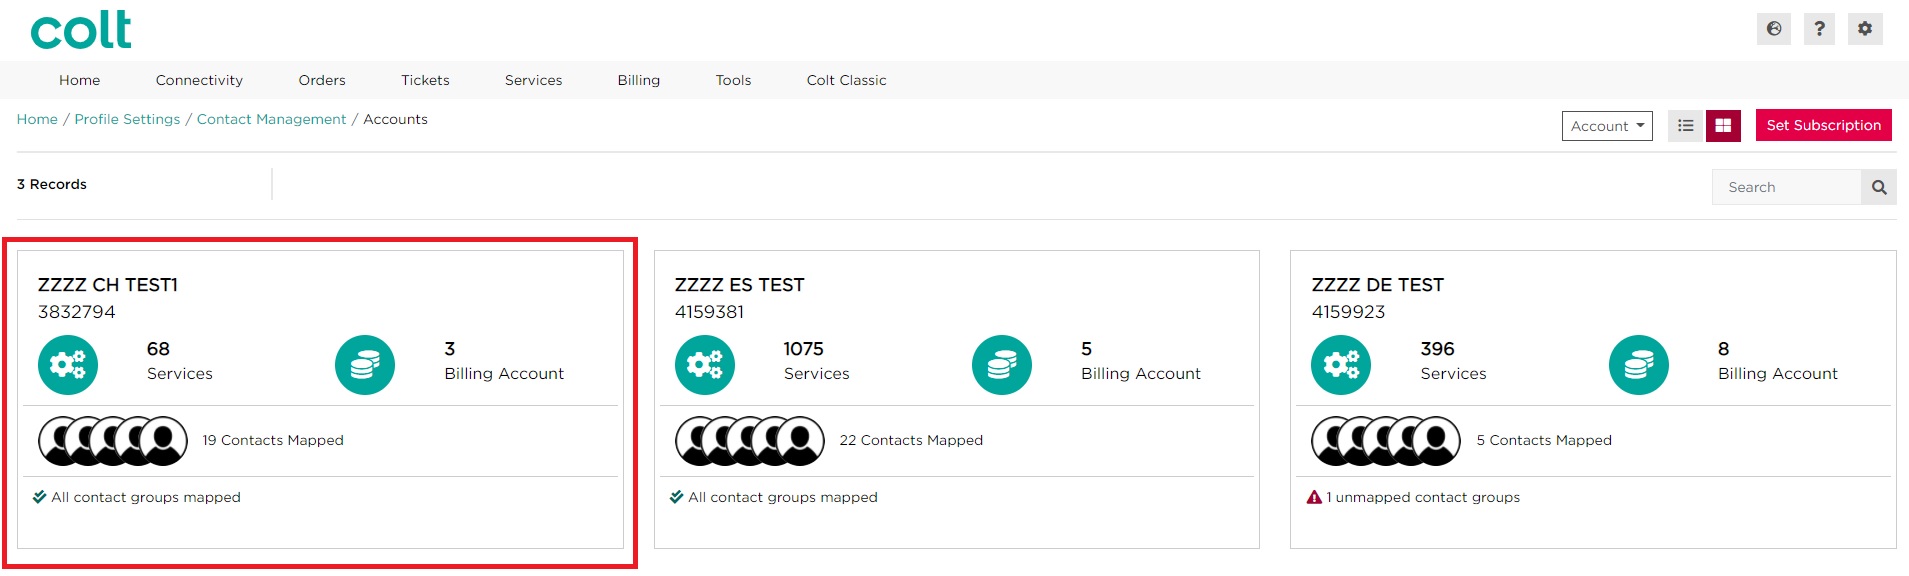
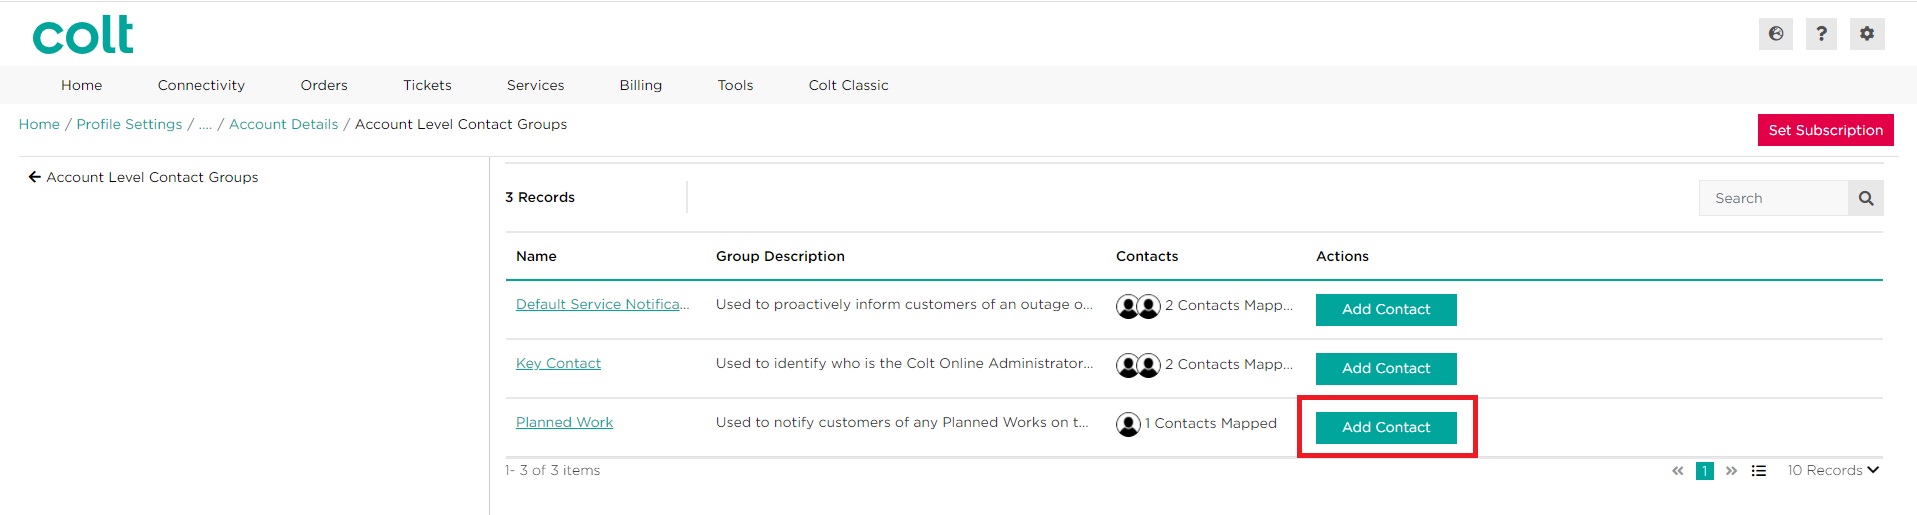
- Select Account Level Contact Groups to view the Account Level subscriptions set up for the customer number
- In order to Add a different contact to this subscription, click on Add Contact for the Planned Works subscription
- Scroll or search for the contact that you wish to add. Select the required contact by clicking on the checkbox, then click on Submit.
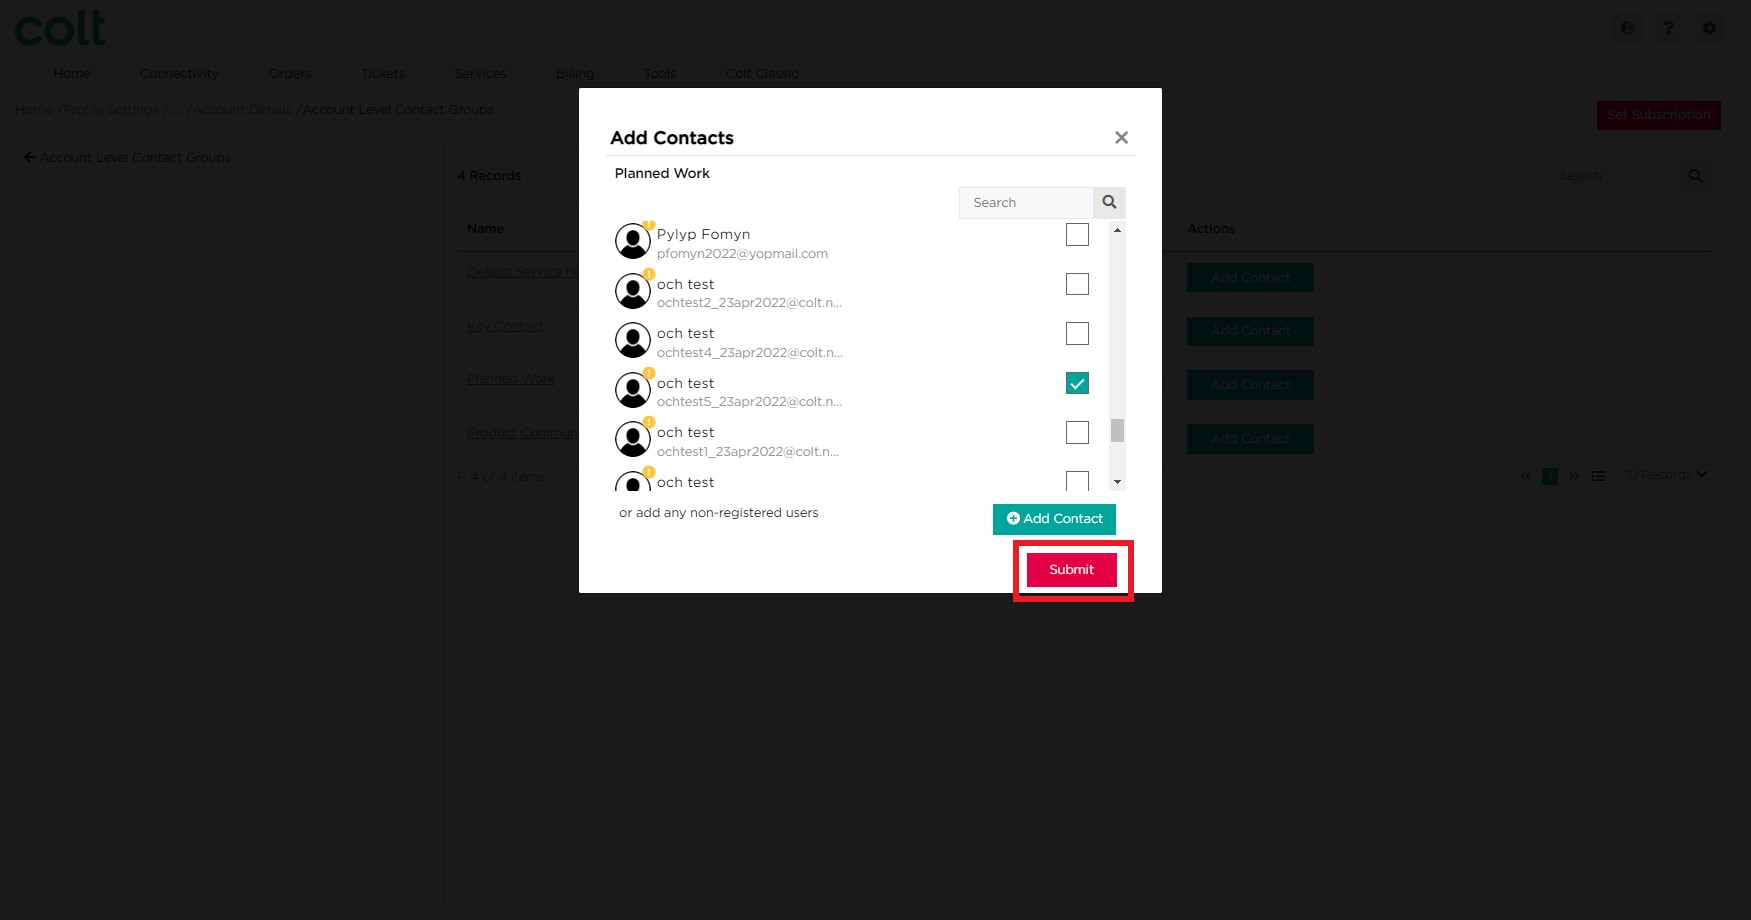 Note: If the required contact does not appear on the list, you may need to create a new contact. Please refer to the section here for more information on how to create a new contact
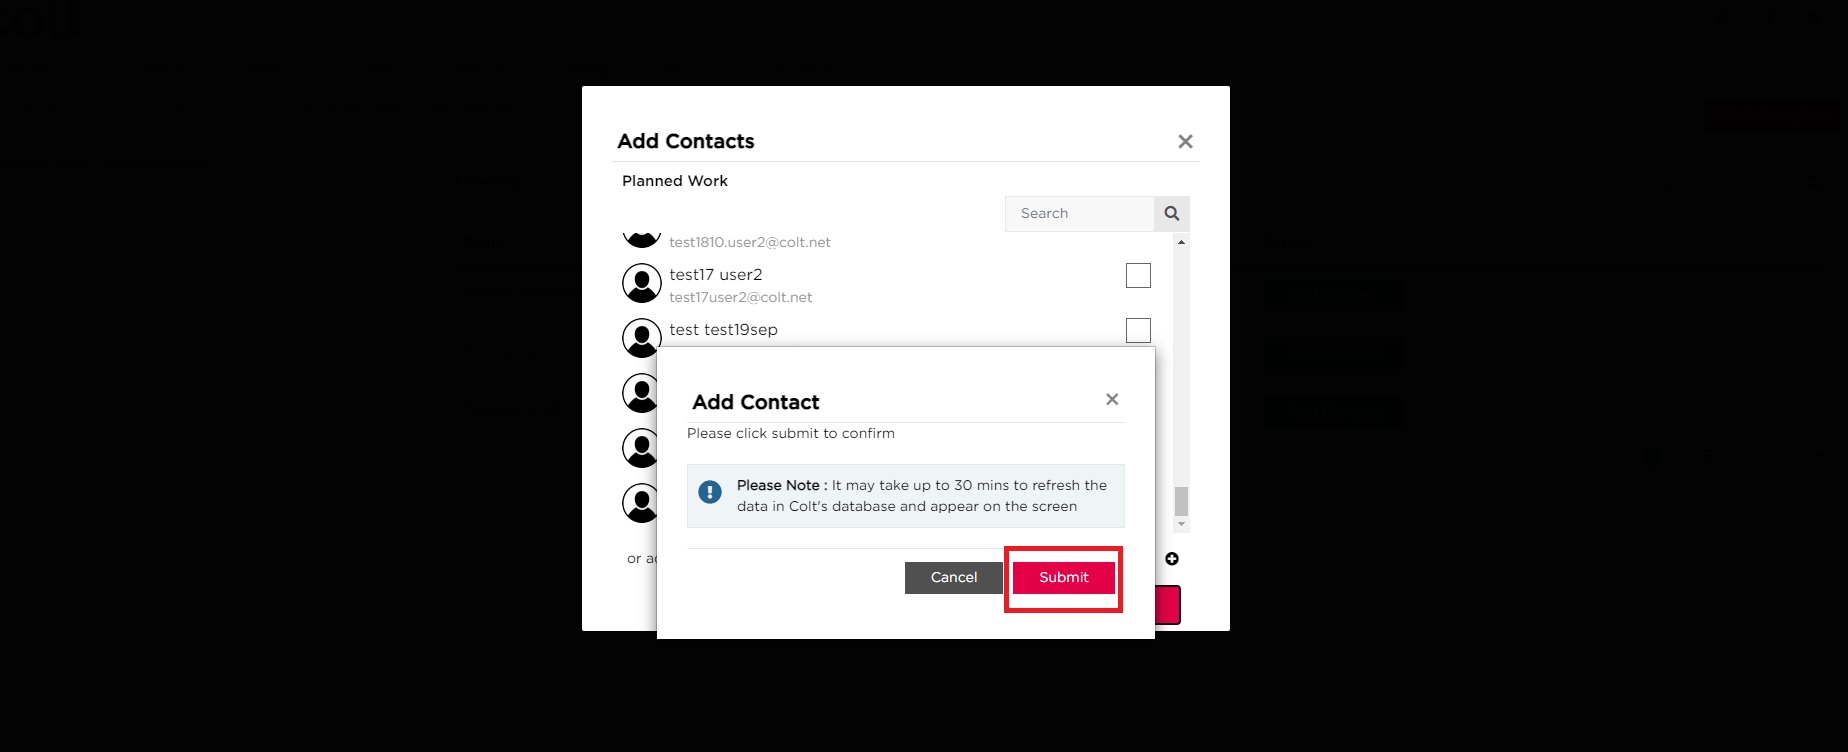
 - Click on Submit to confirm your changes. Alternatively, click on Cancel
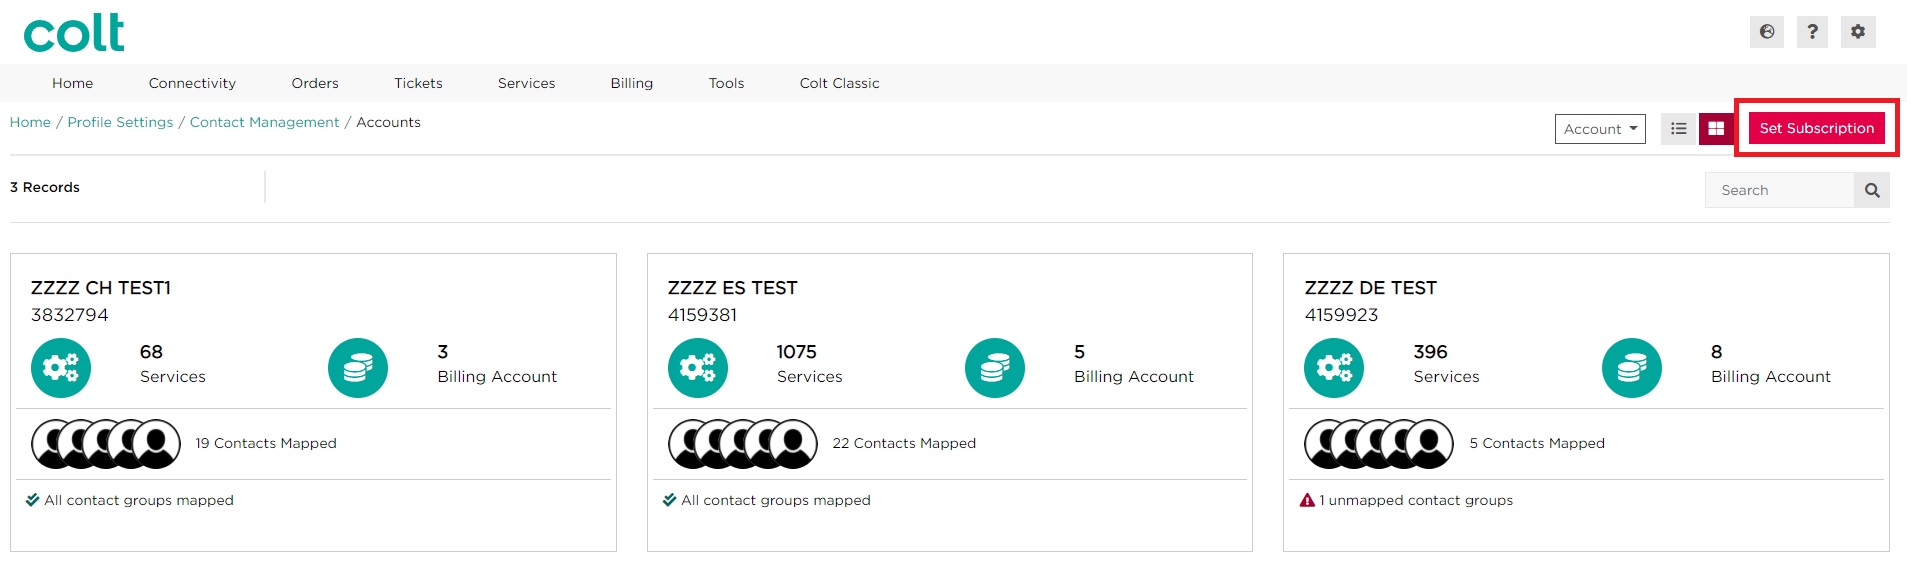
Approach 2 – Subscribing to Planned Works via the Set Subscription Journey
- The Set subscription journey can be triggered from any page of the contact management module, select the Set Subscription button
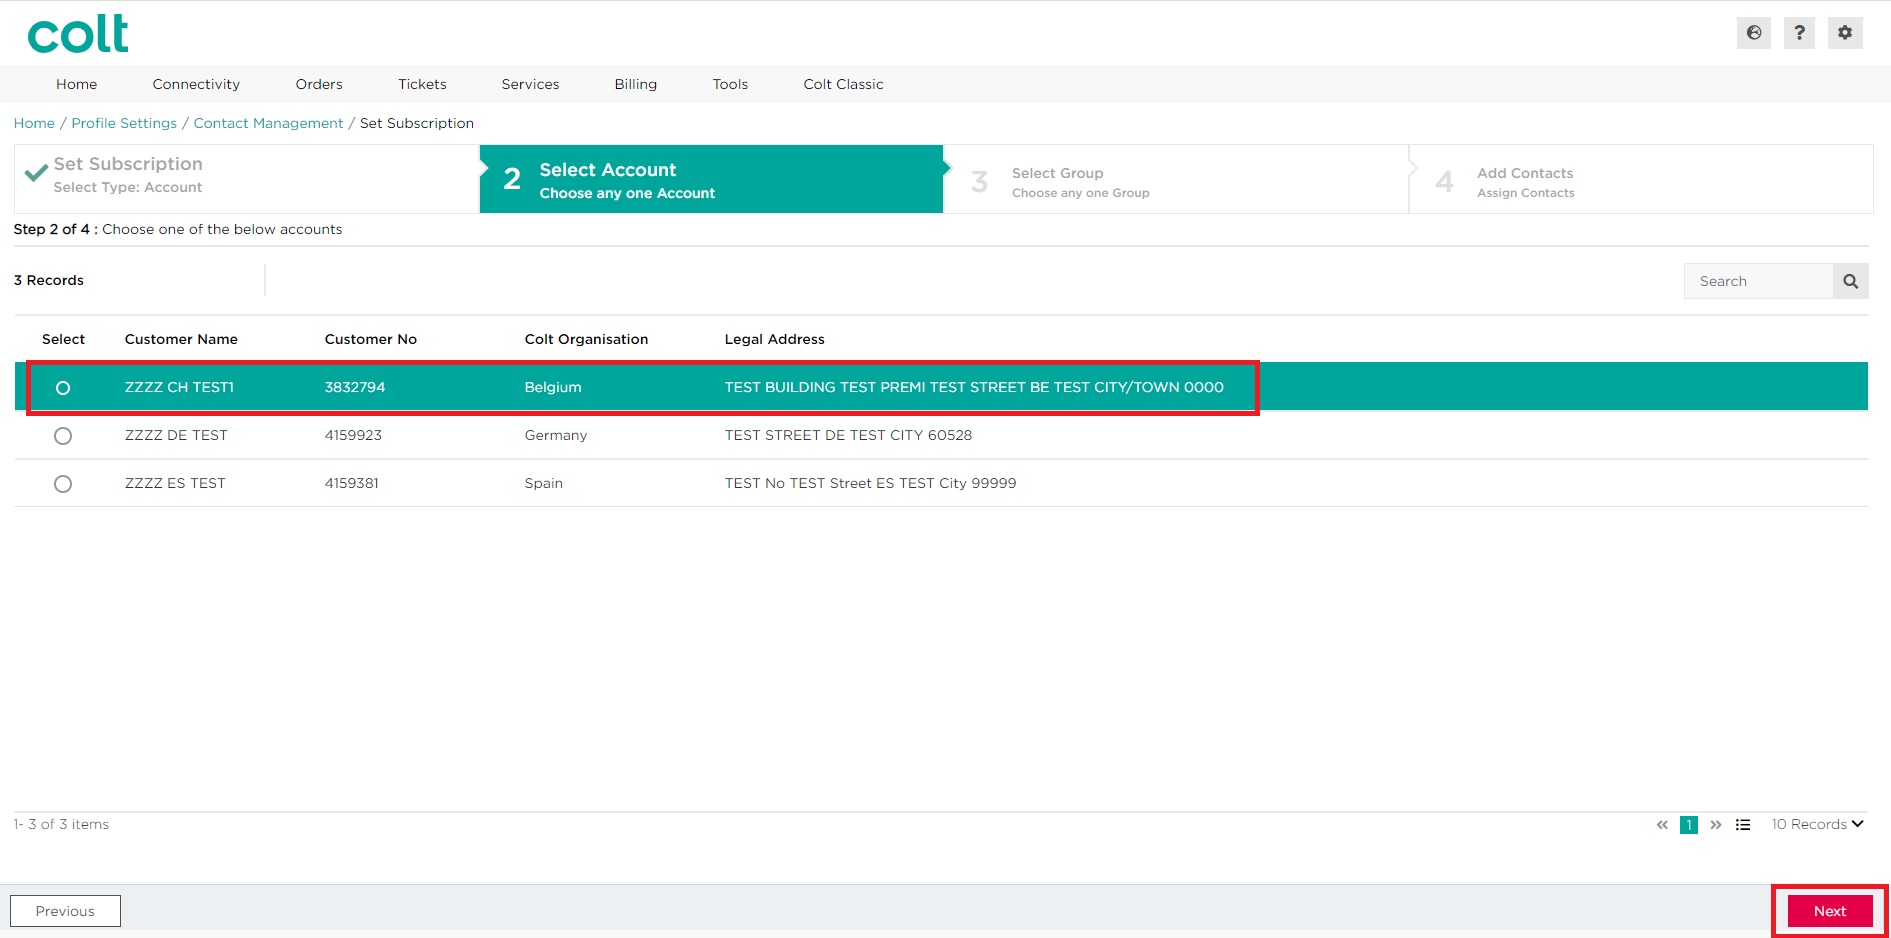
- As Planned Works is an Account Level contact group, select By Account

- Select the Customer Number (OCN Account), then click on Next
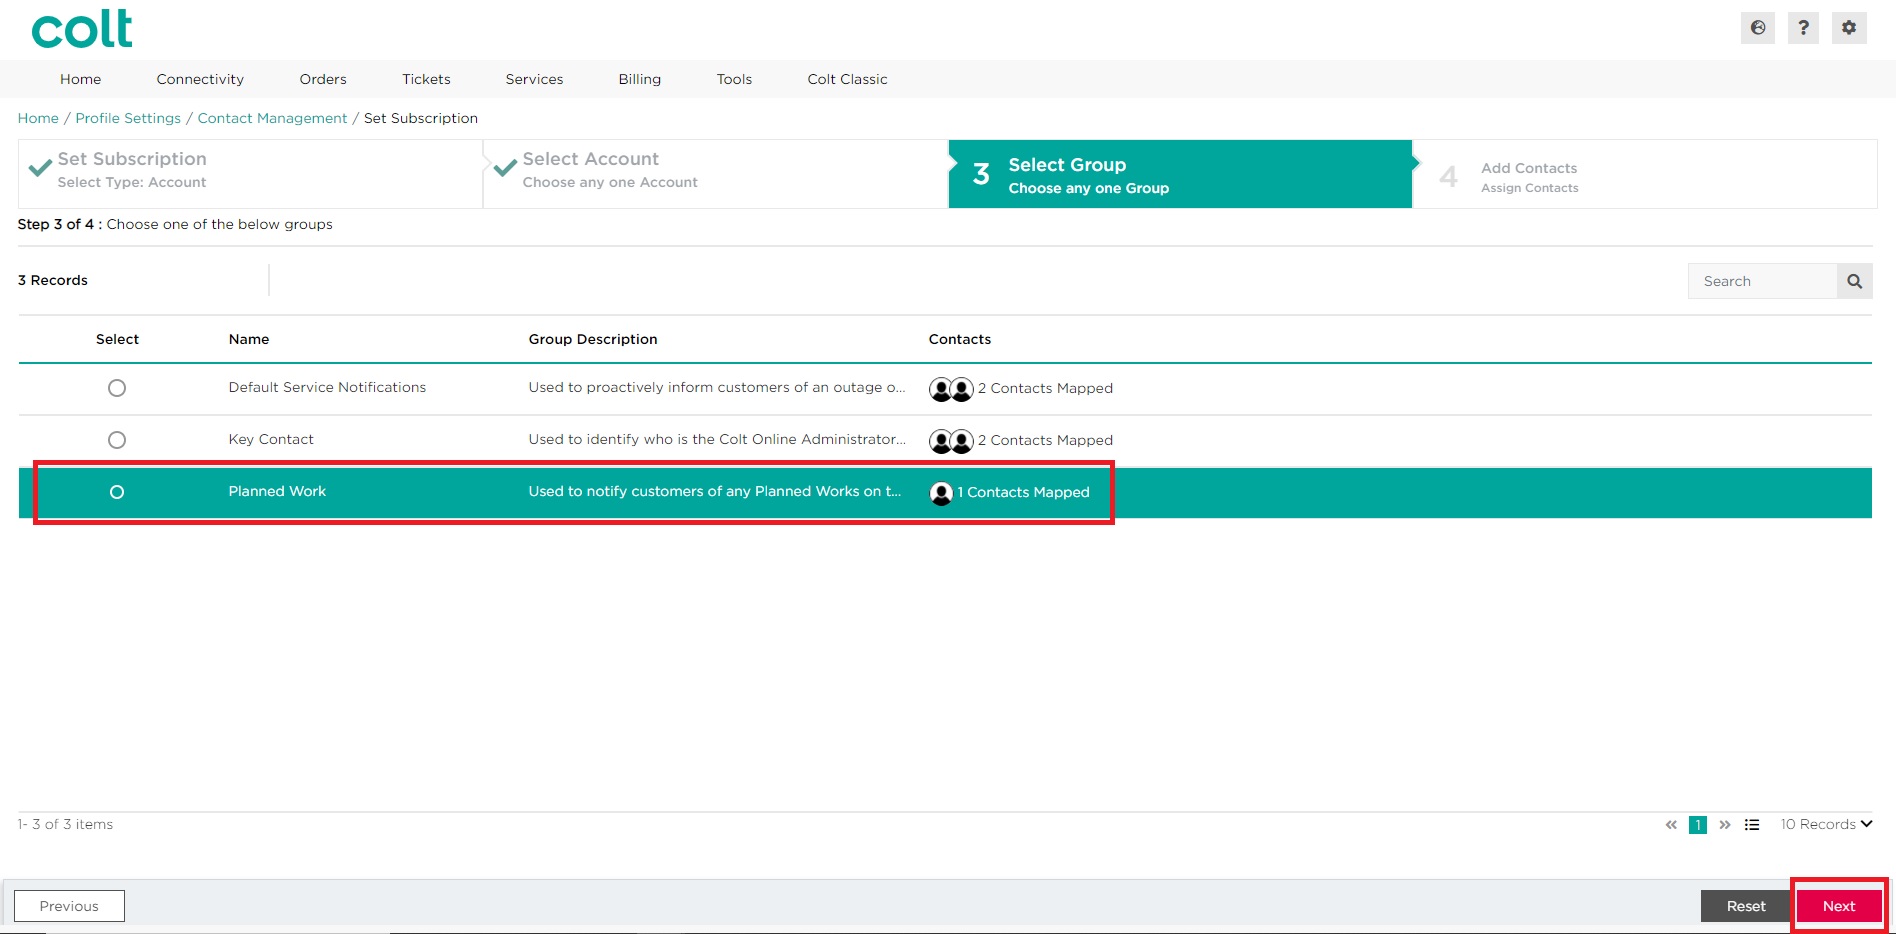
- Select Planned Works. Click on Next
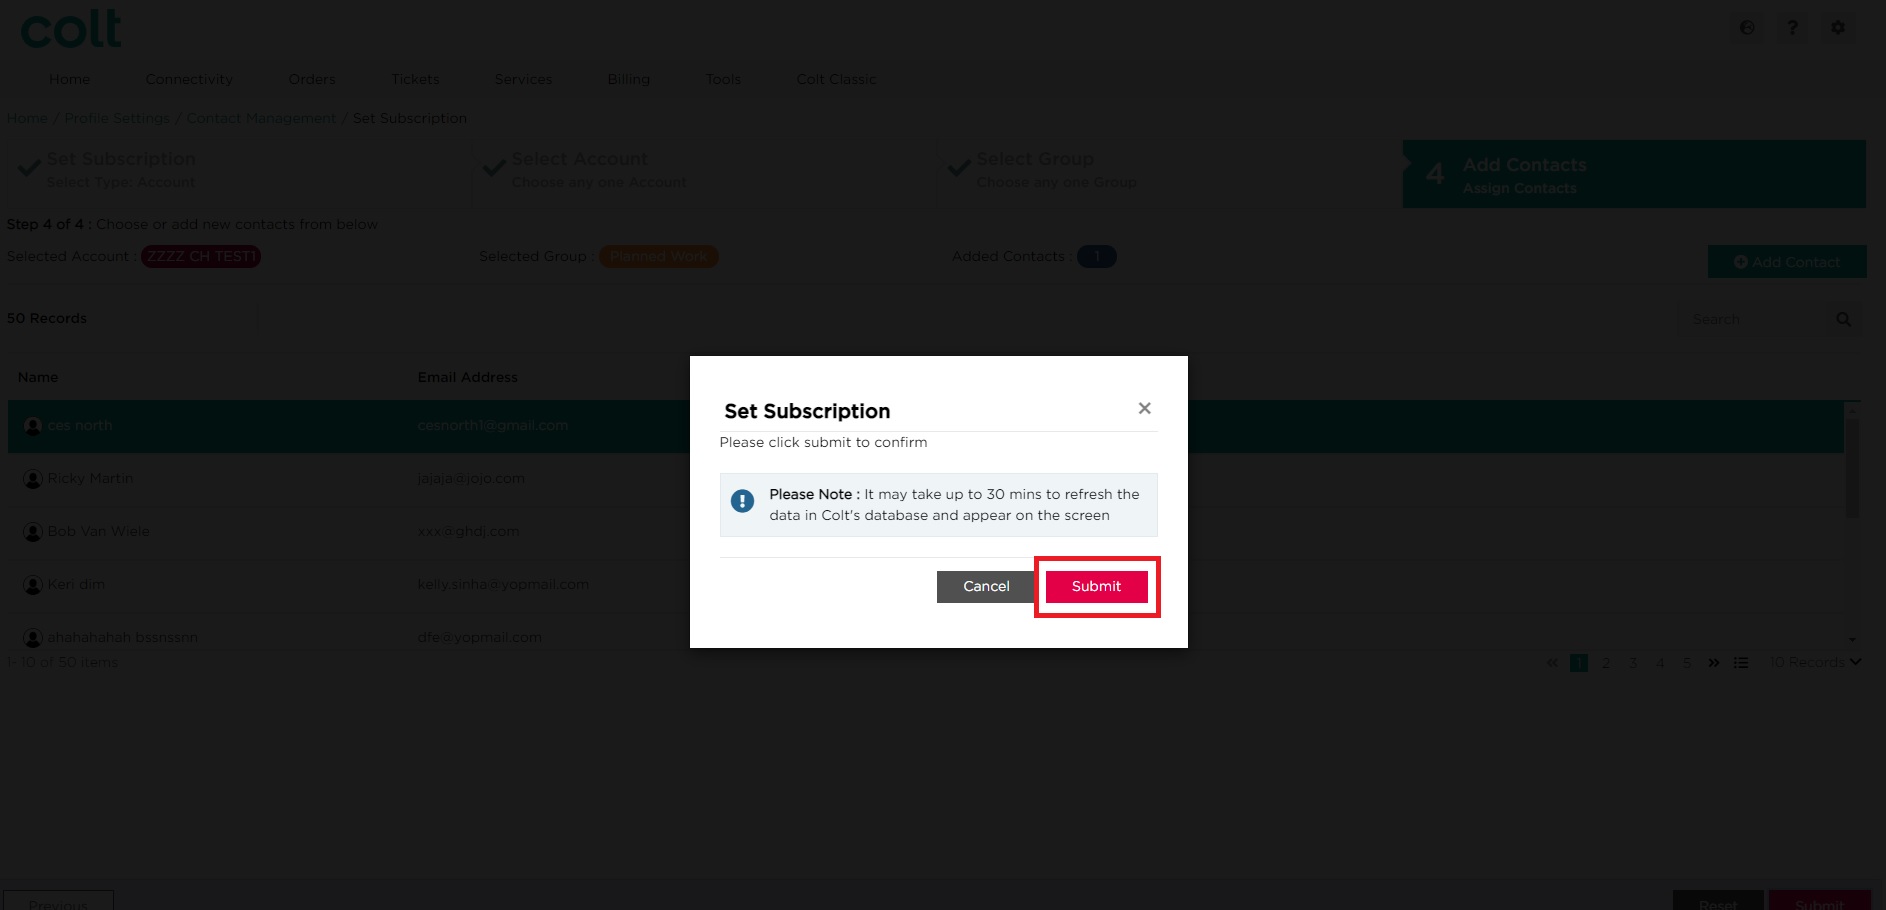
- Scroll or search for the contact that you wish to add. Select the required contact by clicking on the checkbox, then click on Submit.
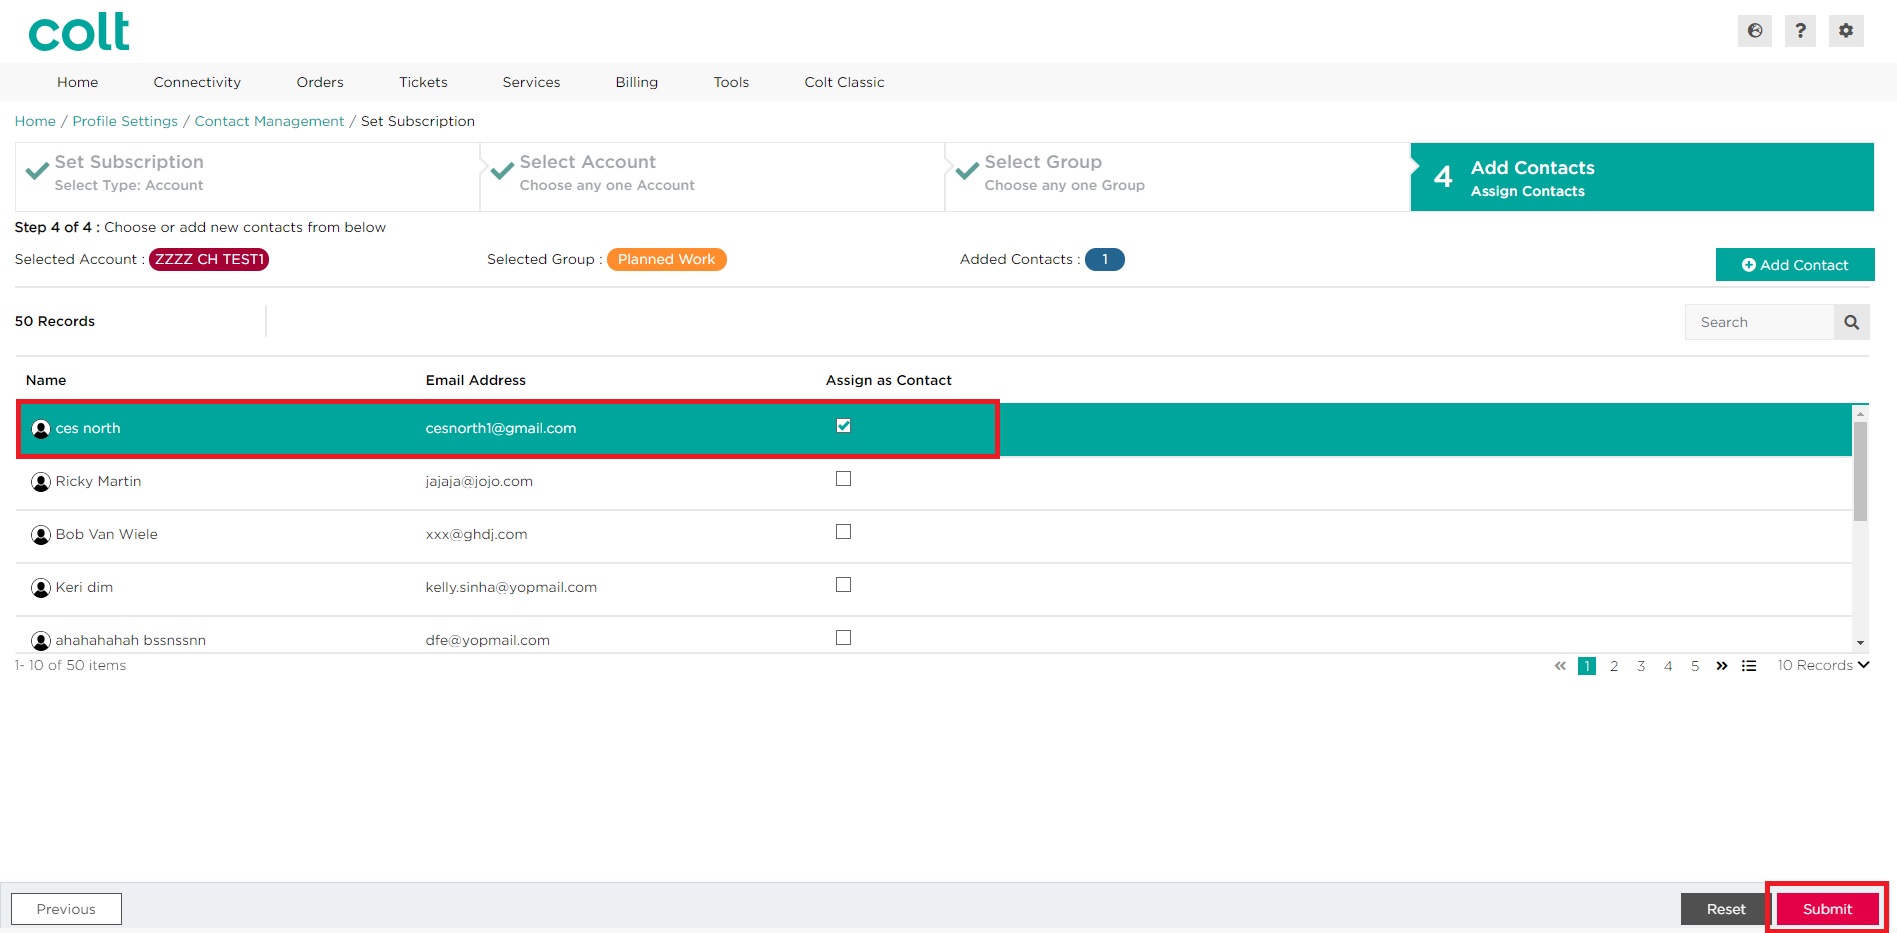 Note: If the required contact does not appear on the list, you may need to create a new contact. Please refer to the section here for more information on how to create a new contact
 - Click on Submit to confirm your changes. Alternatively, click on Cancel